
매우 간단한 Jersey REST 서비스 생성 및 Java 클라이언트에서 JSON 데이터 보내기
게시 됨: 2013-11-29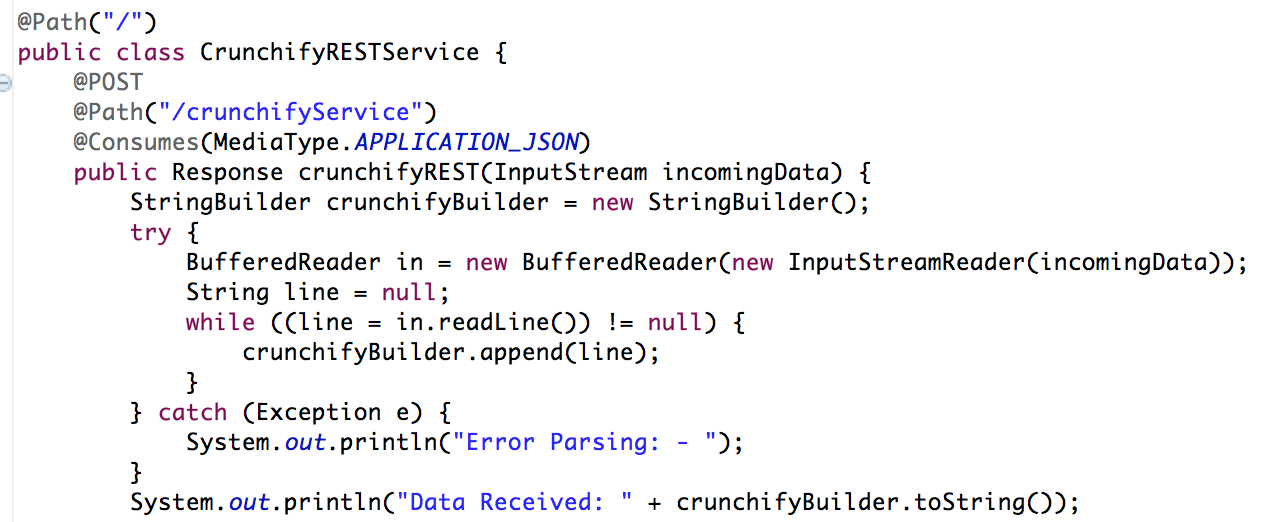
최근에 JSON 데이터를 REST 서비스에 전달해야 하는데 간단한 클라이언트가 없었습니다. 그러나 파일에서 JSON 데이터를 읽고 REST 서비스로 보내는 매우 간단한 Java 프로그램을 만들었습니다.
REST(Representational State Transfer)는 SOAP 및 WSDL(Web Services Description Language) 기반 웹 서비스에 대한 간단한 대안으로 웹 전반에 걸쳐 널리 받아들여지고 있습니다. 인터페이스 디자인의 이러한 변화에 대한 주요 증거는 사용하기 쉬운 쪽으로 SOAP 및 WSDL 기반 인터페이스를 더 이상 사용하지 않거나 전달한 주류 Web 2.0 서비스 제공업체(야후, 구글, 페이스북 포함)의 REST 채택입니다. 그들의 서비스를 노출하는 자원 지향 모델. 이 기사에서 Alex Rodriguez는 REST의 기본 원칙을 소개합니다.
다음과 같이 코딩을 시작하겠습니다.
- RESTFul 웹 서비스 생성
- 자바 파일: CrunchifyRESTService.java
- web.xml 파일
- RESTService 클라이언트 생성
- CrunchifyRESTServiceClient.java 파일
다른 사람은 읽어야 합니다: Spring MVC 예제/자습서: Hello World – Spring MVC 3.2.1
1 단계
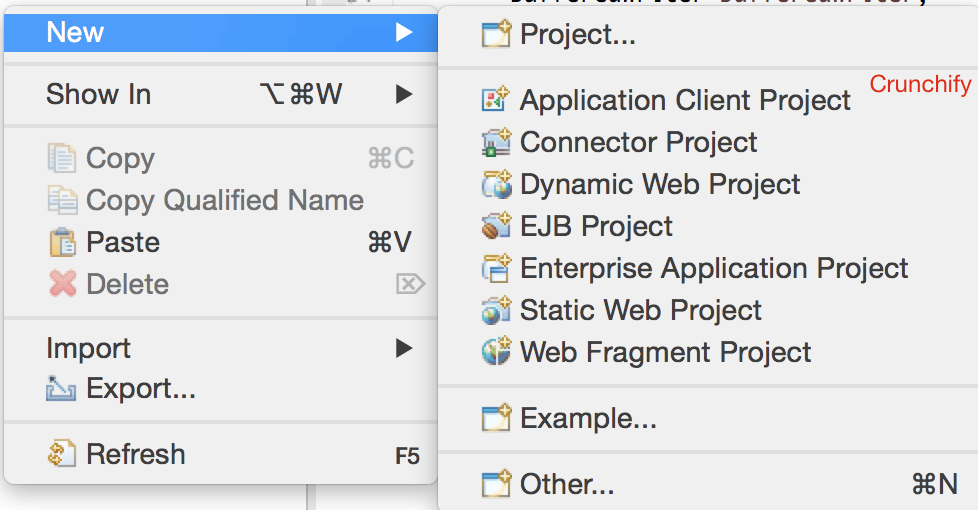
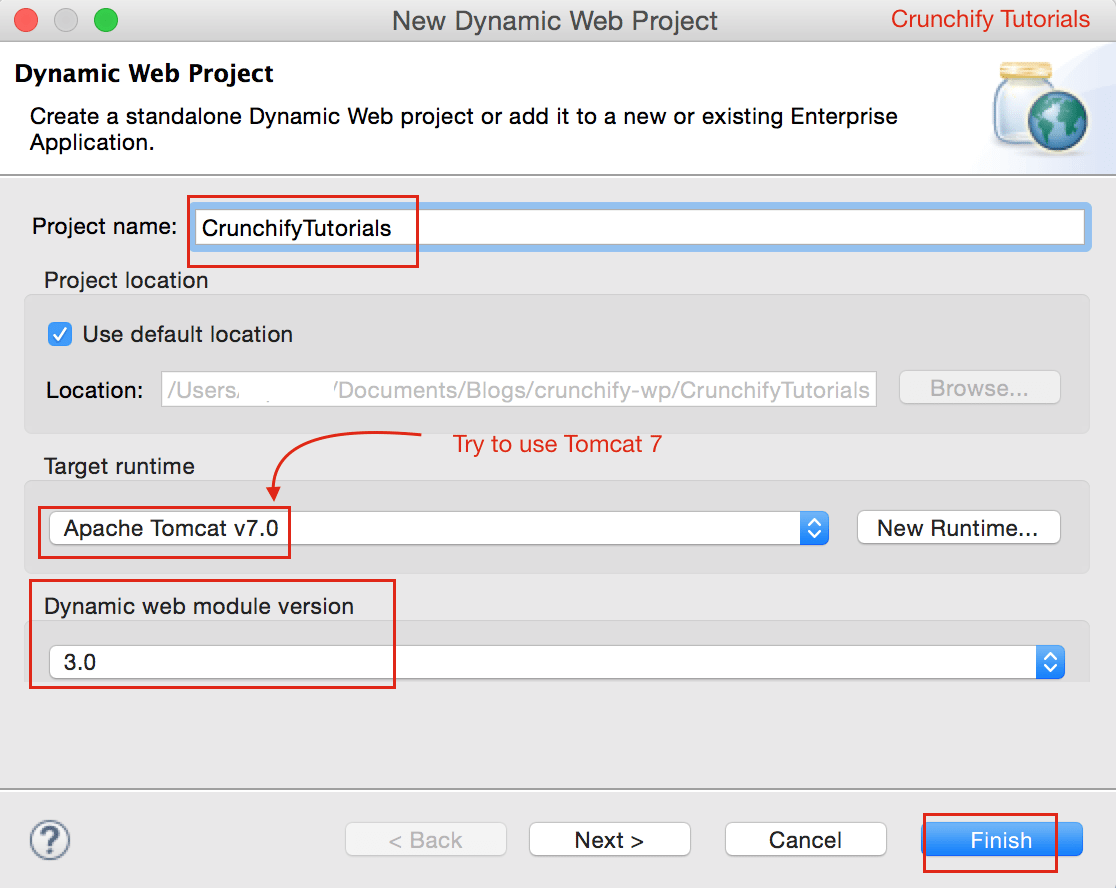
Eclipse => File => New => Dynamic Web Project 에서 . 이름을 " CrunchifyTutorials "로 지정합니다. 아래 튜토리얼은 Tomcat 8 에서도 작동합니다.
2단계 배포 설명자 파일 생성
WebContent\WEB-INF\ 아래에 web.xml (배포 설명자)이 표시되지 않으면 다음 단계를 따르세요.
web.xml 을 열고 내용을 아래 내용으로 바꿉니다.
|
1 2 3 4 5 6 7 8 9 10 11 12 13 14 15 16 17 18 19 20 21 22 23 24 25 |
<? xml version = "1.0" encoding = "UTF-8" ?> < web - app xmlns = "http://java.sun.com/xml/ns/javaee" xmlns : xsi = "http://www.w3.org/2001/XMLSchema-instance" xsi : schemaLocation = "http://java.sun.com/xml/ns/javaee http://java.sun.com/xml/ns/javaee/web-app_3_0.xsd" version = "3.0" > < display - name > CrunchifyRESTJerseyExample < / display - name > < welcome - file - list > < welcome - file > index . html < / welcome - file > < welcome - file > index . htm < / welcome - file > < welcome - file > index . jsp < / welcome - file > < welcome - file > default . html < / welcome - file > < welcome - file > default . htm < / welcome - file > < welcome - file > default . jsp < / welcome - file > < / welcome - file - list > < servlet > < servlet - name > Jersey Web Application < / servlet - name > < servlet - class > com . sun . jersey . spi . container . servlet . ServletContainer < / servlet - class > < load - on - startup > 1 < / load - on - startup > < / servlet > < servlet - mapping > < servlet - name > Jersey Web Application < / servlet - name > < url - pattern > / api /* < / url - pattern > < / servlet - mapping > < / web - app > |
3단계 프로젝트를 Maven 프로젝트로 변환
이 튜토리얼을 따르십시오: https://crunchify.com/how-to-convert-existing-java-project-to-maven-in-eclipse/. 여기 내 pom.xml 파일이 있습니다.
|
1 2 3 4 5 6 7 8 9 10 11 12 13 14 15 16 17 18 19 20 21 22 23 24 25 26 27 28 29 30 31 32 33 34 35 36 37 38 39 40 41 42 43 44 45 46 |
< project xmlns = "http://maven.apache.org/POM/4.0.0" xmlns : xsi = "http://www.w3.org/2001/XMLSchema-instance" xsi : schemaLocation = "http://maven.apache.org/POM/4.0.0 http://maven.apache.org/xsd/maven-4.0.0.xsd" > < modelVersion > 4.0.0 < / modelVersion > < groupId > CrunchifyTutorials < / groupId > < artifactId > CrunchifyTutorials < / artifactId > < version > 0.0.1 - SNAPSHOT < / version > < packaging > war < / packaging > < build > < sourceDirectory > src < / sourceDirectory > < plugins > < plugin > < artifactId > maven - compiler - plugin < / artifactId > < version > 3.1 < / version > < configuration > < source > 1.8 < / source > < target > 1.8 < / target > < / configuration > < / plugin > < plugin > < artifactId > maven - war - plugin < / artifactId > < version > 2.4 < / version > < configuration > < warSourceDirectory > WebContent < / warSourceDirectory > < failOnMissingWebXml > false < / failOnMissingWebXml > < / configuration > < / plugin > < / plugins > < / build > < dependencies > < dependency > < groupId > asm < / groupId > < artifactId > asm - all < / artifactId > < version > 3.3.1 < / version > < / dependency > < dependency > < groupId > com . sun . jersey < / groupId > < artifactId > jersey - bundle < / artifactId > < version > 1.14 < / version > < / dependency > < dependency > < groupId > org . json < / groupId > < artifactId > json < / artifactId > < version > 20090211 < / version > < / dependency > < / dependencies > < / project > |
4단계
RESTFul 서비스 생성: CrunchifyRESTService.java . 여기서 우리는 두 개의 서비스를 생성할 것입니다:
-
/api/crunchifyService– POST 호출 – 테스트에서 이것을 사용할 것입니다. -
/api/verify– GET 호출 – 서비스가 성공적으로 시작되었는지 확인하기 위한 것입니다.
|
1 2 3 4 5 6 7 8 9 10 11 12 13 14 15 16 17 18 19 20 21 22 23 24 25 26 27 28 29 30 31 32 33 34 35 36 37 38 39 40 41 42 43 44 45 46 47 48 49 50 51 52 53 |
package com . crunchify . tutorials ; /** * @author Crunchify.com * */ import java . io . BufferedReader ; import java . io . InputStream ; import java . io . InputStreamReader ; import javax . print . attribute . standard . Media ; import javax . ws . rs . Consumes ; import javax . ws . rs . GET ; import javax . ws . rs . POST ; import javax . ws . rs . Path ; import javax . ws . rs . Produces ; import javax . ws . rs . core . MediaType ; import javax . ws . rs . core . Response ; @Path ( "/" ) public class CrunchifyRESTService { @POST @Path ( "/crunchifyService" ) @Consumes ( MediaType . APPLICATION_JSON ) public Response crunchifyREST ( InputStream incomingData ) { StringBuilder crunchifyBuilder = new StringBuilder ( ) ; try { BufferedReader in = new BufferedReader ( new InputStreamReader ( incomingData ) ) ; String line = null ; while ( ( line = in . readLine ( ) ) ! = null ) { crunchifyBuilder . append ( line ) ; } } catch ( Exception e ) { System . out . println ( "Error Parsing: - " ) ; } System . out . println ( "Data Received: " + crunchifyBuilder . toString ( ) ) ; // return HTTP response 200 in case of success return Response . status ( 200 ) . entity ( crunchifyBuilder . toString ( ) ) . build ( ) ; } @GET @Path ( "/verify" ) @Produces ( MediaType . TEXT_PLAIN ) public Response verifyRESTService ( InputStream incomingData ) { String result = "CrunchifyRESTService Successfully started.." ; // return HTTP response 200 in case of success return Response . status ( 200 ) . entity ( result ) . build ( ) ; } } |

5단계
Tomcat에 프로젝트 CrunchifyTutorials 를 배포합니다. 웹 프로젝트는 예외 없이 배포되어야 합니다.
- Eclipse에서
Servers tab을 마우스 오른쪽 버튼으로 클릭 -
Add and Remove...프로젝트를 클릭합니다. - 오른쪽
Configured:측면에 프로젝트 CrunchifyTutorials를 추가합니다. -
Publish를 클릭하십시오 - 시작을 클릭
Start
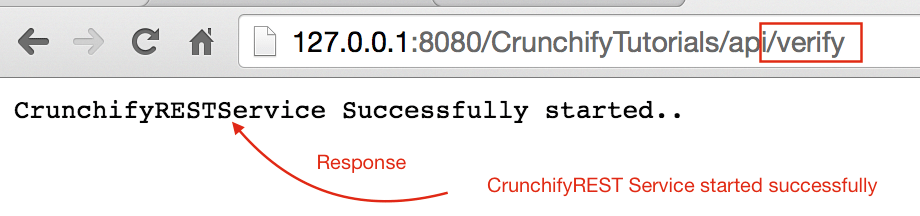
6단계 REST 서비스 확인
휴식 서비스는 다음 URL을 사용하여 액세스할 수 있어야 합니다. http://127.0.0.1:8080/CrunchifyTutorials/api/verify
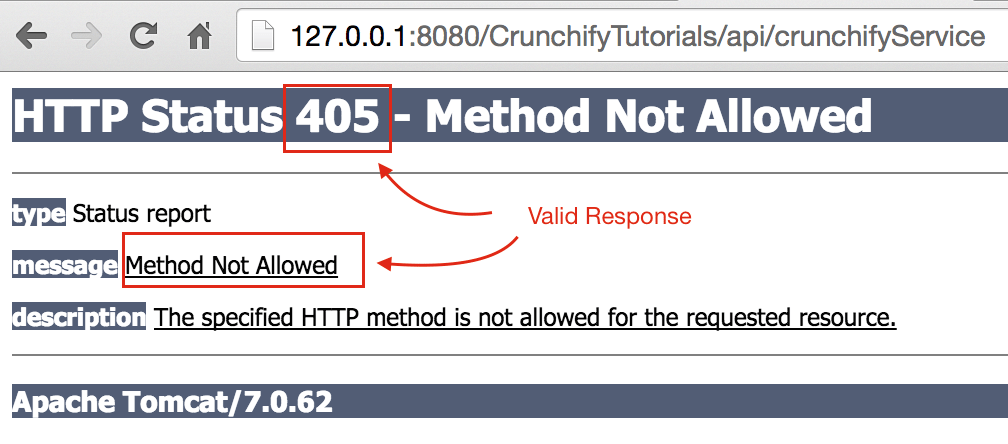
http://127.0.0.1:8080/CrunchifyTutorials/api/crunchifyService에 액세스하려고 하면 오류 코드 405 - Method not allowed - 유효한 응답이 표시됩니다. 보시다시피 POST 호출이며 요청과 함께 일부 데이터가 필요합니다.
계속 진행합시다.
7단계
아래 JSON 내용을 복사하여 Windows의 경우 C:\\CrunchifyJSON.txt 파일 아래에, Macbook의 경우 /Users/<username>/Documents/CrunchifyJSON.txt 파일에 넣습니다.
|
1 2 3 4 5 6 7 |
{ "tutorials" : { "id" : "Crunchify" , "topic" : "REST Service" , "description" : "This is REST Service Example by Crunchify." } } |
8단계
REST 호출 클라이언트 생성: CrunchifyRESTServiceClient.java.
아래 프로그램에서 change path to CrunchifyJSON.txt 하십시오.
|
1 2 3 4 5 6 7 8 9 10 11 12 13 14 15 16 17 18 19 20 21 22 23 24 25 26 27 28 29 30 31 32 33 34 35 36 37 38 39 40 41 42 43 44 45 46 47 48 49 50 51 52 53 54 55 56 57 58 59 60 61 62 63 64 |
package com . crunchify . tutorials ; import java . io . BufferedReader ; import java . io . FileInputStream ; import java . io . InputStream ; import java . io . InputStreamReader ; import java . io . OutputStreamWriter ; import java . net . URL ; import java . net . URLConnection ; import org . json . JSONObject ; /** * @author Crunchify.com * */ public class CrunchifyRESTServiceClient { public static void main ( String [ ] args ) { String string = "" ; try { // Step1: Let's 1st read file from fileSystem // Change CrunchifyJSON.txt path here InputStream crunchifyInputStream = new FileInputStream ( "/Users/<username>/Documents/CrunchifyJSON.txt" ) ; InputStreamReader crunchifyReader = new InputStreamReader ( crunchifyInputStream ) ; BufferedReader br = new BufferedReader ( crunchifyReader ) ; String line ; while ( ( line = br . readLine ( ) ) ! = null ) { string += line + "\n" ; } JSONObject jsonObject = new JSONObject ( string ) ; System . out . println ( jsonObject ) ; // Step2: Now pass JSON File Data to REST Service try { URL url = new URL ( "http://localhost:8080/CrunchifyTutorials/api/crunchifyService" ) ; URLConnection connection = url . openConnection ( ) ; connection . setDoOutput ( true ) ; connection . setRequestProperty ( "Content-Type" , "application/json" ) ; connection . setConnectTimeout ( 5000 ) ; connection . setReadTimeout ( 5000 ) ; OutputStreamWriter out = new OutputStreamWriter ( connection . getOutputStream ( ) ) ; out . write ( jsonObject . toString ( ) ) ; out . close ( ) ; BufferedReader in = new BufferedReader ( new InputStreamReader ( connection . getInputStream ( ) ) ) ; while ( in . readLine ( ) ! = null ) { } System . out . println ( "\nCrunchify REST Service Invoked Successfully.." ) ; in . close ( ) ; } catch ( Exception e ) { System . out . println ( "\nError while calling Crunchify REST Service" ) ; System . out . println ( e ) ; } br . close ( ) ; } catch ( Exception e ) { e . printStackTrace ( ) ; } } } |
9단계
이제 CrunchifyRESTServiceClient.java를 마우스 오른쪽 버튼으로 클릭하여 클라이언트 프로그램을 실행해 보겠습니다. 그러면 아래 두 개의 출력이 표시되어야 합니다.
1) 톰캣 콘솔에서

2) 로컬 클라이언트 콘솔에서
