
Çok Basit Jersey REST Hizmeti Oluşturun ve Java İstemcisinden JSON Verisi Gönderin
Yayınlanan: 2013-11-29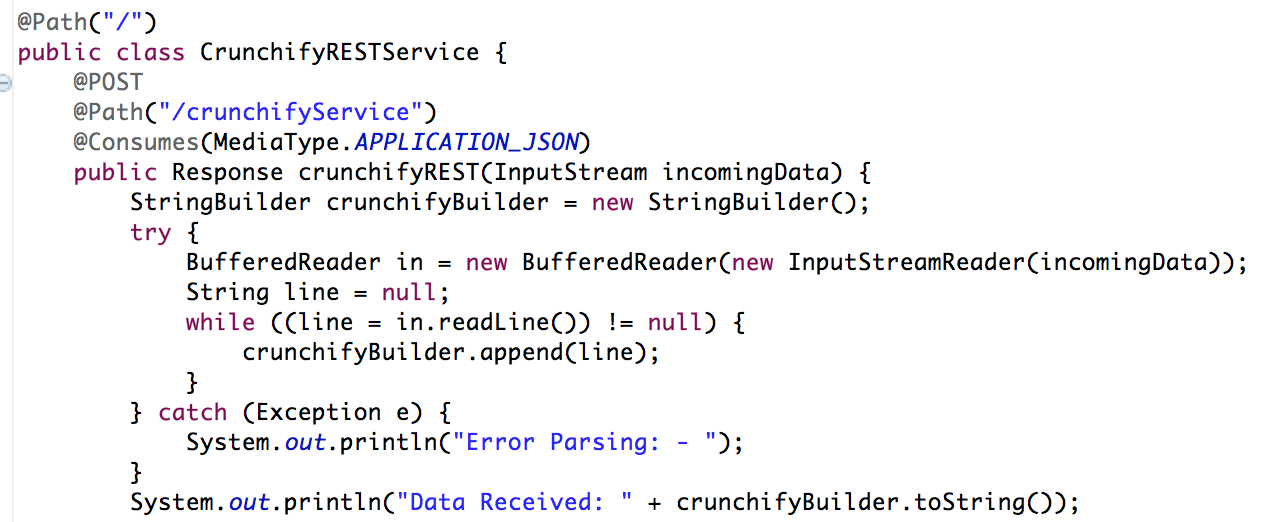
Son zamanlarda JSON verilerini REST Hizmetine iletmem gerekiyor ve kullanışlı basit bir İstemcim yoktu. Ancak dosyadan JSON verilerini okuyan ve REST servisine gönderen çok basit bir Java programı oluşturdu.
Temsili Durum Aktarımı (REST), SOAP ve Web Hizmetleri Açıklama Dili (WSDL) tabanlı Web hizmetlerine daha basit bir alternatif olarak Web'de yaygın olarak kabul görmüştür. Arayüz tasarımındaki bu kaymanın temel kanıtı, SOAP ve WSDL tabanlı arayüzleri daha kolay kullanım lehine reddeden veya bu arayüzlere geçiş yapan Yahoo, Google ve Facebook dahil olmak üzere ana akım Web 2.0 servis sağlayıcıları tarafından REST'in benimsenmesidir. hizmetlerini ortaya çıkarmak için kaynak odaklı model. Bu yazıda, Alex Rodriguez sizi REST'in temel ilkeleriyle tanıştırıyor.
Bunu kodlamaya başlayalım:
- RESTFul Web Hizmeti Oluşturun
- Java dosyası: CrunchifyRESTService.java
- web.xml dosyası
- RESTService İstemcisi Oluştur
- CrunchifyRESTServiceClient.java dosyası
Başka bir okumanız gerekir: Spring MVC Örneği/Eğitim: Merhaba Dünya – Spring MVC 3.2.1
Aşama 1
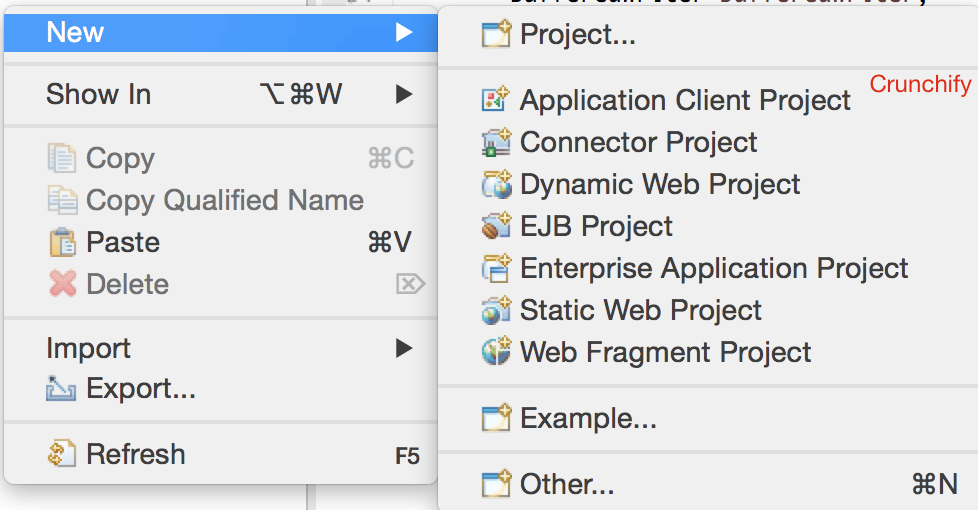
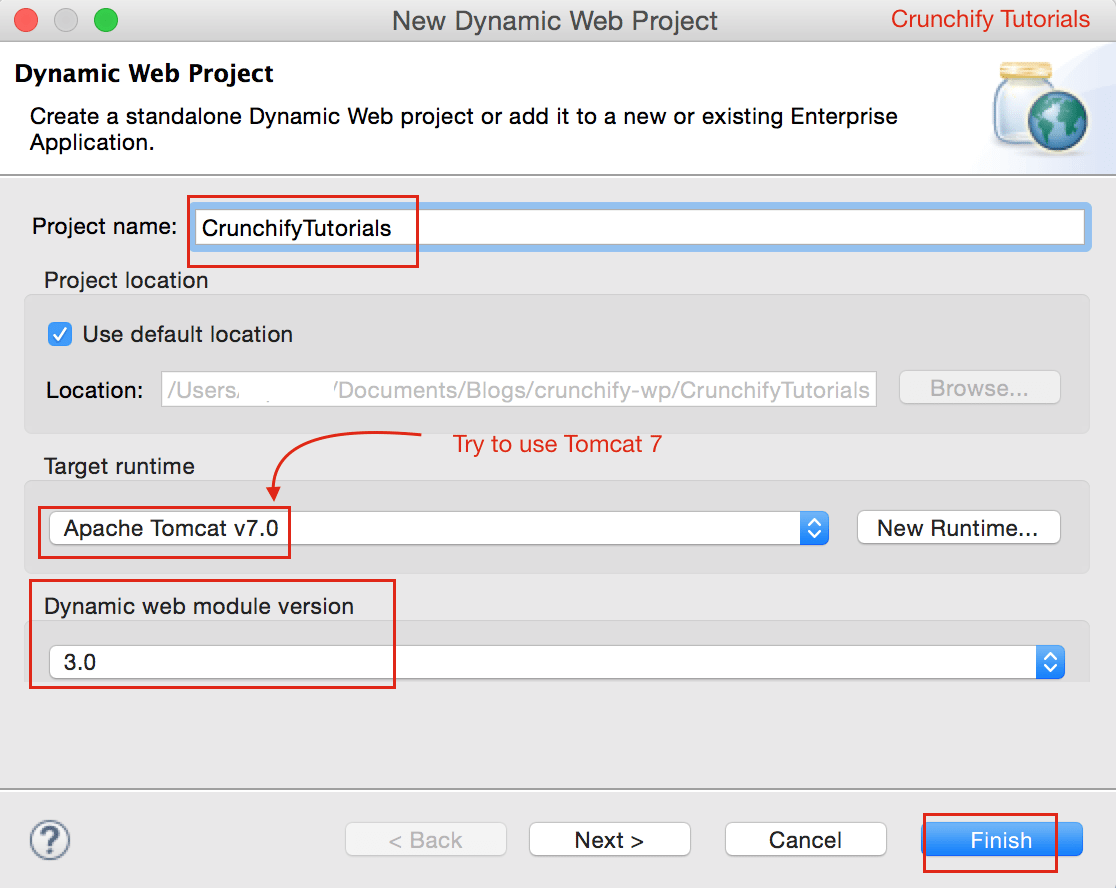
Eclipse => File => New => Dynamic Web Project . “ CrunchifyTutorials ” olarak adlandırın. Aşağıdaki öğretici, Tomcat 8 ile de çalışır.
Adım-2 Dağıtım Tanımlayıcı Dosyası Oluşturun
WebContent\WEB-INF\ altında web.xml (dağıtım tanımlayıcısı) görmüyorsanız aşağıdaki adımları izleyin.
web.xml açın ve içeriği aşağıdaki içeriklerle değiştirin:
|
1 2 3 4 5 6 7 8 9 10 11 12 13 14 15 16 17 18 19 20 21 22 23 24 25 |
<? xml version = "1.0" encoding = "UTF-8" ?> < web - app xmlns = "http://java.sun.com/xml/ns/javaee" xmlns : xsi = "http://www.w3.org/2001/XMLSchema-instance" xsi : schemaLocation = "http://java.sun.com/xml/ns/javaee http://java.sun.com/xml/ns/javaee/web-app_3_0.xsd" version = "3.0" > < display - name > CrunchifyRESTJerseyExample < / display - name > < welcome - file - list > < welcome - file > index . html < / welcome - file > < welcome - file > index . htm < / welcome - file > < welcome - file > index . jsp < / welcome - file > < welcome - file > default . html < / welcome - file > < welcome - file > default . htm < / welcome - file > < welcome - file > default . jsp < / welcome - file > < / welcome - file - list > < servlet > < servlet - name > Jersey Web Application < / servlet - name > < servlet - class > com . sun . jersey . spi . container . servlet . ServletContainer < / servlet - class > < load - on - startup > 1 < / load - on - startup > < / servlet > < servlet - mapping > < servlet - name > Jersey Web Application < / servlet - name > < url - pattern > / api /* < / url - pattern > < / servlet - mapping > < / web - app > |
Adım-3 Projeyi Maven Projesine Dönüştür
Bu öğreticiyi izleyin: https://crunchify.com/how-to-convert-existing-java-project-to-maven-in-eclipse/. İşte benim pom.xml dosyam.
|
1 2 3 4 5 6 7 8 9 10 11 12 13 14 15 16 17 18 19 20 21 22 23 24 25 26 27 28 29 30 31 32 33 34 35 36 37 38 39 40 41 42 43 44 45 46 |
< project xmlns = "http://maven.apache.org/POM/4.0.0" xmlns : xsi = "http://www.w3.org/2001/XMLSchema-instance" xsi : schemaLocation = "http://maven.apache.org/POM/4.0.0 http://maven.apache.org/xsd/maven-4.0.0.xsd" > < modelVersion > 4.0.0 < / modelVersion > < groupId > CrunchifyTutorials < / groupId > < artifactId > CrunchifyTutorials < / artifactId > < version > 0.0.1 - SNAPSHOT < / version > < packaging > war < / packaging > < build > < sourceDirectory > src < / sourceDirectory > < plugins > < plugin > < artifactId > maven - compiler - plugin < / artifactId > < version > 3.1 < / version > < configuration > < source > 1.8 < / source > < target > 1.8 < / target > < / configuration > < / plugin > < plugin > < artifactId > maven - war - plugin < / artifactId > < version > 2.4 < / version > < configuration > < warSourceDirectory > WebContent < / warSourceDirectory > < failOnMissingWebXml > false < / failOnMissingWebXml > < / configuration > < / plugin > < / plugins > < / build > < dependencies > < dependency > < groupId > asm < / groupId > < artifactId > asm - all < / artifactId > < version > 3.3.1 < / version > < / dependency > < dependency > < groupId > com . sun . jersey < / groupId > < artifactId > jersey - bundle < / artifactId > < version > 1.14 < / version > < / dependency > < dependency > < groupId > org . json < / groupId > < artifactId > json < / artifactId > < version > 20090211 < / version > < / dependency > < / dependencies > < / project > |
4. Adım
RESTFul hizmeti oluşturun: CrunchifyRESTService.java . Burada iki hizmet oluşturacağız:
-
/api/crunchifyService– POST çağrısı – bunu testimizde kullanacağız -
/api/verify– GET çağrısı – yalnızca hizmetin başarıyla başlatıldığından emin olmak için
|
1 2 3 4 5 6 7 8 9 10 11 12 13 14 15 16 17 18 19 20 21 22 23 24 25 26 27 28 29 30 31 32 33 34 35 36 37 38 39 40 41 42 43 44 45 46 47 48 49 50 51 52 53 |
package com . crunchify . tutorials ; /** * @author Crunchify.com * */ import java . io . BufferedReader ; import java . io . InputStream ; import java . io . InputStreamReader ; import javax . print . attribute . standard . Media ; import javax . ws . rs . Consumes ; import javax . ws . rs . GET ; import javax . ws . rs . POST ; import javax . ws . rs . Path ; import javax . ws . rs . Produces ; import javax . ws . rs . core . MediaType ; import javax . ws . rs . core . Response ; @Path ( "/" ) public class CrunchifyRESTService { @POST @Path ( "/crunchifyService" ) @Consumes ( MediaType . APPLICATION_JSON ) public Response crunchifyREST ( InputStream incomingData ) { StringBuilder crunchifyBuilder = new StringBuilder ( ) ; try { BufferedReader in = new BufferedReader ( new InputStreamReader ( incomingData ) ) ; String line = null ; while ( ( line = in . readLine ( ) ) ! = null ) { crunchifyBuilder . append ( line ) ; } } catch ( Exception e ) { System . out . println ( "Error Parsing: - " ) ; } System . out . println ( "Data Received: " + crunchifyBuilder . toString ( ) ) ; // return HTTP response 200 in case of success return Response . status ( 200 ) . entity ( crunchifyBuilder . toString ( ) ) . build ( ) ; } @GET @Path ( "/verify" ) @Produces ( MediaType . TEXT_PLAIN ) public Response verifyRESTService ( InputStream incomingData ) { String result = "CrunchifyRESTService Successfully started.." ; // return HTTP response 200 in case of success return Response . status ( 200 ) . entity ( result ) . build ( ) ; } } |

Adım 5
CrunchifyTutorials projesini dağıtın. Web projesi istisnasız dağıtılmalıdır.
- Eclipse'de
Servers tabsağ tıklayın -
Add and Remove...Projesi'ne tıklayın - Project CrunchifyTutorials'ı sağ
Configured:tarafına ekleyin. -
Publishtıklayın -
Starttıklayın
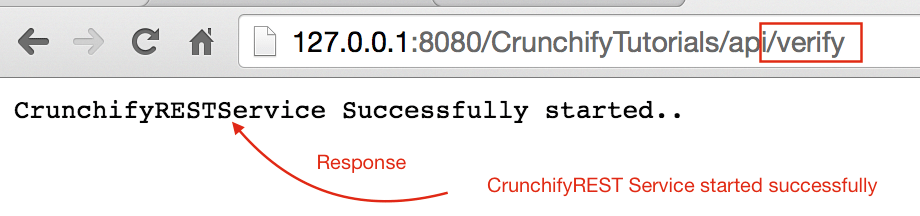
Adım-6 REST hizmetini doğrulayın
Dinlenme hizmetine şu URL kullanılarak erişilebilir olmalıdır: http://127.0.0.1:8080/CrunchifyTutorials/api/verify
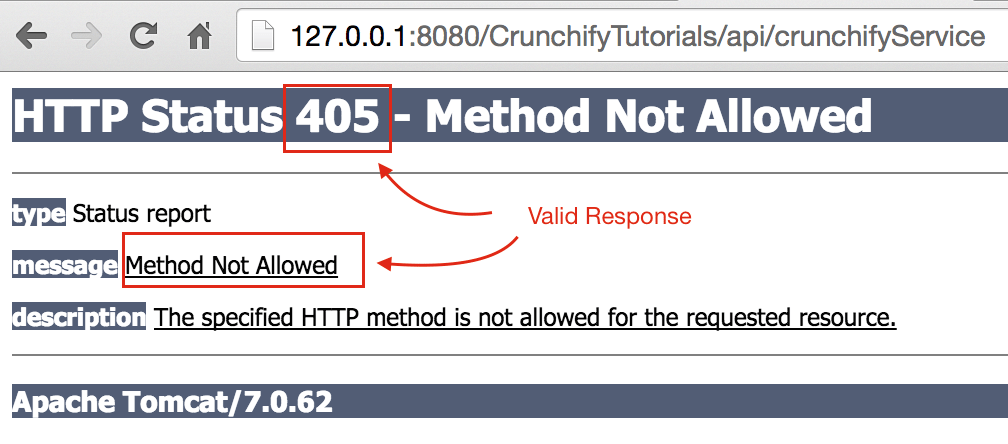
http://127.0.0.1:8080/CrunchifyTutorials/api/crunchifyService adresine erişmeye çalışırsanız, 405 - Method not allowed - geçerli yanıt olan hata kodunu görürsünüz. Gördüğünüz gibi, bu POST çağrısıdır ve istekle birlikte bazı veriler beklemelidir.
Hadi devam edelim.
Adım-7
JSON içeriğinin altına kopyalayın ve Windows için C:\\CrunchifyJSON.txt /Users/<username>/Documents/CrunchifyJSON.txt veya Macbook ise /Users/<username>/Documents/CrunchifyJSON.txt dosyası altına koyun.
|
1 2 3 4 5 6 7 |
{ "tutorials" : { "id" : "Crunchify" , "topic" : "REST Service" , "description" : "This is REST Service Example by Crunchify." } } |
Adım-8
REST Çağrı İstemcisi oluşturun: CrunchifyRESTServiceClient.java.
Lütfen aşağıdaki programda change path to CrunchifyJSON.txt .
|
1 2 3 4 5 6 7 8 9 10 11 12 13 14 15 16 17 18 19 20 21 22 23 24 25 26 27 28 29 30 31 32 33 34 35 36 37 38 39 40 41 42 43 44 45 46 47 48 49 50 51 52 53 54 55 56 57 58 59 60 61 62 63 64 |
package com . crunchify . tutorials ; import java . io . BufferedReader ; import java . io . FileInputStream ; import java . io . InputStream ; import java . io . InputStreamReader ; import java . io . OutputStreamWriter ; import java . net . URL ; import java . net . URLConnection ; import org . json . JSONObject ; /** * @author Crunchify.com * */ public class CrunchifyRESTServiceClient { public static void main ( String [ ] args ) { String string = "" ; try { // Step1: Let's 1st read file from fileSystem // Change CrunchifyJSON.txt path here InputStream crunchifyInputStream = new FileInputStream ( "/Users/<username>/Documents/CrunchifyJSON.txt" ) ; InputStreamReader crunchifyReader = new InputStreamReader ( crunchifyInputStream ) ; BufferedReader br = new BufferedReader ( crunchifyReader ) ; String line ; while ( ( line = br . readLine ( ) ) ! = null ) { string += line + "\n" ; } JSONObject jsonObject = new JSONObject ( string ) ; System . out . println ( jsonObject ) ; // Step2: Now pass JSON File Data to REST Service try { URL url = new URL ( "http://localhost:8080/CrunchifyTutorials/api/crunchifyService" ) ; URLConnection connection = url . openConnection ( ) ; connection . setDoOutput ( true ) ; connection . setRequestProperty ( "Content-Type" , "application/json" ) ; connection . setConnectTimeout ( 5000 ) ; connection . setReadTimeout ( 5000 ) ; OutputStreamWriter out = new OutputStreamWriter ( connection . getOutputStream ( ) ) ; out . write ( jsonObject . toString ( ) ) ; out . close ( ) ; BufferedReader in = new BufferedReader ( new InputStreamReader ( connection . getInputStream ( ) ) ) ; while ( in . readLine ( ) ! = null ) { } System . out . println ( "\nCrunchify REST Service Invoked Successfully.." ) ; in . close ( ) ; } catch ( Exception e ) { System . out . println ( "\nError while calling Crunchify REST Service" ) ; System . out . println ( e ) ; } br . close ( ) ; } catch ( Exception e ) { e . printStackTrace ( ) ; } } } |
Adım-9
Şimdi CrunchifyRESTServiceClient.java'ya sağ tıklayarak Client Programını çalıştıralım ve aşağıdaki iki çıktıyı görmelisiniz.
1) Tomcat Konsolunda

2) Yerel İstemci Konsolunda
