
Crie um serviço REST Jersey muito simples e envie dados JSON do cliente Java
Publicados: 2013-11-29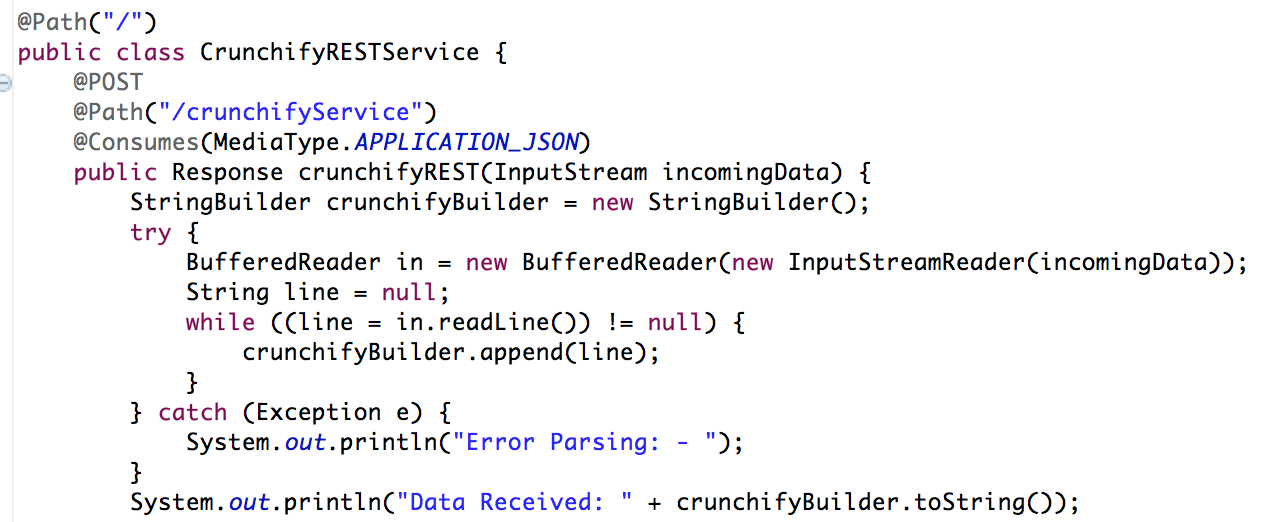
Recentemente, tive que passar dados JSON para o serviço REST e não tinha nenhum cliente simples à mão. Mas criou um programa Java muito simples que lê dados JSON do arquivo e os envia para o serviço REST.
Representational State Transfer (REST) ganhou ampla aceitação em toda a Web como uma alternativa mais simples para serviços da Web baseados em SOAP e Web Services Description Language (WSDL). A principal evidência dessa mudança no design da interface é a adoção do REST pelos principais provedores de serviços da Web 2.0 - incluindo Yahoo, Google e Facebook - que descontinuaram ou passaram interfaces baseadas em SOAP e WSDL em favor de uma interface mais fácil de usar, modelo orientado a recursos para expor seus serviços. Neste artigo, Alex Rodriguez apresenta os princípios básicos do REST.
Vamos começar a codificar isso:
- Criar serviço Web RESTFul
- Arquivo Java: CrunchifyRESTService.java
- arquivo web.xml
- Criar cliente RESTService
- Arquivo CrunchifyRESTServiceClient.java
Outro deve ler: Spring MVC Example/Tutorial: Hello World – Spring MVC 3.2.1
Passo 1
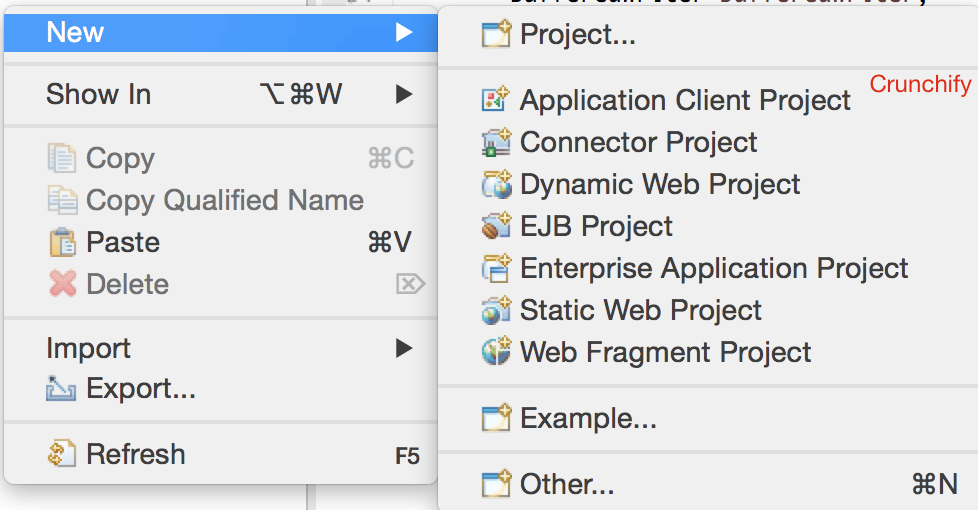
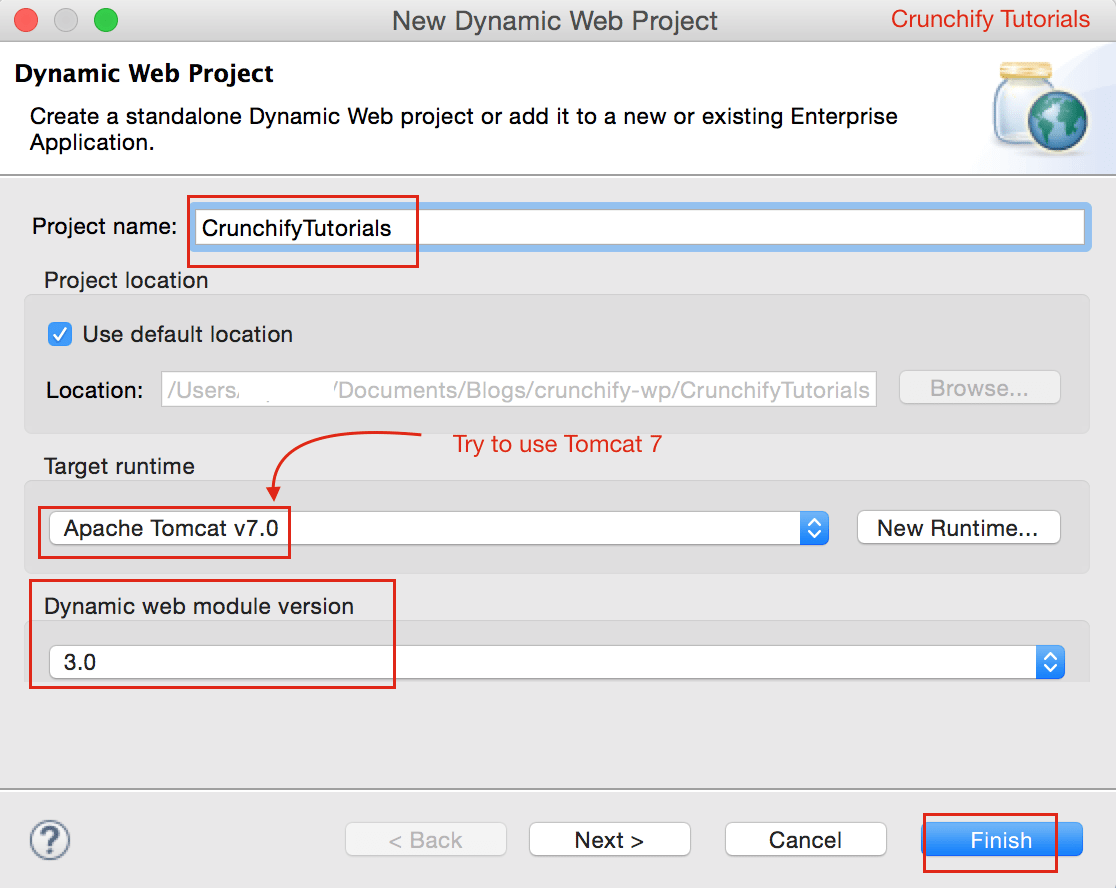
No Eclipse => File => New => Dynamic Web Project . Nomeie-o como “ CrunchifyTutorials ”. O tutorial abaixo também funciona com Tomcat 8 .
Etapa 2 Criar arquivo descritor de implantação
Se você não web.xml (descritor de implantação) em WebContent\WEB-INF\ , siga estas etapas.
Abra web.xml e substitua o conteúdo pelo conteúdo abaixo:
|
1 2 3 4 5 6 7 8 9 10 11 12 13 14 15 16 17 18 19 20 21 22 23 24 25 |
<? xml version = "1.0" encoding = "UTF-8" ?> < web - app xmlns = "http://java.sun.com/xml/ns/javaee" xmlns : xsi = "http://www.w3.org/2001/XMLSchema-instance" xsi : schemaLocation = "http://java.sun.com/xml/ns/javaee http://java.sun.com/xml/ns/javaee/web-app_3_0.xsd" version = "3.0" > < display - name > CrunchifyRESTJerseyExample < / display - name > < welcome - file - list > < welcome - file > index . html < / welcome - file > < welcome - file > index . htm < / welcome - file > < welcome - file > index . jsp < / welcome - file > < welcome - file > default . html < / welcome - file > < welcome - file > default . htm < / welcome - file > < welcome - file > default . jsp < / welcome - file > < / welcome - file - list > < servlet > < servlet - name > Jersey Web Application < / servlet - name > < servlet - class > com . sun . jersey . spi . container . servlet . ServletContainer < / servlet - class > < load - on - startup > 1 < / load - on - startup > < / servlet > < servlet - mapping > < servlet - name > Jersey Web Application < / servlet - name > < url - pattern > / api /* < / url - pattern > < / servlet - mapping > < / web - app > |
Etapa 3 Converter projeto em projeto Maven
Siga este tutorial: https://crunchify.com/how-to-convert-existing-java-project-to-maven-in-eclipse/. Aqui está meu arquivo pom.xml.
|
1 2 3 4 5 6 7 8 9 10 11 12 13 14 15 16 17 18 19 20 21 22 23 24 25 26 27 28 29 30 31 32 33 34 35 36 37 38 39 40 41 42 43 44 45 46 |
< project xmlns = "http://maven.apache.org/POM/4.0.0" xmlns : xsi = "http://www.w3.org/2001/XMLSchema-instance" xsi : schemaLocation = "http://maven.apache.org/POM/4.0.0 http://maven.apache.org/xsd/maven-4.0.0.xsd" > < modelVersion > 4.0.0 < / modelVersion > < groupId > CrunchifyTutorials < / groupId > < artifactId > CrunchifyTutorials < / artifactId > < version > 0.0.1 - SNAPSHOT < / version > < packaging > war < / packaging > < build > < sourceDirectory > src < / sourceDirectory > < plugins > < plugin > < artifactId > maven - compiler - plugin < / artifactId > < version > 3.1 < / version > < configuration > < source > 1.8 < / source > < target > 1.8 < / target > < / configuration > < / plugin > < plugin > < artifactId > maven - war - plugin < / artifactId > < version > 2.4 < / version > < configuration > < warSourceDirectory > WebContent < / warSourceDirectory > < failOnMissingWebXml > false < / failOnMissingWebXml > < / configuration > < / plugin > < / plugins > < / build > < dependencies > < dependency > < groupId > asm < / groupId > < artifactId > asm - all < / artifactId > < version > 3.3.1 < / version > < / dependency > < dependency > < groupId > com . sun . jersey < / groupId > < artifactId > jersey - bundle < / artifactId > < version > 1.14 < / version > < / dependency > < dependency > < groupId > org . json < / groupId > < artifactId > json < / artifactId > < version > 20090211 < / version > < / dependency > < / dependencies > < / project > |
Passo 4
Criar serviço RESTFul: CrunchifyRESTService.java . Aqui vamos criar dois serviços:
-
/api/crunchifyService– chamada POST – usaremos isso com nosso teste -
/api/verify– chamada GET – apenas para garantir que o serviço foi iniciado com sucesso
|
1 2 3 4 5 6 7 8 9 10 11 12 13 14 15 16 17 18 19 20 21 22 23 24 25 26 27 28 29 30 31 32 33 34 35 36 37 38 39 40 41 42 43 44 45 46 47 48 49 50 51 52 53 |
package com . crunchify . tutorials ; /** * @author Crunchify.com * */ import java . io . BufferedReader ; import java . io . InputStream ; import java . io . InputStreamReader ; import javax . print . attribute . standard . Media ; import javax . ws . rs . Consumes ; import javax . ws . rs . GET ; import javax . ws . rs . POST ; import javax . ws . rs . Path ; import javax . ws . rs . Produces ; import javax . ws . rs . core . MediaType ; import javax . ws . rs . core . Response ; @Path ( "/" ) public class CrunchifyRESTService { @POST @Path ( "/crunchifyService" ) @Consumes ( MediaType . APPLICATION_JSON ) public Response crunchifyREST ( InputStream incomingData ) { StringBuilder crunchifyBuilder = new StringBuilder ( ) ; try { BufferedReader in = new BufferedReader ( new InputStreamReader ( incomingData ) ) ; String line = null ; while ( ( line = in . readLine ( ) ) ! = null ) { crunchifyBuilder . append ( line ) ; } } catch ( Exception e ) { System . out . println ( "Error Parsing: - " ) ; } System . out . println ( "Data Received: " + crunchifyBuilder . toString ( ) ) ; // return HTTP response 200 in case of success return Response . status ( 200 ) . entity ( crunchifyBuilder . toString ( ) ) . build ( ) ; } @GET @Path ( "/verify" ) @Produces ( MediaType . TEXT_PLAIN ) public Response verifyRESTService ( InputStream incomingData ) { String result = "CrunchifyRESTService Successfully started.." ; // return HTTP response 200 in case of success return Response . status ( 200 ) . entity ( result ) . build ( ) ; } } |

Passo-5
Implante o projeto CrunchifyTutorials no Tomcat. O projeto da Web deve ser implantado sem nenhuma exceção.
- Clique com o botão direito na
Servers tabno Eclipse - Clique em
Add and Remove...Projeto - Adicione Project CrunchifyTutorials ao lado direito
Configured: - Clique em
Publish - Clique em
Start
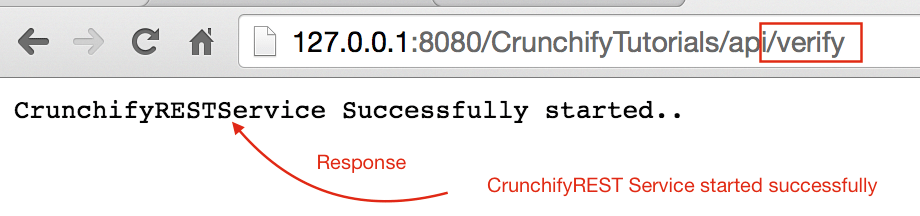
Etapa 6 Verifique o serviço REST
O serviço Rest deve estar acessível usando este URL: http://127.0.0.1:8080/CrunchifyTutorials/api/verify
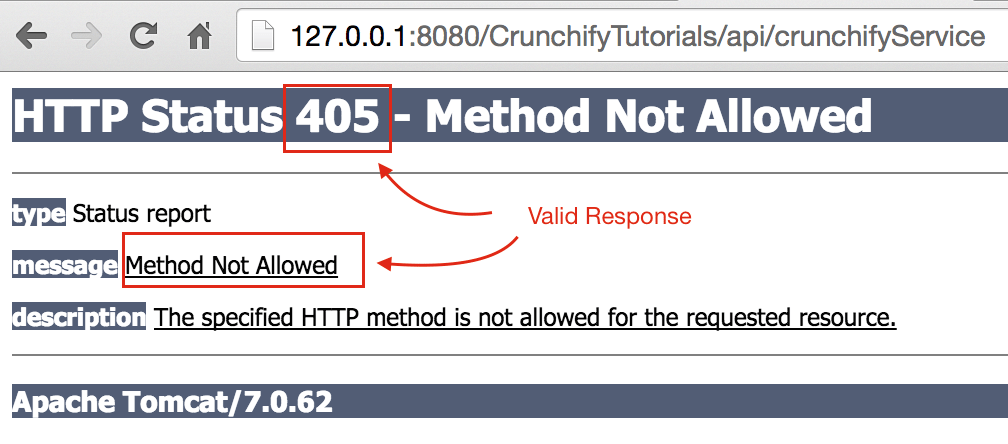
Se você tentar acessar http://127.0.0.1:8080/CrunchifyTutorials/api/crunchifyService, verá o código de erro 405 - Method not allowed - que é uma resposta válida. Como você pode ver, é uma chamada POST e deve esperar alguns dados com a solicitação.
Vamos continuar.
Passo-7
Copie o conteúdo JSON abaixo e coloque-o no arquivo C:\\CrunchifyJSON.txt para Windows ou no arquivo /Users/<username>/Documents/CrunchifyJSON.txt se Macbook.
|
1 2 3 4 5 6 7 |
{ "tutorials" : { "id" : "Crunchify" , "topic" : "REST Service" , "description" : "This is REST Service Example by Crunchify." } } |
Passo-8
Criar cliente de chamada REST: CrunchifyRESTServiceClient.java.
change path to CrunchifyJSON.txt no programa abaixo.
|
1 2 3 4 5 6 7 8 9 10 11 12 13 14 15 16 17 18 19 20 21 22 23 24 25 26 27 28 29 30 31 32 33 34 35 36 37 38 39 40 41 42 43 44 45 46 47 48 49 50 51 52 53 54 55 56 57 58 59 60 61 62 63 64 |
package com . crunchify . tutorials ; import java . io . BufferedReader ; import java . io . FileInputStream ; import java . io . InputStream ; import java . io . InputStreamReader ; import java . io . OutputStreamWriter ; import java . net . URL ; import java . net . URLConnection ; import org . json . JSONObject ; /** * @author Crunchify.com * */ public class CrunchifyRESTServiceClient { public static void main ( String [ ] args ) { String string = "" ; try { // Step1: Let's 1st read file from fileSystem // Change CrunchifyJSON.txt path here InputStream crunchifyInputStream = new FileInputStream ( "/Users/<username>/Documents/CrunchifyJSON.txt" ) ; InputStreamReader crunchifyReader = new InputStreamReader ( crunchifyInputStream ) ; BufferedReader br = new BufferedReader ( crunchifyReader ) ; String line ; while ( ( line = br . readLine ( ) ) ! = null ) { string += line + "\n" ; } JSONObject jsonObject = new JSONObject ( string ) ; System . out . println ( jsonObject ) ; // Step2: Now pass JSON File Data to REST Service try { URL url = new URL ( "http://localhost:8080/CrunchifyTutorials/api/crunchifyService" ) ; URLConnection connection = url . openConnection ( ) ; connection . setDoOutput ( true ) ; connection . setRequestProperty ( "Content-Type" , "application/json" ) ; connection . setConnectTimeout ( 5000 ) ; connection . setReadTimeout ( 5000 ) ; OutputStreamWriter out = new OutputStreamWriter ( connection . getOutputStream ( ) ) ; out . write ( jsonObject . toString ( ) ) ; out . close ( ) ; BufferedReader in = new BufferedReader ( new InputStreamReader ( connection . getInputStream ( ) ) ) ; while ( in . readLine ( ) ! = null ) { } System . out . println ( "\nCrunchify REST Service Invoked Successfully.." ) ; in . close ( ) ; } catch ( Exception e ) { System . out . println ( "\nError while calling Crunchify REST Service" ) ; System . out . println ( e ) ; } br . close ( ) ; } catch ( Exception e ) { e . printStackTrace ( ) ; } } } |
Passo-9
Agora vamos executar o Client Program clicando com o botão direito do mouse em CrunchifyRESTServiceClient.java e você deverá ver abaixo duas saídas
1) no console do Tomcat

2) no Console do cliente local
