
서블릿 튜토리얼: JSP 시작하기 – 서블릿 예제
게시 됨: 2013-07-16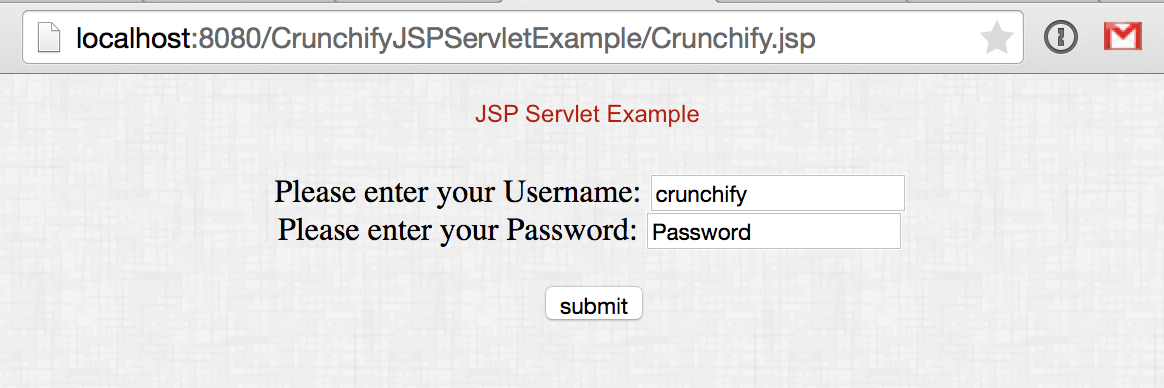
다음은 단계별 지침이 포함된 간단한 JSP – Servlet 예제입니다. JSP – Servlet 예제에서 요청 매개변수를 검색하는 방법을 보여드리겠습니다.
수행할 단계는 다음과 같습니다.
- 이클립스 IDE를 엽니다.
- 새 동적 웹 프로젝트 CrunchifyJSPServletExample을 만듭니다.
- HelloCrunchify.java 파일을 생성하여 HttpServlet을 확장합니다(200개의 모든 Java 예제 목록).
- Crunchify.jsp 파일을 생성합니다.
- web.xml 파일(배포 설명자 파일).
- web.xml 파일이 표시되지 않으면 여기에서 솔루션을 찾으십시오.
- Tomcat 웹 서버에 프로젝트를 추가하고 실행합니다.
다음은 전체 프로젝트 구조입니다.

1 단계
HelloCrunchify.java 파일 생성
|
1 2 3 4 5 6 7 8 9 10 11 12 13 14 15 16 17 18 19 20 21 22 23 24 25 26 27 28 29 30 31 32 33 34 35 36 37 |
package com . crunchify . jsp . servlet ; import java . io . IOException ; import javax . servlet . ServletException ; import javax . servlet . http . HttpServlet ; import javax . servlet . http . HttpServletRequest ; import javax . servlet . http . HttpServletResponse ; import java . io . PrintWriter ; /** * @author Crunchify.com */ public class HelloCrunchify extends HttpServlet { protected void doGet ( HttpServletRequest request , HttpServletResponse response ) throws ServletException , IOException { // reading the user input String username = request . getParameter ( "username" ) ; String password = request . getParameter ( "password" ) ; PrintWriter out = response . getWriter ( ) ; out . println ( "<!DOCTYPE html PUBLIC \"-//W3C//DTD HTML 4.01 Transitional//EN\" +" + "http://www.w3.org/TR/html4/loose.dtd\">\n" + "<html> \n" + "<head> \n" + "<meta http-equiv=\"Content-Type\" content=\"text/html; " + "charset=ISO-8859-1\"> \n" + "<title> Crunchify.com JSP Servlet Example </title> \n" + "</head> \n" + "<body> <div align='center'> \n" + "<style= \"font-size=\"12px\" color='black'\"" + "\">" + "Username: " + username + " <br> " + "Password: " + password + "</font></body> \n" + "</html>" ) ; } } |
다른 사람은 다음을 읽어야 합니다.
- Tomcat 시작 시 Java 프로그램을 자동으로 실행하는 방법
- Spring Web MVC(.jsp)에서 AJAX, jQuery를 사용하는 방법 – 예제
2 단계
Crunchify.jsp 파일 생성:
|
1 2 3 4 5 6 7 8 9 10 11 12 13 14 15 16 17 18 19 20 21 22 23 24 25 26 27 28 29 30 |
<% @ page language = "java" contentType = "text/html; charset=ISO-8859-1" pageEncoding = "ISO-8859-1" %> < ! DOCTYPE html PUBLIC "-//W3C//DTD HTML 4.01 Transitional//EN" "http://www.w3.org/TR/html4/loose.dtd" > < html > <style type ="text/css"> body { background-image : url ( 'https://cdn.crunchify.com/wp-content/uploads/2013/03/Crunchify.bg_.300.png' ) ; } </style> < head > < meta http - equiv = "Content-Type" content = "text/html; charset=ISO-8859-1" > < title > Crunchify JSP Servlet Example < / title > < / head > < body > < div align = "center" style = "margin-top: 50px;" > < form action = "CrunchifyServlet" > Please enter your Username : < input type = "text" name = "username" size = "20px" > < br > Please enter your Password : < input type = "text" name = "password" size = "20px" > < br > < br > < input type = "submit" value = "submit" > < / form > < / div > < / body > < / html > |

3단계
web.xml 파일 업데이트:
|
1 2 3 4 5 6 7 8 9 10 11 12 13 14 15 16 17 18 19 20 21 22 23 |
<? xml version = "1.0" encoding = "UTF-8" ?> < web - app xmlns : xsi = "http://www.w3.org/2001/XMLSchema-instance" xmlns = "http://java.sun.com/xml/ns/javaee" xmlns : web = "http://java.sun.com/xml/ns/javaee/web-app_2_5.xsd" xsi : schemaLocation = "http://java.sun.com/xml/ns/javaee http://java.sun.com/xml/ns/javaee/web-app_3_0.xsd" version = "3.0" > < display - name > CrunchifyJSPServletExample < / display - name > < welcome - file - list > < welcome - file > index . html < / welcome - file > < welcome - file > index . htm < / welcome - file > < welcome - file > index . jsp < / welcome - file > < welcome - file > default . html < / welcome - file > < welcome - file > default . htm < / welcome - file > < welcome - file > default . jsp < / welcome - file > < / welcome - file - list > < servlet > < servlet - name > Hello < / servlet - name > < servlet - class > com . crunchify . jsp . servlet . HelloCrunchify < / servlet - class > < / servlet > < servlet - mapping > < servlet - name > Hello < / servlet - name > < url - pattern > / CrunchifyServlet < / url - pattern > < / servlet - mapping > < / web - app > |
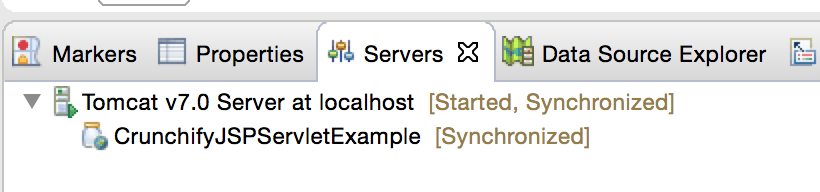
4단계
Tomcat에 CrunchifyJSPServletExample 을 배포하고 실행합니다.
5단계
URL을 http://localhost:8080/CrunchifyJSPServletExample/Crunchify.jsp 로 지정하십시오.
6단계
체크아웃 결과. URL은 다음과 같아야 합니다. http://localhost:8080/CrunchifyJSPServletExample/CrunchifyServlet?username=crunchify&password=Password

서버를 다시 시작하거나 시작한 경우를 제외하고 서버는 " web.xml "의 변경 사항을 인식하지 않습니다.