
Buat Layanan REST Jersey Sangat Sederhana dan Kirim Data JSON Dari Klien Java
Diterbitkan: 2013-11-29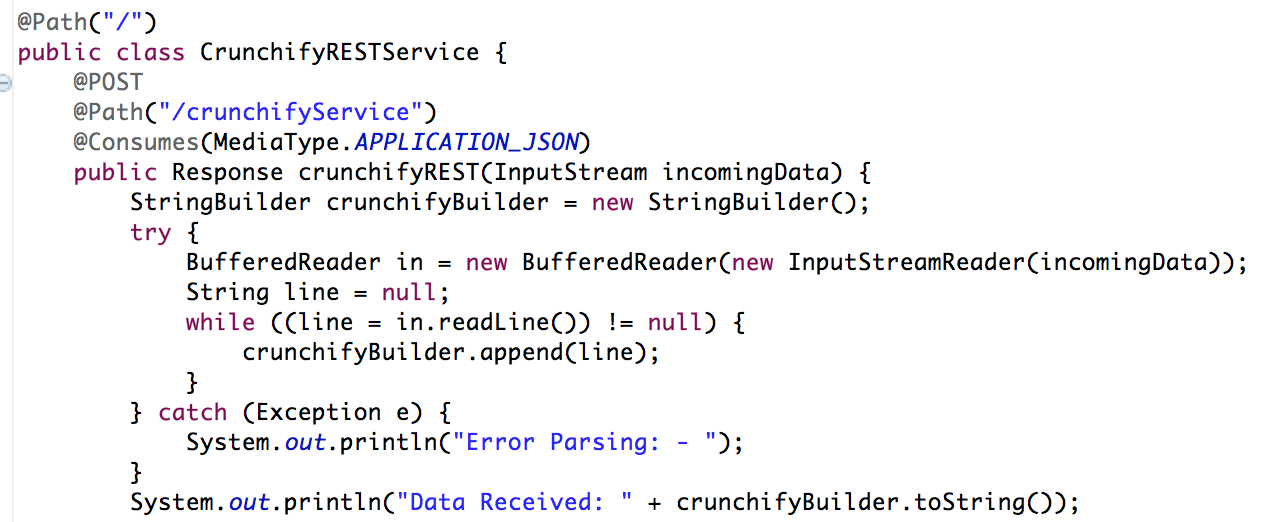
Baru-baru ini saya harus meneruskan data JSON ke Layanan REST dan tidak memiliki Klien sederhana yang berguna. Tetapi membuat program Java yang sangat sederhana yang membaca data JSON dari file dan mengirimkannya ke layanan REST.
Representational State Transfer (REST) telah diterima secara luas di seluruh Web sebagai alternatif yang lebih sederhana untuk layanan Web berbasis SOAP dan Web Services Description Language (WSDL). Bukti utama dari pergeseran dalam desain antarmuka ini adalah adopsi REST oleh penyedia layanan Web 2.0 utama—termasuk Yahoo, Google, dan Facebook—yang telah menghentikan atau meneruskan antarmuka berbasis SOAP dan WSDL demi antarmuka yang lebih mudah digunakan, model berorientasi sumber daya untuk mengekspos layanan mereka. Dalam artikel ini, Alex Rodriguez memperkenalkan Anda pada prinsip-prinsip dasar REST.
Mari kita mulai mengkodekan ini:
- Buat Layanan Web RESTFul
- File Java: CrunchifyRESTService.java
- file web.xml
- Buat Klien Layanan REST
- File CrunchifyRESTServiceClient.java
Yang lain harus dibaca: Contoh/Tutorial Spring MVC: Hello World – Spring MVC 3.2.1
Langkah 1
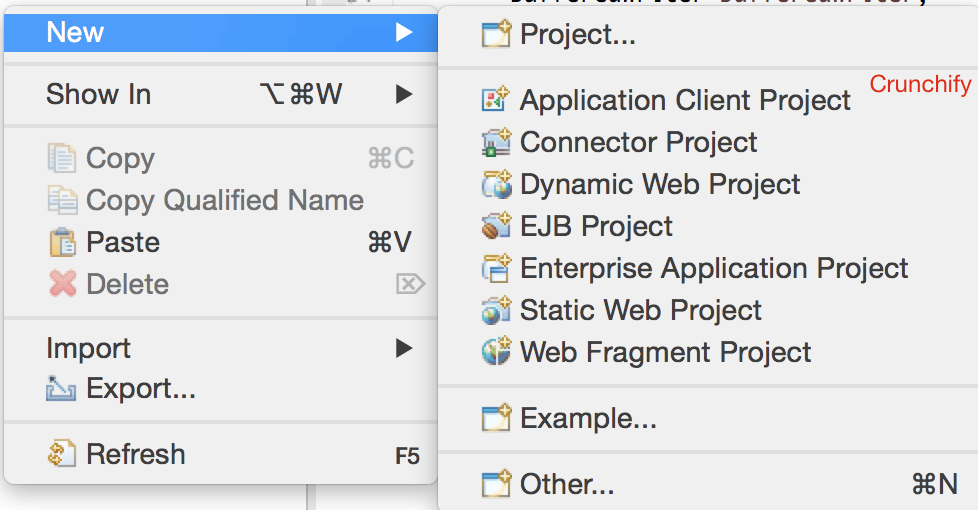
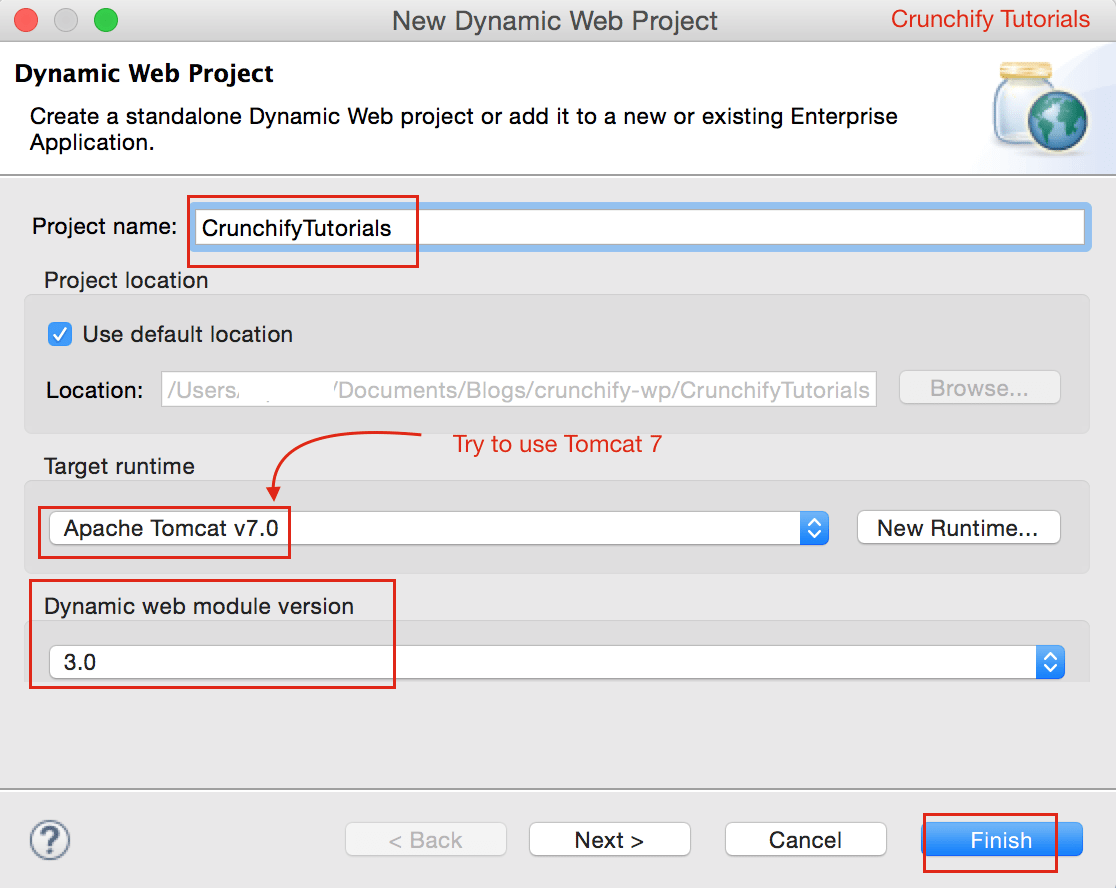
Di Eclipse => File => New => Dynamic Web Project . Beri nama sebagai " CrunchifyTutorials ". Tutorial di bawah ini juga berfungsi dengan Tomcat 8 .
Langkah-2 Buat File Deskriptor Penerapan
Jika Anda tidak melihat web.xml (deskriptor penerapan) di bawah WebContent\WEB-INF\ , ikuti langkah-langkah berikut.
Buka web.xml dan ganti konten dengan konten di bawah ini:
|
1 2 3 4 5 6 7 8 9 10 11 12 13 14 15 16 17 18 19 20 21 22 23 24 25 |
<? xml version = "1.0" encoding = "UTF-8" ?> < web - app xmlns = "http://java.sun.com/xml/ns/javaee" xmlns : xsi = "http://www.w3.org/2001/XMLSchema-instance" xsi : schemaLocation = "http://java.sun.com/xml/ns/javaee http://java.sun.com/xml/ns/javaee/web-app_3_0.xsd" version = "3.0" > < display - name > CrunchifyRESTJerseyExample < / display - name > < welcome - file - list > < welcome - file > index . html < / welcome - file > < welcome - file > index . htm < / welcome - file > < welcome - file > index . jsp < / welcome - file > < welcome - file > default . html < / welcome - file > < welcome - file > default . htm < / welcome - file > < welcome - file > default . jsp < / welcome - file > < / welcome - file - list > < servlet > < servlet - name > Jersey Web Application < / servlet - name > < servlet - class > com . sun . jersey . spi . container . servlet . ServletContainer < / servlet - class > < load - on - startup > 1 < / load - on - startup > < / servlet > < servlet - mapping > < servlet - name > Jersey Web Application < / servlet - name > < url - pattern > / api /* < / url - pattern > < / servlet - mapping > < / web - app > |
Langkah-3 Konversi Proyek ke Proyek Maven
Ikuti tutorial ini: https://crunchify.com/how-to-convert-existing-Java-project-to-maven-in-Eclipse/. Ini file pom.xml saya.
|
1 2 3 4 5 6 7 8 9 10 11 12 13 14 15 16 17 18 19 20 21 22 23 24 25 26 27 28 29 30 31 32 33 34 35 36 37 38 39 40 41 42 43 44 45 46 |
< project xmlns = "http://maven.apache.org/POM/4.0.0" xmlns : xsi = "http://www.w3.org/2001/XMLSchema-instance" xsi : schemaLocation = "http://maven.apache.org/POM/4.0.0 http://maven.apache.org/xsd/maven-4.0.0.xsd" > < modelVersion > 4.0.0 < / modelVersion > < groupId > CrunchifyTutorials < / groupId > < artifactId > CrunchifyTutorials < / artifactId > < version > 0.0.1 - SNAPSHOT < / version > < packaging > war < / packaging > < build > < sourceDirectory > src < / sourceDirectory > < plugins > < plugin > < artifactId > maven - compiler - plugin < / artifactId > < version > 3.1 < / version > < configuration > < source > 1.8 < / source > < target > 1.8 < / target > < / configuration > < / plugin > < plugin > < artifactId > maven - war - plugin < / artifactId > < version > 2.4 < / version > < configuration > < warSourceDirectory > WebContent < / warSourceDirectory > < failOnMissingWebXml > false < / failOnMissingWebXml > < / configuration > < / plugin > < / plugins > < / build > < dependencies > < dependency > < groupId > asm < / groupId > < artifactId > asm - all < / artifactId > < version > 3.3.1 < / version > < / dependency > < dependency > < groupId > com . sun . jersey < / groupId > < artifactId > jersey - bundle < / artifactId > < version > 1.14 < / version > < / dependency > < dependency > < groupId > org . json < / groupId > < artifactId > json < / artifactId > < version > 20090211 < / version > < / dependency > < / dependencies > < / project > |
Langkah-4
Buat layanan RESTFul: CrunchifyRESTService.java . Di sini kita akan membuat dua layanan:
-
/api/crunchifyService– POST call – kami akan menggunakan ini dengan pengujian kami -
/api/verify– DAPATKAN panggilan – hanya untuk memastikan layanan dimulai dengan sukses
|
1 2 3 4 5 6 7 8 9 10 11 12 13 14 15 16 17 18 19 20 21 22 23 24 25 26 27 28 29 30 31 32 33 34 35 36 37 38 39 40 41 42 43 44 45 46 47 48 49 50 51 52 53 |
package com . crunchify . tutorials ; /** * @author Crunchify.com * */ import java . io . BufferedReader ; import java . io . InputStream ; import java . io . InputStreamReader ; import javax . print . attribute . standard . Media ; import javax . ws . rs . Consumes ; import javax . ws . rs . GET ; import javax . ws . rs . POST ; import javax . ws . rs . Path ; import javax . ws . rs . Produces ; import javax . ws . rs . core . MediaType ; import javax . ws . rs . core . Response ; @Path ( "/" ) public class CrunchifyRESTService { @POST @Path ( "/crunchifyService" ) @Consumes ( MediaType . APPLICATION_JSON ) public Response crunchifyREST ( InputStream incomingData ) { StringBuilder crunchifyBuilder = new StringBuilder ( ) ; try { BufferedReader in = new BufferedReader ( new InputStreamReader ( incomingData ) ) ; String line = null ; while ( ( line = in . readLine ( ) ) ! = null ) { crunchifyBuilder . append ( line ) ; } } catch ( Exception e ) { System . out . println ( "Error Parsing: - " ) ; } System . out . println ( "Data Received: " + crunchifyBuilder . toString ( ) ) ; // return HTTP response 200 in case of success return Response . status ( 200 ) . entity ( crunchifyBuilder . toString ( ) ) . build ( ) ; } @GET @Path ( "/verify" ) @Produces ( MediaType . TEXT_PLAIN ) public Response verifyRESTService ( InputStream incomingData ) { String result = "CrunchifyRESTService Successfully started.." ; // return HTTP response 200 in case of success return Response . status ( 200 ) . entity ( result ) . build ( ) ; } } |

Langkah-5
Terapkan proyek CrunchifyTutorials di Tomcat. Proyek web harus disebarkan tanpa kecuali.
- Klik kanan pada
Servers tabdi Eclipse - Klik
Add and Remove...Proyek - Tambahkan Project CrunchifyTutorials ke kanan
Configured:side. - Klik
Publish - Klik
Start
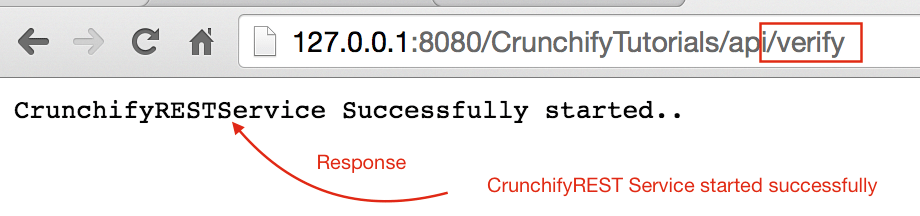
Langkah-6 Verifikasi layanan REST
Layanan istirahat harus dapat diakses menggunakan URL ini: http://127.0.0.1:8080/CrunchifyTutorials/api/verify
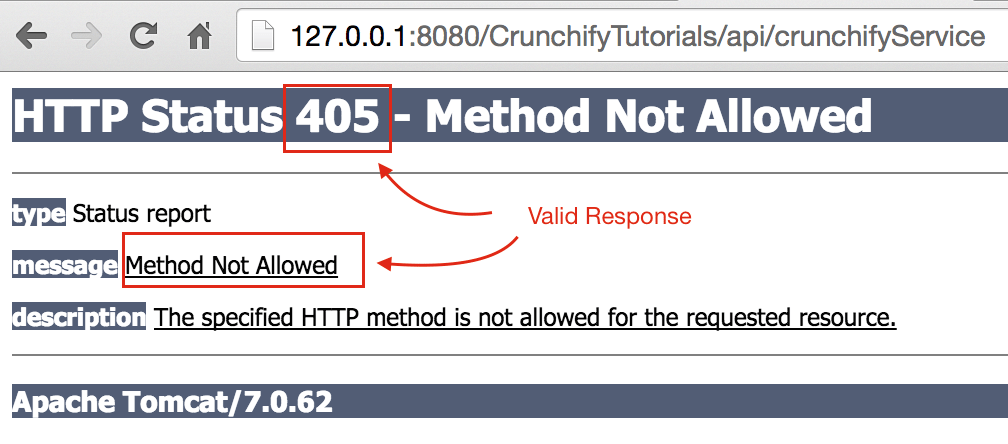
Jika Anda mencoba mengakses http://127.0.0.1:8080/CrunchifyTutorials/api/crunchifyService maka Anda akan melihat kode kesalahan 405 - Method not allowed - yang merupakan respons yang valid. Seperti yang Anda lihat, ini adalah panggilan POST dan seharusnya mengharapkan beberapa data dengan permintaan.
Mari kita lanjutkan.
Langkah-7
Salin konten JSON di bawah ini dan letakkan di bawah file C:\\CrunchifyJSON.txt untuk windows atau file /Users/<username>/Documents/CrunchifyJSON.txt jika Macbook.
|
1 2 3 4 5 6 7 |
{ "tutorials" : { "id" : "Crunchify" , "topic" : "REST Service" , "description" : "This is REST Service Example by Crunchify." } } |
Langkah-8
Buat Klien Panggilan REST: CrunchifyRESTServiceClient.java.
Silakan change path to CrunchifyJSON.txt di program di bawah ini.
|
1 2 3 4 5 6 7 8 9 10 11 12 13 14 15 16 17 18 19 20 21 22 23 24 25 26 27 28 29 30 31 32 33 34 35 36 37 38 39 40 41 42 43 44 45 46 47 48 49 50 51 52 53 54 55 56 57 58 59 60 61 62 63 64 |
package com . crunchify . tutorials ; import java . io . BufferedReader ; import java . io . FileInputStream ; import java . io . InputStream ; import java . io . InputStreamReader ; import java . io . OutputStreamWriter ; import java . net . URL ; import java . net . URLConnection ; import org . json . JSONObject ; /** * @author Crunchify.com * */ public class CrunchifyRESTServiceClient { public static void main ( String [ ] args ) { String string = "" ; try { // Step1: Let's 1st read file from fileSystem // Change CrunchifyJSON.txt path here InputStream crunchifyInputStream = new FileInputStream ( "/Users/<username>/Documents/CrunchifyJSON.txt" ) ; InputStreamReader crunchifyReader = new InputStreamReader ( crunchifyInputStream ) ; BufferedReader br = new BufferedReader ( crunchifyReader ) ; String line ; while ( ( line = br . readLine ( ) ) ! = null ) { string += line + "\n" ; } JSONObject jsonObject = new JSONObject ( string ) ; System . out . println ( jsonObject ) ; // Step2: Now pass JSON File Data to REST Service try { URL url = new URL ( "http://localhost:8080/CrunchifyTutorials/api/crunchifyService" ) ; URLConnection connection = url . openConnection ( ) ; connection . setDoOutput ( true ) ; connection . setRequestProperty ( "Content-Type" , "application/json" ) ; connection . setConnectTimeout ( 5000 ) ; connection . setReadTimeout ( 5000 ) ; OutputStreamWriter out = new OutputStreamWriter ( connection . getOutputStream ( ) ) ; out . write ( jsonObject . toString ( ) ) ; out . close ( ) ; BufferedReader in = new BufferedReader ( new InputStreamReader ( connection . getInputStream ( ) ) ) ; while ( in . readLine ( ) ! = null ) { } System . out . println ( "\nCrunchify REST Service Invoked Successfully.." ) ; in . close ( ) ; } catch ( Exception e ) { System . out . println ( "\nError while calling Crunchify REST Service" ) ; System . out . println ( e ) ; } br . close ( ) ; } catch ( Exception e ) { e . printStackTrace ( ) ; } } } |
Langkah-9
Sekarang mari kita jalankan Program Klien dengan klik kanan pada CrunchifyRESTServiceClient.java dan Anda akan melihat dua output di bawah ini
1) di Konsol Tomcat

2) di Konsol Klien Lokal
