
Cree un servicio REST Jersey muy simple y envíe datos JSON desde el cliente Java
Publicado: 2013-11-29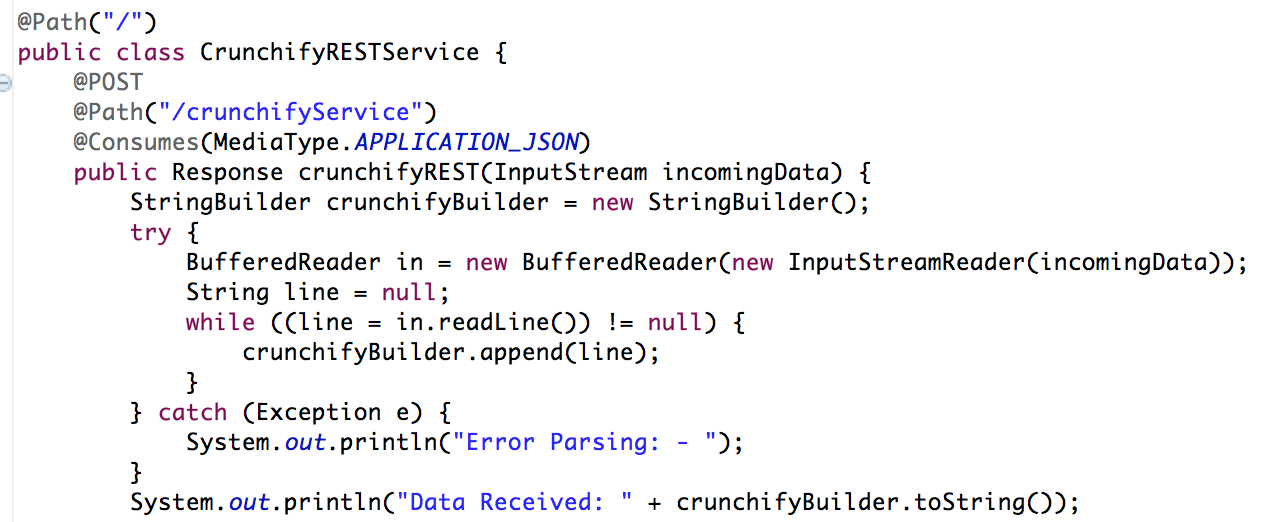
Recientemente tuve que pasar datos JSON al servicio REST y no tenía ningún cliente simple a mano. Pero creó un programa Java muy simple que lee datos JSON del archivo y los envía al servicio REST.
La transferencia de estado representacional (REST) ha ganado una amplia aceptación en la web como una alternativa más simple a los servicios web basados en SOAP y el lenguaje de descripción de servicios web (WSDL). La evidencia clave de este cambio en el diseño de la interfaz es la adopción de REST por parte de los principales proveedores de servicios Web 2.0, incluidos Yahoo, Google y Facebook, que han dejado de usar o han pasado de las interfaces basadas en SOAP y WSDL a favor de una más fácil de usar. modelo orientado a los recursos para exponer sus servicios. En este artículo, Alex Rodríguez le presenta los principios básicos de REST.
Comencemos a codificar esto:
- Crear servicio web RESTFul
- Archivo Java: CrunchifyRESTService.java
- archivo web.xml
- Crear cliente de servicio REST
- Archivo CrunchifyRESTServiceClient.java
Otra lectura obligada: Spring MVC Ejemplo/Tutorial: Hello World – Spring MVC 3.2.1
Paso 1
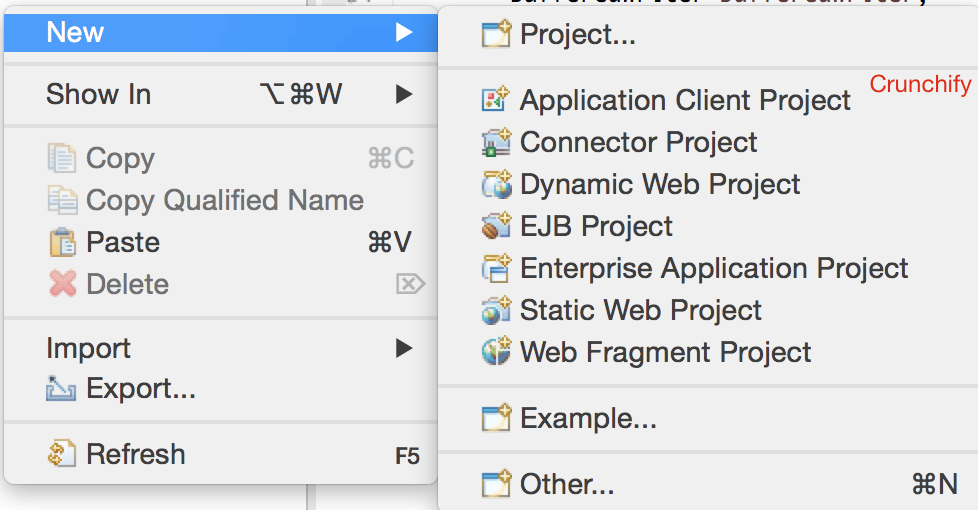
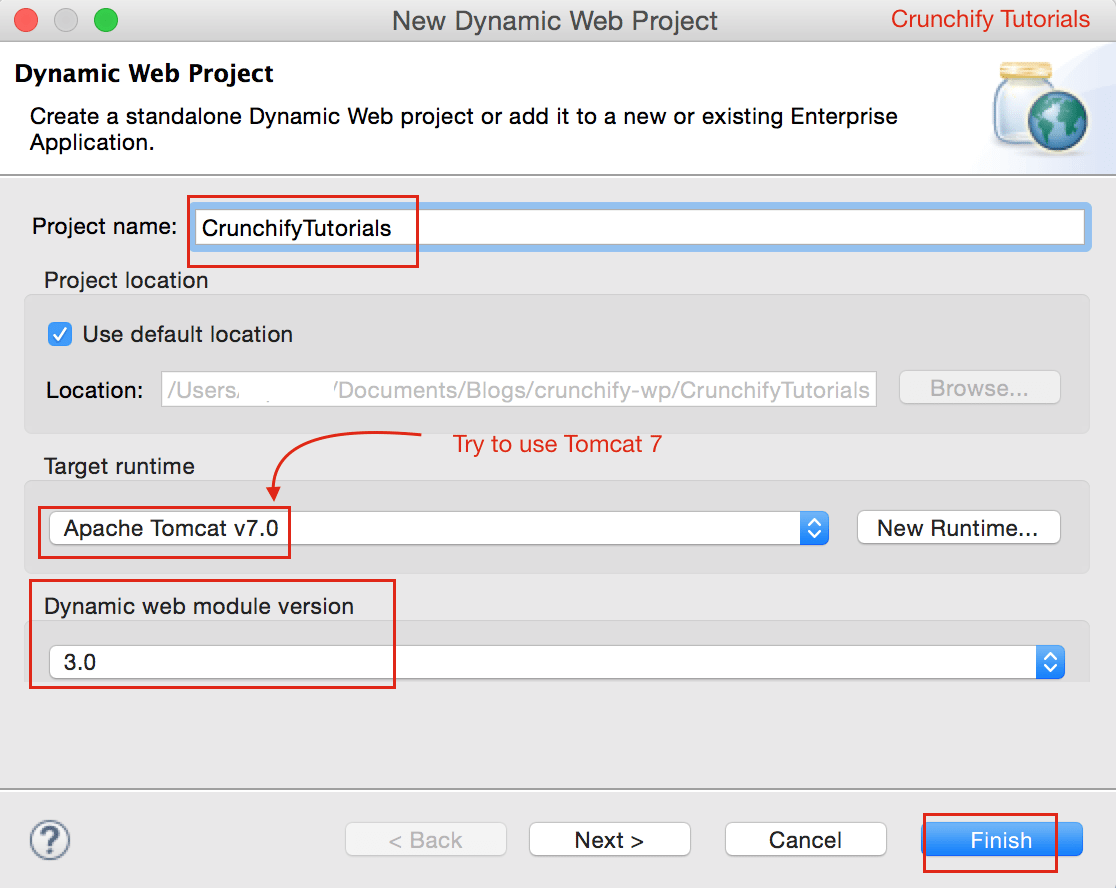
En Eclipse => File => New => Dynamic Web Project . Nómbrelo como " CrunchifyTutorials ". El siguiente tutorial también funciona con Tomcat 8 .
Paso 2 Crear archivo descriptor de implementación
Si no ve web.xml (descriptor de implementación) en WebContent\WEB-INF\ , siga estos pasos.
Abra web.xml y reemplace el contenido con los siguientes contenidos:
|
1 2 3 4 5 6 7 8 9 10 11 12 13 14 15 16 17 18 19 20 21 22 23 24 25 |
<? xml version = "1.0" encoding = "UTF-8" ?> < web - app xmlns = "http://java.sun.com/xml/ns/javaee" xmlns : xsi = "http://www.w3.org/2001/XMLSchema-instance" xsi : schemaLocation = "http://java.sun.com/xml/ns/javaee http://java.sun.com/xml/ns/javaee/web-app_3_0.xsd" version = "3.0" > < display - name > CrunchifyRESTJerseyExample < / display - name > < welcome - file - list > < welcome - file > index . html < / welcome - file > < welcome - file > index . htm < / welcome - file > < welcome - file > index . jsp < / welcome - file > < welcome - file > default . html < / welcome - file > < welcome - file > default . htm < / welcome - file > < welcome - file > default . jsp < / welcome - file > < / welcome - file - list > < servlet > < servlet - name > Jersey Web Application < / servlet - name > < servlet - class > com . sun . jersey . spi . container . servlet . ServletContainer < / servlet - class > < load - on - startup > 1 < / load - on - startup > < / servlet > < servlet - mapping > < servlet - name > Jersey Web Application < / servlet - name > < url - pattern > / api /* < / url - pattern > < / servlet - mapping > < / web - app > |
Paso 3 Convertir Proyecto a Proyecto Maven
Siga este tutorial: https://crunchify.com/how-to-convert-existing-java-project-to-maven-in-eclipse/. Aquí está mi archivo pom.xml.
|
1 2 3 4 5 6 7 8 9 10 11 12 13 14 15 16 17 18 19 20 21 22 23 24 25 26 27 28 29 30 31 32 33 34 35 36 37 38 39 40 41 42 43 44 45 46 |
< project xmlns = "http://maven.apache.org/POM/4.0.0" xmlns : xsi = "http://www.w3.org/2001/XMLSchema-instance" xsi : schemaLocation = "http://maven.apache.org/POM/4.0.0 http://maven.apache.org/xsd/maven-4.0.0.xsd" > < modelVersion > 4.0.0 < / modelVersion > < groupId > CrunchifyTutorials < / groupId > < artifactId > CrunchifyTutorials < / artifactId > < version > 0.0.1 - SNAPSHOT < / version > < packaging > war < / packaging > < build > < sourceDirectory > src < / sourceDirectory > < plugins > < plugin > < artifactId > maven - compiler - plugin < / artifactId > < version > 3.1 < / version > < configuration > < source > 1.8 < / source > < target > 1.8 < / target > < / configuration > < / plugin > < plugin > < artifactId > maven - war - plugin < / artifactId > < version > 2.4 < / version > < configuration > < warSourceDirectory > WebContent < / warSourceDirectory > < failOnMissingWebXml > false < / failOnMissingWebXml > < / configuration > < / plugin > < / plugins > < / build > < dependencies > < dependency > < groupId > asm < / groupId > < artifactId > asm - all < / artifactId > < version > 3.3.1 < / version > < / dependency > < dependency > < groupId > com . sun . jersey < / groupId > < artifactId > jersey - bundle < / artifactId > < version > 1.14 < / version > < / dependency > < dependency > < groupId > org . json < / groupId > < artifactId > json < / artifactId > < version > 20090211 < / version > < / dependency > < / dependencies > < / project > |
Etapa 4
Cree un servicio RESTFul: CrunchifyRESTService.java . Aquí crearemos dos servicios:
-
/api/crunchifyService– Llamada POST – usaremos esto con nuestra prueba -
/api/verify– OBTENER llamada – solo para asegurarse de que el servicio se inició correctamente
|
1 2 3 4 5 6 7 8 9 10 11 12 13 14 15 16 17 18 19 20 21 22 23 24 25 26 27 28 29 30 31 32 33 34 35 36 37 38 39 40 41 42 43 44 45 46 47 48 49 50 51 52 53 |
package com . crunchify . tutorials ; /** * @author Crunchify.com * */ import java . io . BufferedReader ; import java . io . InputStream ; import java . io . InputStreamReader ; import javax . print . attribute . standard . Media ; import javax . ws . rs . Consumes ; import javax . ws . rs . GET ; import javax . ws . rs . POST ; import javax . ws . rs . Path ; import javax . ws . rs . Produces ; import javax . ws . rs . core . MediaType ; import javax . ws . rs . core . Response ; @Path ( "/" ) public class CrunchifyRESTService { @POST @Path ( "/crunchifyService" ) @Consumes ( MediaType . APPLICATION_JSON ) public Response crunchifyREST ( InputStream incomingData ) { StringBuilder crunchifyBuilder = new StringBuilder ( ) ; try { BufferedReader in = new BufferedReader ( new InputStreamReader ( incomingData ) ) ; String line = null ; while ( ( line = in . readLine ( ) ) ! = null ) { crunchifyBuilder . append ( line ) ; } } catch ( Exception e ) { System . out . println ( "Error Parsing: - " ) ; } System . out . println ( "Data Received: " + crunchifyBuilder . toString ( ) ) ; // return HTTP response 200 in case of success return Response . status ( 200 ) . entity ( crunchifyBuilder . toString ( ) ) . build ( ) ; } @GET @Path ( "/verify" ) @Produces ( MediaType . TEXT_PLAIN ) public Response verifyRESTService ( InputStream incomingData ) { String result = "CrunchifyRESTService Successfully started.." ; // return HTTP response 200 in case of success return Response . status ( 200 ) . entity ( result ) . build ( ) ; } } |

Paso-5
Implemente el proyecto CrunchifyTutorials en Tomcat. El proyecto web debe implementarse sin ninguna excepción.
- Haga clic derecho en la
Servers taben Eclipse - Haga clic en
Add and Remove...Proyecto - Agregue Project CrunchifyTutorials a la derecha
Configured:lado. - Haga clic en
Publish - Haga clic en
Start
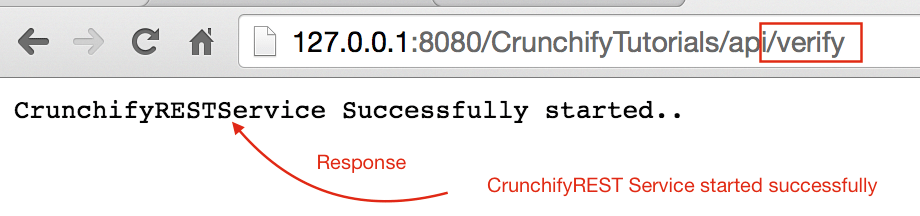
Paso 6 Verificar el servicio REST
Se debe poder acceder al servicio de descanso mediante esta URL: http://127.0.0.1:8080/CrunchifyTutorials/api/verify
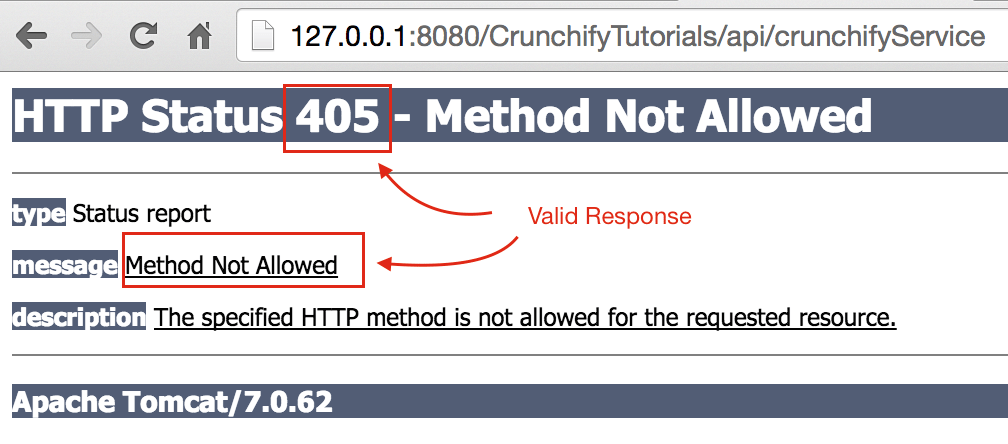
Si intenta acceder a http://127.0.0.1:8080/CrunchifyTutorials/api/crunchifyService, verá el código de error 405 - Method not allowed - que es una respuesta válida. Como puede ver, es una llamada POST y debería esperar algunos datos con la solicitud.
Vamonos.
Paso-7
Copie debajo del contenido JSON y colóquelo en el archivo C:\\CrunchifyJSON.txt para Windows o en el archivo /Users/<username>/Documents/CrunchifyJSON.txt si es Macbook.
|
1 2 3 4 5 6 7 |
{ "tutorials" : { "id" : "Crunchify" , "topic" : "REST Service" , "description" : "This is REST Service Example by Crunchify." } } |
Paso-8
Crear cliente de llamada REST: CrunchifyRESTServiceClient.java.
change path to CrunchifyJSON.txt en el programa a continuación.
|
1 2 3 4 5 6 7 8 9 10 11 12 13 14 15 16 17 18 19 20 21 22 23 24 25 26 27 28 29 30 31 32 33 34 35 36 37 38 39 40 41 42 43 44 45 46 47 48 49 50 51 52 53 54 55 56 57 58 59 60 61 62 63 64 |
package com . crunchify . tutorials ; import java . io . BufferedReader ; import java . io . FileInputStream ; import java . io . InputStream ; import java . io . InputStreamReader ; import java . io . OutputStreamWriter ; import java . net . URL ; import java . net . URLConnection ; import org . json . JSONObject ; /** * @author Crunchify.com * */ public class CrunchifyRESTServiceClient { public static void main ( String [ ] args ) { String string = "" ; try { // Step1: Let's 1st read file from fileSystem // Change CrunchifyJSON.txt path here InputStream crunchifyInputStream = new FileInputStream ( "/Users/<username>/Documents/CrunchifyJSON.txt" ) ; InputStreamReader crunchifyReader = new InputStreamReader ( crunchifyInputStream ) ; BufferedReader br = new BufferedReader ( crunchifyReader ) ; String line ; while ( ( line = br . readLine ( ) ) ! = null ) { string += line + "\n" ; } JSONObject jsonObject = new JSONObject ( string ) ; System . out . println ( jsonObject ) ; // Step2: Now pass JSON File Data to REST Service try { URL url = new URL ( "http://localhost:8080/CrunchifyTutorials/api/crunchifyService" ) ; URLConnection connection = url . openConnection ( ) ; connection . setDoOutput ( true ) ; connection . setRequestProperty ( "Content-Type" , "application/json" ) ; connection . setConnectTimeout ( 5000 ) ; connection . setReadTimeout ( 5000 ) ; OutputStreamWriter out = new OutputStreamWriter ( connection . getOutputStream ( ) ) ; out . write ( jsonObject . toString ( ) ) ; out . close ( ) ; BufferedReader in = new BufferedReader ( new InputStreamReader ( connection . getInputStream ( ) ) ) ; while ( in . readLine ( ) ! = null ) { } System . out . println ( "\nCrunchify REST Service Invoked Successfully.." ) ; in . close ( ) ; } catch ( Exception e ) { System . out . println ( "\nError while calling Crunchify REST Service" ) ; System . out . println ( e ) ; } br . close ( ) ; } catch ( Exception e ) { e . printStackTrace ( ) ; } } } |
Paso-9
Ahora ejecutemos el Programa del cliente haciendo clic derecho en CrunchifyRESTServiceClient.java y debería ver debajo dos salidas
1) en la consola Tomcat

2) en la consola de cliente local
