
React 測試驅動開發:從用戶故事到生產
已發表: 2022-03-11在這篇文章中,我們將使用從用戶故事到開發的測試驅動開發 (TDD) 來開發一個 React 應用程序。 此外,我們將在 TDD 中使用 Jest 和 Enzyme。 完成本指南後,您將能夠:
- 根據需求創建史詩和用戶故事。
- 根據用戶故事創建測試。
- 使用 TDD 開發 React 應用程序。
- 使用 Enzyme 和 Jest 測試一個 React 應用程序。
- 使用/重用 CSS 變量進行響應式設計。
- 創建一個可重用的 React 組件,該組件根據提供的 props 以不同的方式呈現和運行。
- 使用 React PropTypes 類型檢查組件道具。
本文假設您具有 React 的基本知識。 如果您是 React 的新手,我建議您完成官方教程並查看 Toptal 的 2019 React 教程:第 1 部分和第 2 部分。
我們的測試驅動的 React 應用程序概述
我們將構建一個包含一些 UI 組件的基本番茄鐘應用程序。 每個組件在相應的測試文件中都有一組單獨的測試。 首先,我們可以根據我們的項目需求創建如下的史詩和用戶故事。
| 史詩 | 用戶的故事 | 驗收標準 |
| 作為用戶,我需要使用計時器來管理我的時間。 | 作為用戶,我需要啟動計時器以便倒計時。 | 確保用戶能夠: *啟動計時器 *看計時器開始倒計時 即使用戶多次單擊開始按鈕,倒計時也不應中斷。 |
| 作為用戶,我需要停止計時器,以便僅在需要時才可以倒計時。 | 確保用戶能夠: *停止計時器 *看到計時器停止 即使用戶多次單擊停止按鈕,也不會發生任何事情。 | |
| 作為用戶,我需要重置計時器,以便從頭開始倒計時。 | 確保用戶能夠: *重置計時器 *見定時器重置為默認值 |
線框
項目設置
首先,我們將使用Create React App創建一個 React 項目,如下所示:
$ npx create-react-app react-timer $ cd react-timer $ npm start您將看到在 URL http://localhost:3000 處打開一個新的瀏覽器選項卡。 您可以使用Ctrl+C停止正在運行的 React 應用程序。
現在,我們將添加 Jest 和 Enzyme 以及一些依賴項,如下所示:
$ npm i -D enzyme $ npm i -D react-test-renderer enzyme-adapter-react-16此外,我們將在src目錄中添加或更新一個名為setupTests.js的文件:
import { configure } from 'enzyme'; import Adapter from 'enzyme-adapter-react-16'; configure({ adapter: new Adapter() });由於Create React App在每次測試之前都會運行setupTests.js文件,因此它將執行並正確配置 Enzyme。
配置 CSS
我們將編寫變量和基本的 CSS 重置,因為我們希望 CSS 變量在應用程序中全局可用。 我們將從 :root 範圍定義變量。 定義變量的語法是使用自定義屬性表示法,每個都以 - 開頭,後跟變量名。
導航到index.css文件並添加以下內容:
:root { --main-font: “Roboto”, sans-serif; } body, div, p { margin: 0; padding: 0; }現在,我們需要將 CSS 導入我們的應用程序。 更新 index.js 文件如下:
import React from 'react'; import ReactDOM from 'react-dom'; import './index.css'; ReactDOM.render( <React.StrictMode> <App /> </React.StrictMode> document.getElementById(“root”) )淺渲染測試
您可能已經知道,TDD 流程如下所示:
- 添加一個測試。
- 運行所有測試,您將看到測試失敗。
- 編寫代碼以通過測試。
- 運行所有測試。
- 重構。
- 重複。
因此,我們將為淺渲染測試添加第一個測試,然後編寫代碼以通過測試。 將一個名為App.spec.js的新規範文件添加到src/components/App目錄,如下所示:
import React from 'react'; import { shallow } from 'enzyme'; import App from './App'; describe('App', () => { it('should render a <div />', () => { const container = shallow(<App />); expect(container.find('div').length).toEqual(1); }); });然後,您可以運行測試:
$ npm test您將看到測試失敗。
應用組件
現在,我們將繼續創建 App 組件以通過測試。 導航到src/components/App目錄下的App.jsx並添加如下代碼:
import React from 'react'; const App = () => <div className=”app-container” />; export default App;現在,再次運行測試。
$ npm test第一個測試現在應該通過了。
添加應用 CSS
我們將在目錄src/components/App中創建一個文件App.css來為 App 組件添加一些樣式,如下所示:
.app-container { height: 100vh; width: 100vw; align-items: center; display: flex; justify-content: center; }現在,我們準備將 CSS 導入App.jsx文件:
import React from 'react'; import './App.css'; const App = () => <div className=”app-container” />; export default App;接下來,我們必須更新index.js文件以導入 App 組件,如下所示:
import React from "react" import ReactDOM from "react-dom" import "./index.css" import App from "./components/App/App" import * as serviceWorker from "./serviceWorker" ReactDOM.render( <React.StrictMode> <App /> </React.StrictMode>, document.getElementById("root") ) // If you want your app to work offline and load faster, you can change // unregister() to register() below. Note this comes with some pitfalls. // Learn more about service workers: https://bit.ly/CRA-PWA serviceWorker.unregister()添加定時器組件
最後,應用程序將包含 Timer 組件,因此我們將更新App.spec.js文件以檢查應用程序中是否存在 Timer 組件。 此外,我們將在第一個測試用例之外聲明容器變量,因為需要在每個測試用例之前完成淺渲染測試。
import React from "react" import { shallow } from "enzyme" import App from "./App" import Timer from "../Timer/Timer" describe("App", () => { let container beforeEach(() => (container = shallow(<App />))) it("should render a <div />", () => { expect(container.find("div").length).toEqual(1) }) it("should render the Timer Component", () => { expect(container.containsMatchingElement(<Timer />)).toEqual(true) }) }) 如果您在此階段運行npm test ,則測試將失敗,因為 Timer 組件尚不存在。
編寫定時器淺層渲染測試
現在,我們將在src/components目錄下名為Timer的新目錄中創建一個名為Timer.spec.js的文件。
此外,我們將在Timer.spec.js文件中添加淺渲染測試:
import React from "react" import { shallow } from "enzyme" import Timer from "./Timer" describe("Timer", () => { let container beforeEach(() => (container = shallow(<Timer />))) it("should render a <div />", () => { expect(container.find("div").length).toBeGreaterThanOrEqual(1) }) })正如預期的那樣,測試將失敗。
創建定時器組件
接下來,讓我們創建一個名為Timer.jsx的新文件,並根據用戶故事定義相同的變量和方法:
import React, { Component } from 'react'; class Timer extends Component { constructor(props) { super(props); this.state = { minutes: 25, seconds: 0, isOn: false }; } startTimer() { console.log('Starting timer.'); } stopTimer() { console.log('Stopping timer.'); } resetTimer() { console.log('Resetting timer.'); } render = () => { return <div className="timer-container" />; }; } export default Timer; 這應該可以通過測試,並且應該在Timer.spec.js文件中渲染一個<div /> ,但是測試不應該渲染 Timer 組件,因為我們還沒有在 app 組件中添加 Timer 組件。
我們將在App.jsx文件中添加 Timer 組件,如下所示:
import React from 'react'; import './App.css'; import Timer from '../Timer/Timer'; const App = () => ( <div className="app-container"> <Timer /> </div> ); export default App;現在所有的測試都應該通過了。
添加計時器 CSS
我們將添加與計時器相關的 CSS 變量,並為較小的設備添加媒體查詢。
更新文件index.css如下:
:root { --timer-background-color: #FFFFFF; --timer-border: 1px solid #000000; --timer-height: 70%; --timer-width: 70%; } body, div, p { margin: 0; padding: 0; } @media screen and (max-width: 1024px) { :root { --timer-height: 100%; --timer-width: 100%; } }此外,我們將在components/Timer目錄下創建Timer.css文件:
.timer-container { background-color: var(--timer-background-color); border: var(--timer-border); height: var(--timer-height); width: var(--timer-width); }我們必須更新Timer.jsx以導入Timer.css文件。
import React, { Component } from "react" import "./Timer.css"如果您現在運行 React 應用程序,您將在瀏覽器上看到一個帶有邊框的簡單屏幕。
編寫 TimerButton 淺層渲染測試
我們需要三個按鈕:開始、停止和重置,因此我們將創建TimerButton 組件。
首先,我們需要更新Timer.spec.js文件以檢查Timer組件中是否存在TimerButton組件:
it("should render instances of the TimerButton component", () => { expect(container.find("TimerButton").length).toEqual(3) })現在,讓我們將TimerButton.spec.js文件添加到src/components目錄下名為TimerButton的新目錄中,並將測試添加到文件中,如下所示:
import React from "react" import { shallow } from "enzyme" import TimerButton from "./TimerButton" describe("TimerButton", () => { let container beforeEach(() => { container = shallow( <TimerButton buttonAction={jest.fn()} buttonValue={""} /> ) }) it("should render a <div />", () => { expect(container.find("div").length).toBeGreaterThanOrEqual(1) }) })現在,如果您運行測試,您將看到測試失敗。

讓我們為TimerButton組件創建TimerButton.jsx文件:
import React from 'react'; import PropTypes from 'prop-types'; const TimerButton = ({ buttonAction, buttonValue }) => ( <div className="button-container" /> ); TimerButton.propTypes = { buttonAction: PropTypes.func.isRequired, buttonValue: PropTypes.string.isRequired, }; export default TimerButton; 如果你在這個階段運行npm test ,測試應該會渲染 TimerButton 組件的實例,但是會失敗,因為我們還沒有將 TimerButton 組件添加到 Timer 組件中。
讓我們導入TimerButton組件,並在Timer.jsx的 render 方法中添加三個TimerButton組件:
render = () => { return ( <div className="timer-container"> <div className="time-display"></div> <div className="timer-button-container"> <TimerButton buttonAction={this.startTimer} buttonValue={'Start'} /> <TimerButton buttonAction={this.stopTimer} buttonValue={'Stop'} /> <TimerButton buttonAction={this.resetTimer} buttonValue={'Reset'} /> </div> </div> ); };定時器按鈕 CSS
現在,是時候為 TimerButton 組件添加 CSS 變量了。 讓我們將:root範圍內的變量添加到index.css文件中:
:root { ... --button-border: 3px solid #000000; --button-text-size: 2em; } @media screen and (max-width: 1024px) { :root { … --button-text-size: 4em; } }另外,讓我們在src/components目錄下的TimerButton目錄中創建一個名為TimerButton.css的文件:
.button-container { flex: 1 1 auto; text-align: center; margin: 0px 20px; border: var(--button-border); font-size: var(--button-text-size); } .button-container:hover { cursor: pointer; }讓我們相應地更新TimerButton.jsx以導入TimerButton.css文件並顯示按鈕值:
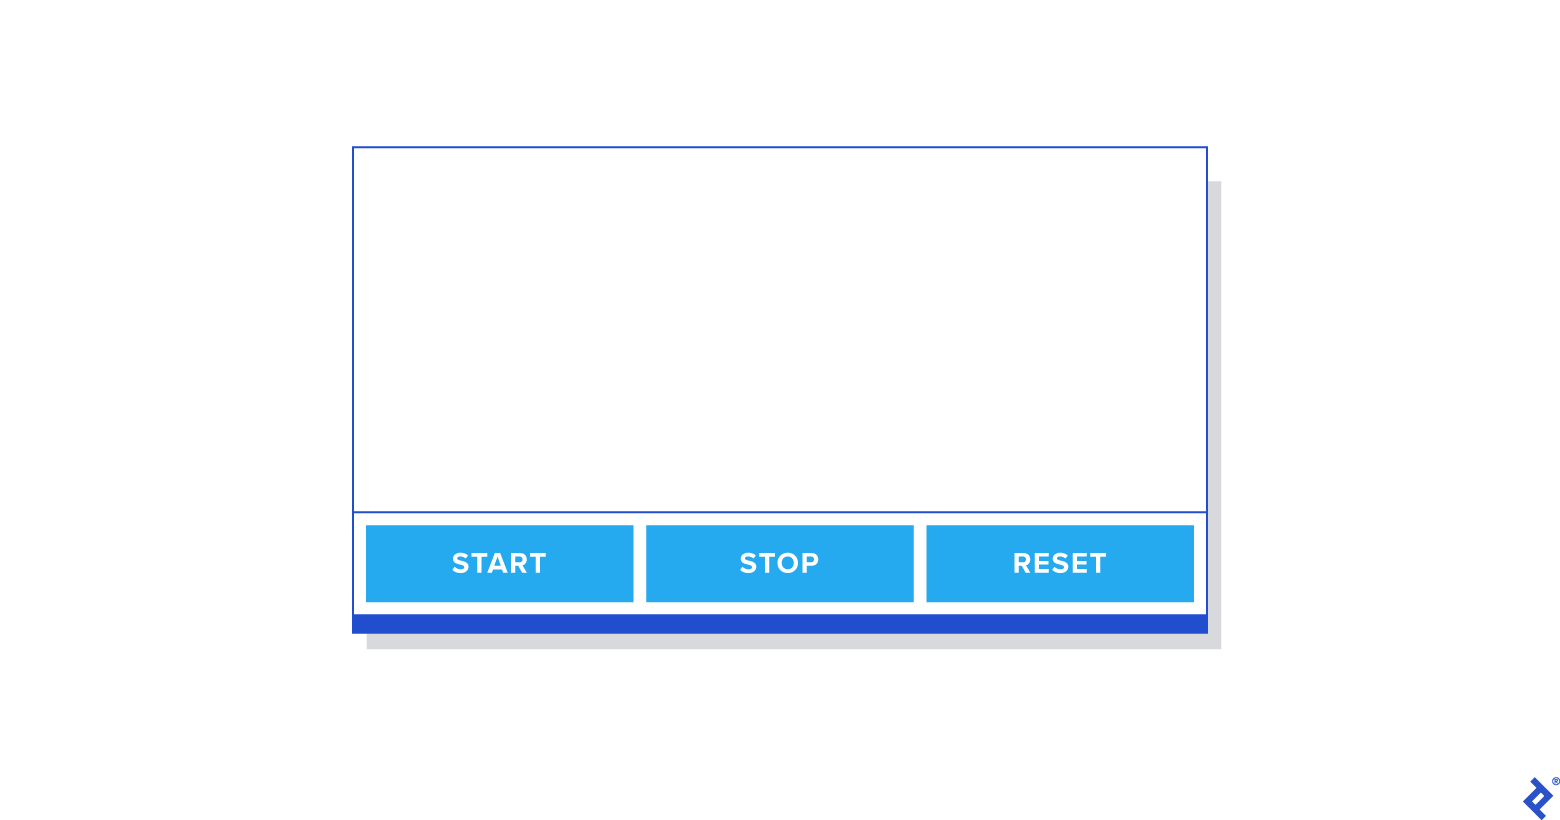
import React from 'react'; import PropTypes from 'prop-types'; import './TimerButton.css'; const TimerButton = ({ buttonAction, buttonValue }) => ( <div className="button-container"> <p className="button-value">{buttonValue}</p> </div> ); TimerButton.propTypes = { buttonAction: PropTypes.func.isRequired, buttonValue: PropTypes.string.isRequired, }; export default TimerButton;此外,我們需要更新Timer.css以使三個按鈕水平對齊,所以讓我們也更新Timer.css文件:
import React from 'react'; import PropTypes from 'prop-types'; import './TimerButton.css'; const TimerButton = ({ buttonAction, buttonValue }) => ( <div className="button-container"> <p className="button-value">{buttonValue}</p> </div> ); TimerButton.propTypes = { buttonAction: PropTypes.func.isRequired, buttonValue: PropTypes.string.isRequired, }; export default TimerButton;如果您現在運行 React 應用程序,您將看到如下屏幕:
重構定時器
我們將重構 Timer,因為我們要實現startTimer、stopTimer、restartTimer和resetTimer等功能。 我們先更新Timer.spec.js文件:
describe('mounted Timer', () => { let container; beforeEach(() => (container = mount(<Timer />))); it('invokes startTimer when the start button is clicked', () => { const spy = jest.spyOn(container.instance(), 'startTimer'); container.instance().forceUpdate(); expect(spy).toHaveBeenCalledTimes(0); container.find('.start-timer').first().simulate('click'); expect(spy).toHaveBeenCalledTimes(1); }); it('invokes stopTimer when the stop button is clicked', () => { const spy = jest.spyOn(container.instance(), 'stopTimer'); container.instance().forceUpdate(); expect(spy).toHaveBeenCalledTimes(0); container.find('.stop-timer').first().simulate('click'); expect(spy).toHaveBeenCalledTimes(1); }); it('invokes resetTimer when the reset button is clicked', () => { const spy = jest.spyOn(container.instance(), 'resetTimer'); container.instance().forceUpdate(); expect(spy).toHaveBeenCalledTimes(0); container.find('.reset-timer').first().simulate('click'); expect(spy).toHaveBeenCalledTimes(1); }); });如果您運行測試,您將看到添加的測試失敗,因為我們還沒有更新TimerButton組件。 讓我們更新TimerButton組件以添加點擊事件:
const TimerButton = ({ buttonAction, buttonValue }) => ( <div className="button-container" onClick={() => buttonAction()}> <p className="button-value">{buttonValue}</p> </div> );現在,測試應該通過了。
接下來,我們將添加更多測試來檢查掛載的 Timer測試用例中調用每個函數時的狀態:
it('should change isOn state true when the start button is clicked', () => { container.instance().forceUpdate(); container.find('.start-timer').first().simulate('click'); expect(container.instance().state.isOn).toEqual(true); }); it('should change isOn state false when the stop button is clicked', () => { container.instance().forceUpdate(); container.find('.stop-timer').first().simulate('click'); expect(container.instance().state.isOn).toEqual(false); }); it('should change isOn state false when the reset button is clicked', () => { container.instance().forceUpdate(); container.find('.stop-timer').first().simulate('click'); expect(container.instance().state.isOn).toEqual(false); expect(container.instance().state.minutes).toEqual(25); expect(container.instance().state.seconds).toEqual(0); });如果你運行測試,你會看到它們失敗,因為我們還沒有實現每個方法。 因此,讓我們實現每個函數以通過測試:
startTimer() { this.setState({ isOn: true }); } stopTimer() { this.setState({ isOn: false }); } resetTimer() { this.stopTimer(); this.setState({ minutes: 25, seconds: 0, }); }如果您運行它們,您將看到測試通過。 現在,讓我們在Timer.jsx中實現剩餘的功能:
import React, { Component } from 'react'; import './Timer.css'; import TimerButton from '../TimerButton/TimerButton'; class Timer extends Component { constructor(props) { super(props); this.state = { minutes: 25, seconds: 0, isOn: false, }; this.startTimer = this.startTimer.bind(this); this.stopTimer = this.stopTimer.bind(this); this.resetTimer = this.resetTimer.bind(this); } startTimer() { if (this.state.isOn === true) { return; } this.myInterval = setInterval(() => { const { seconds, minutes } = this.state; if (seconds > 0) { this.setState(({ seconds }) => ({ seconds: seconds - 1, })); } if (seconds === 0) { if (minutes === 0) { clearInterval(this.myInterval); } else { this.setState(({ minutes }) => ({ minutes: minutes - 1, seconds: 59, })); } } }, 1000); this.setState({ isOn: true }); } stopTimer() { clearInterval(this.myInterval); this.setState({ isOn: false }); } resetTimer() { this.stopTimer(); this.setState({ minutes: 25, seconds: 0, }); } render = () => { const { minutes, seconds } = this.state; return ( <div className="timer-container"> <div className="time-display"> {minutes}:{seconds < 10 ? `0${seconds}` : seconds} </div> <div className="timer-button-container"> <TimerButton className="start-timer" buttonAction={this.startTimer} buttonValue={'Start'} /> <TimerButton className="stop-timer" buttonAction={this.stopTimer} buttonValue={'Stop'} /> <TimerButton className="reset-timer" buttonAction={this.resetTimer} buttonValue={'Reset'} /> </div> </div> ); }; } export default Timer;您將看到所有功能都基於我們之前準備的用戶故事工作。
所以,這就是我們使用 TDD 開發基本 React 應用程序的方式。 如果用戶故事和驗收標準更詳細,可以更精確地編寫測試用例,從而貢獻更多。
包起來
使用 TDD 開發應用程序時,不僅要將項目分解為史詩或用戶故事,而且要為驗收標準做好充分準備,這一點非常重要。 在本文中,我想向您展示如何分解項目並使用準備好的驗收標准進行 React TDD 開發。
儘管有很多與 React TDD 相關的資源,但我希望本文能幫助您了解一些關於使用用戶故事使用 React 進行 TDD 開發的知識。 如果您選擇模擬這種方法,請參閱此處的完整源代碼。