
Reactテスト駆動開発:ユーザーストーリーから本番まで
公開: 2022-03-11この投稿では、ユーザーストーリーから開発まで、テスト駆動開発(TDD)を使用してReactアプリを開発します。 また、TDDにはJestとEnzymeを使用します。 このガイドを完了すると、次のことができるようになります。
- 要件に基づいてエピックとユーザーストーリーを作成します。
- ユーザーストーリーに基づいてテストを作成します。
- TDDを使用してReactアプリを開発します。
- EnzymeとJestを使用してReactアプリをテストします。
- レスポンシブデザインのためにCSS変数を使用/再利用します。
- 提供された小道具に基づいて異なる方法でレンダリングおよび機能する再利用可能なReactコンポーネントを作成します。
- ReactPropTypesを使用してコンポーネントの小道具を入力します。
この記事は、Reactの基本的な知識があることを前提としています。 Reactをまったく使用したことがない場合は、公式チュートリアルを完了して、Toptalの2019 Reactチュートリアル:パート1とパート2を確認することをお勧めします。
テスト駆動型Reactアプリの概要
いくつかのUIコンポーネントで構成される基本的なポモドーロタイマーアプリを構築します。 各コンポーネントには、対応するテストファイルに個別のテストセットがあります。 まず、プロジェクトの要件に基づいて、次のようにエピックとユーザーストーリーを作成できます。
| 大作 | ユーザーストーリー | 合否基準 |
| ユーザーとして、時間を管理できるようにタイマーを使用する必要があります。 | ユーザーとして、時間をカウントダウンできるようにタイマーを開始する必要があります。 | ユーザーが次のことができることを確認します。 *タイマーを開始します *タイマーがカウントダウンを開始するのを参照してください ユーザーがスタートボタンを2回以上クリックしても、時間のカウントダウンが中断されないようにする必要があります。 |
| ユーザーとして、必要なときにだけ時間をカウントダウンできるように、タイマーを停止する必要があります。 | ユーザーが次のことができることを確認します。 *タイマーを停止します *タイマーが停止したことを確認してください ユーザーが停止ボタンを2回以上クリックしても、何も起こりません。 | |
| ユーザーとして、最初から時間をカウントダウンできるように、タイマーをリセットする必要があります。 | ユーザーが次のことができることを確認します。 *タイマーをリセットします *デフォルトにリセットされたタイマーを参照してください |
ワイヤーフレーム
プロジェクトの設定
まず、次のようにCreateReactAppを使用してReactプロジェクトを作成します。
$ npx create-react-app react-timer $ cd react-timer $ npm startURL http:// localhost:3000で新しいブラウザタブが開きます。 Ctrl + Cを使用して、実行中のReactアプリを停止できます。
次に、JestとEnzyme、およびいくつかの依存関係を次のように追加します。
$ npm i -D enzyme $ npm i -D react-test-renderer enzyme-adapter-react-16また、 srcディレクトリにsetupTests.jsというファイルを追加または更新します。
import { configure } from 'enzyme'; import Adapter from 'enzyme-adapter-react-16'; configure({ adapter: new Adapter() });Create React Appは、各テストの前にsetupTests.jsファイルを実行するため、Enzymeを実行して適切に構成します。
CSSの構成
CSS変数をアプリケーションでグローバルに使用できるようにするため、変数と基本的なCSSリセットを記述します。 :rootスコープから変数を定義します。 変数を定義するための構文は、それぞれが–で始まり、その後に変数名が続くカスタムプロパティ表記を使用することです。
index.cssファイルに移動し、以下を追加します。
:root { --main-font: “Roboto”, sans-serif; } body, div, p { margin: 0; padding: 0; }次に、CSSをアプリケーションにインポートする必要があります。 index.jsファイルを次のように更新します。
import React from 'react'; import ReactDOM from 'react-dom'; import './index.css'; ReactDOM.render( <React.StrictMode> <App /> </React.StrictMode> document.getElementById(“root”) )浅いレンダリングテスト
ご存知かもしれませんが、TDDプロセスは次のようになります。
- テストを追加します。
- すべてのテストを実行すると、テストが失敗することがわかります。
- テストに合格するためのコードを記述します。
- すべてのテストを実行します。
- リファクタリング。
- 繰り返す。
したがって、浅いレンダリングテストの最初のテストを追加してから、テストに合格するコードを記述します。 次のように、 App.spec.jsという名前の新しいスペックファイルをsrc / components/Appディレクトリに追加します。
import React from 'react'; import { shallow } from 'enzyme'; import App from './App'; describe('App', () => { it('should render a <div />', () => { const container = shallow(<App />); expect(container.find('div').length).toEqual(1); }); });次に、テストを実行できます。
$ npm testテストが失敗することがわかります。
アプリコンポーネント
次に、テストに合格するためのアプリコンポーネントの作成に進みます。 ディレクトリsrc/components / AppのApp.jsxに移動し、次のようにコードを追加します。
import React from 'react'; const App = () => <div className=”app-container” />; export default App;ここで、テストを再実行します。
$ npm testこれで、最初のテストに合格するはずです。
アプリCSSの追加
src / components / AppディレクトリにApp.cssファイルを作成して、次のようにAppコンポーネントにスタイルを追加します。
.app-container { height: 100vh; width: 100vw; align-items: center; display: flex; justify-content: center; }これで、CSSをApp.jsxファイルにインポートする準備が整いました。
import React from 'react'; import './App.css'; const App = () => <div className=”app-container” />; export default App;次に、 index.jsファイルを更新して、Appコンポーネントを次のようにインポートする必要があります。
import React from "react" import ReactDOM from "react-dom" import "./index.css" import App from "./components/App/App" import * as serviceWorker from "./serviceWorker" ReactDOM.render( <React.StrictMode> <App /> </React.StrictMode>, document.getElementById("root") ) // If you want your app to work offline and load faster, you can change // unregister() to register() below. Note this comes with some pitfalls. // Learn more about service workers: https://bit.ly/CRA-PWA serviceWorker.unregister()タイマーコンポーネントの追加
最後に、アプリにはタイマーコンポーネントが含まれるため、 App.spec.jsファイルを更新して、アプリにタイマーコンポーネントが存在するかどうかを確認します。 また、浅いレンダリングテストは各テストケースの前に実行する必要があるため、最初のテストケースの外側でコンテナ変数を宣言します。
import React from "react" import { shallow } from "enzyme" import App from "./App" import Timer from "../Timer/Timer" describe("App", () => { let container beforeEach(() => (container = shallow(<App />))) it("should render a <div />", () => { expect(container.find("div").length).toEqual(1) }) it("should render the Timer Component", () => { expect(container.containsMatchingElement(<Timer />)).toEqual(true) }) }) この段階でnpm testを実行すると、Timerコンポーネントがまだ存在しないため、テストは失敗します。
タイマーの浅いレンダリングテストの作成
次に、 src/componentsディレクトリの下のTimerという名前の新しいディレクトリにTimer.spec.jsという名前のファイルを作成します。
また、 Timer.spec.jsファイルに浅いレンダリングテストを追加します。
import React from "react" import { shallow } from "enzyme" import Timer from "./Timer" describe("Timer", () => { let container beforeEach(() => (container = shallow(<Timer />))) it("should render a <div />", () => { expect(container.find("div").length).toBeGreaterThanOrEqual(1) }) })予想どおり、テストは失敗します。
タイマーコンポーネントの作成
次に、 Timer.jsxという新しいファイルを作成し、ユーザーストーリーに基づいて同じ変数とメソッドを定義しましょう。
import React, { Component } from 'react'; class Timer extends Component { constructor(props) { super(props); this.state = { minutes: 25, seconds: 0, isOn: false }; } startTimer() { console.log('Starting timer.'); } stopTimer() { console.log('Stopping timer.'); } resetTimer() { console.log('Resetting timer.'); } render = () => { return <div className="timer-container" />; }; } export default Timer; これはテストに合格し、 Timer.spec.jsファイルに<div />をレンダリングする必要がありますが、アプリコンポーネントにTimerコンポーネントをまだ追加していないため、テストはタイマーコンポーネントをレンダリングしないはずです。
次のように、 App.jsxファイルにTimerコンポーネントを追加します。
import React from 'react'; import './App.css'; import Timer from '../Timer/Timer'; const App = () => ( <div className="app-container"> <Timer /> </div> ); export default App;すべてのテストに合格するはずです。
タイマーCSSの追加
タイマーに関連するCSS変数を追加し、小型デバイス用のメディアクエリを追加します。
次のようにファイルindex.cssを更新します。
:root { --timer-background-color: #FFFFFF; --timer-border: 1px solid #000000; --timer-height: 70%; --timer-width: 70%; } body, div, p { margin: 0; padding: 0; } @media screen and (max-width: 1024px) { :root { --timer-height: 100%; --timer-width: 100%; } }また、 components/Timerディレクトリの下にTimer.cssファイルを作成します。
.timer-container { background-color: var(--timer-background-color); border: var(--timer-border); height: var(--timer-height); width: var(--timer-width); }Timer.cssファイルをインポートするには、 Timer.jsxを更新する必要があります。
import React, { Component } from "react" import "./Timer.css"ここでReactアプリを実行すると、ブラウザーに境界線のあるシンプルな画面が表示されます。
TimerButtonの浅いレンダリングテストを作成する
Start、Stop 、 Resetの3つのボタンが必要なので、 TimerButtonコンポーネントを作成します。
まず、 Timer.spec.jsファイルを更新して、 TimerコンポーネントにTimerButtonコンポーネントが存在するかどうかを確認する必要があります。
it("should render instances of the TimerButton component", () => { expect(container.find("TimerButton").length).toEqual(3) })次に、 src / componentsディレクトリの下のTimerButtonという新しいディレクトリにTimerButton.spec.jsファイルを追加し、次のようにファイルにテストを追加しましょう。

import React from "react" import { shallow } from "enzyme" import TimerButton from "./TimerButton" describe("TimerButton", () => { let container beforeEach(() => { container = shallow( <TimerButton buttonAction={jest.fn()} buttonValue={""} /> ) }) it("should render a <div />", () => { expect(container.find("div").length).toBeGreaterThanOrEqual(1) }) })ここで、テストを実行すると、テストが失敗することがわかります。
TimerButtonコンポーネントのTimerButton.jsxファイルを作成しましょう。
import React from 'react'; import PropTypes from 'prop-types'; const TimerButton = ({ buttonAction, buttonValue }) => ( <div className="button-container" /> ); TimerButton.propTypes = { buttonAction: PropTypes.func.isRequired, buttonValue: PropTypes.string.isRequired, }; export default TimerButton; この段階でnpm testを実行すると、テストはTimerButtonコンポーネントのインスタンスをレンダリングするはずですが、TimerButtonコンポーネントをTimerコンポーネントにまだ追加していないため、失敗します。
TimerButtonコンポーネントをインポートし、Timer.jsxのrenderメソッドに3つのTimerButtonコンポーネントを追加しましょう。
render = () => { return ( <div className="timer-container"> <div className="time-display"></div> <div className="timer-button-container"> <TimerButton buttonAction={this.startTimer} buttonValue={'Start'} /> <TimerButton buttonAction={this.stopTimer} buttonValue={'Stop'} /> <TimerButton buttonAction={this.resetTimer} buttonValue={'Reset'} /> </div> </div> ); };TimerButton CSS
次に、TimerButtonコンポーネントのCSS変数を追加します。 :rootスコープの変数をindex.cssファイルに追加しましょう:
:root { ... --button-border: 3px solid #000000; --button-text-size: 2em; } @media screen and (max-width: 1024px) { :root { … --button-text-size: 4em; } }また、 src/componentsディレクトリの下のTimerButtonディレクトリにTimerButton.cssというファイルを作成しましょう。
.button-container { flex: 1 1 auto; text-align: center; margin: 0px 20px; border: var(--button-border); font-size: var(--button-text-size); } .button-container:hover { cursor: pointer; }それに応じてTimerButton.jsxを更新して、 TimerButton.cssファイルをインポートし、ボタンの値を表示してみましょう。
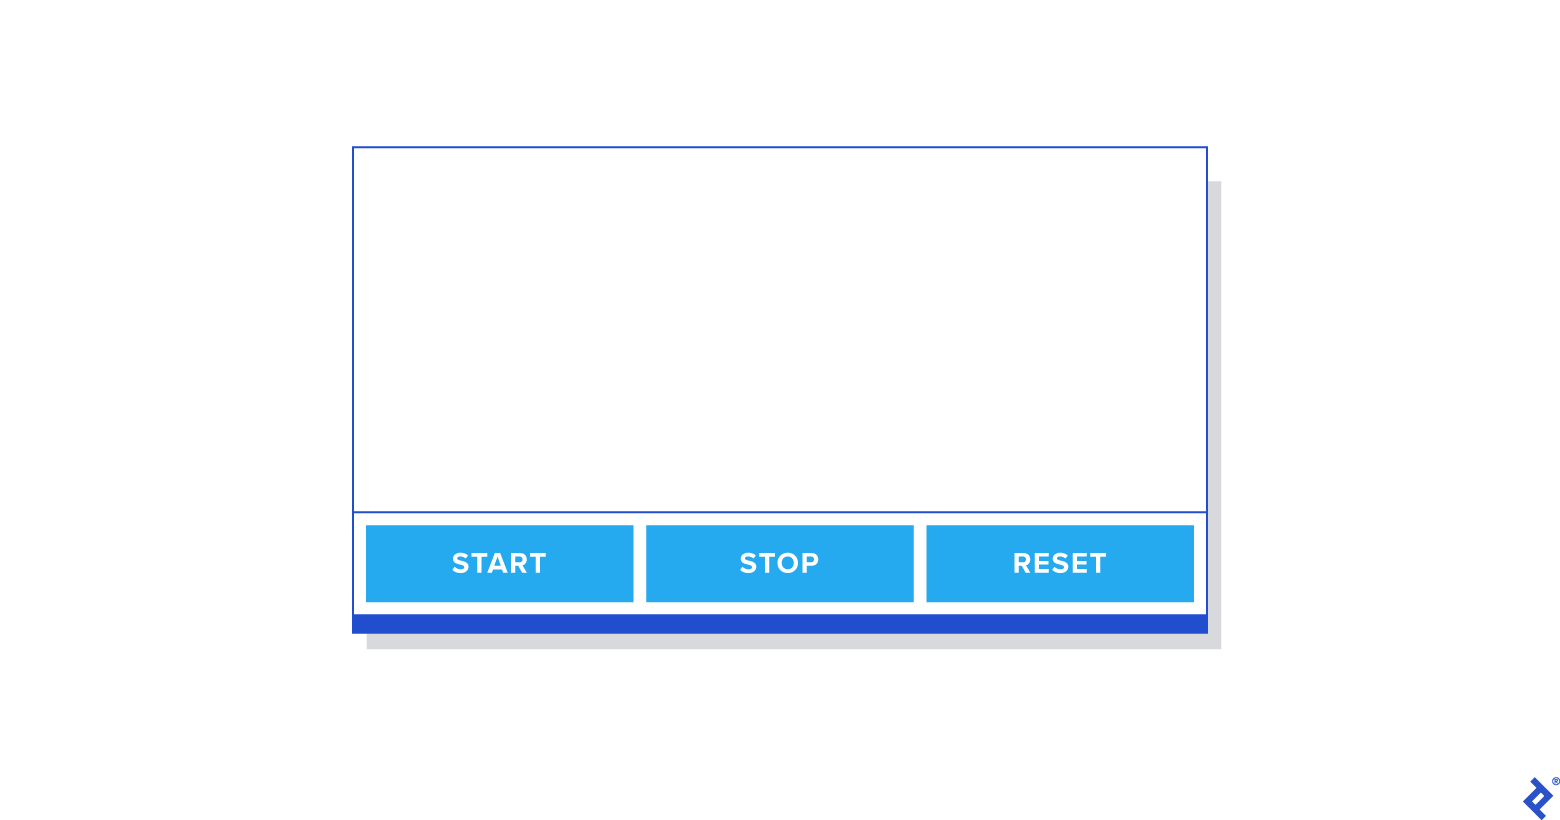
import React from 'react'; import PropTypes from 'prop-types'; import './TimerButton.css'; const TimerButton = ({ buttonAction, buttonValue }) => ( <div className="button-container"> <p className="button-value">{buttonValue}</p> </div> ); TimerButton.propTypes = { buttonAction: PropTypes.func.isRequired, buttonValue: PropTypes.string.isRequired, }; export default TimerButton;また、 Timer.cssを更新して、3つのボタンを水平に揃える必要があるため、 Timer.cssファイルも更新しましょう。
import React from 'react'; import PropTypes from 'prop-types'; import './TimerButton.css'; const TimerButton = ({ buttonAction, buttonValue }) => ( <div className="button-container"> <p className="button-value">{buttonValue}</p> </div> ); TimerButton.propTypes = { buttonAction: PropTypes.func.isRequired, buttonValue: PropTypes.string.isRequired, }; export default TimerButton;ここでReactアプリを実行すると、次のような画面が表示されます。
タイマーのリファクタリング
startTimer、stopTimer、restartTimer、resetTimerなどの関数を実装するため、タイマーをリファクタリングします。 最初にTimer.spec.jsファイルを更新しましょう。
describe('mounted Timer', () => { let container; beforeEach(() => (container = mount(<Timer />))); it('invokes startTimer when the start button is clicked', () => { const spy = jest.spyOn(container.instance(), 'startTimer'); container.instance().forceUpdate(); expect(spy).toHaveBeenCalledTimes(0); container.find('.start-timer').first().simulate('click'); expect(spy).toHaveBeenCalledTimes(1); }); it('invokes stopTimer when the stop button is clicked', () => { const spy = jest.spyOn(container.instance(), 'stopTimer'); container.instance().forceUpdate(); expect(spy).toHaveBeenCalledTimes(0); container.find('.stop-timer').first().simulate('click'); expect(spy).toHaveBeenCalledTimes(1); }); it('invokes resetTimer when the reset button is clicked', () => { const spy = jest.spyOn(container.instance(), 'resetTimer'); container.instance().forceUpdate(); expect(spy).toHaveBeenCalledTimes(0); container.find('.reset-timer').first().simulate('click'); expect(spy).toHaveBeenCalledTimes(1); }); });テストを実行すると、 TimerButtonコンポーネントがまだ更新されていないため、追加されたテストが失敗することがわかります。 TimerButtonコンポーネントを更新して、クリックイベントを追加しましょう。
const TimerButton = ({ buttonAction, buttonValue }) => ( <div className="button-container" onClick={() => buttonAction()}> <p className="button-value">{buttonValue}</p> </div> );これで、テストに合格するはずです。
次に、マウントされたタイマーテストケースで各関数が呼び出されたときの状態を確認するためのテストをさらに追加します。
it('should change isOn state true when the start button is clicked', () => { container.instance().forceUpdate(); container.find('.start-timer').first().simulate('click'); expect(container.instance().state.isOn).toEqual(true); }); it('should change isOn state false when the stop button is clicked', () => { container.instance().forceUpdate(); container.find('.stop-timer').first().simulate('click'); expect(container.instance().state.isOn).toEqual(false); }); it('should change isOn state false when the reset button is clicked', () => { container.instance().forceUpdate(); container.find('.stop-timer').first().simulate('click'); expect(container.instance().state.isOn).toEqual(false); expect(container.instance().state.minutes).toEqual(25); expect(container.instance().state.seconds).toEqual(0); });テストを実行すると、各メソッドをまだ実装していないため、テストが失敗することがわかります。 それでは、テストに合格するために各関数を実装しましょう。
startTimer() { this.setState({ isOn: true }); } stopTimer() { this.setState({ isOn: false }); } resetTimer() { this.stopTimer(); this.setState({ minutes: 25, seconds: 0, }); }テストを実行すると、テストに合格することがわかります。 それでは、 Timer.jsxに残りの関数を実装しましょう:
import React, { Component } from 'react'; import './Timer.css'; import TimerButton from '../TimerButton/TimerButton'; class Timer extends Component { constructor(props) { super(props); this.state = { minutes: 25, seconds: 0, isOn: false, }; this.startTimer = this.startTimer.bind(this); this.stopTimer = this.stopTimer.bind(this); this.resetTimer = this.resetTimer.bind(this); } startTimer() { if (this.state.isOn === true) { return; } this.myInterval = setInterval(() => { const { seconds, minutes } = this.state; if (seconds > 0) { this.setState(({ seconds }) => ({ seconds: seconds - 1, })); } if (seconds === 0) { if (minutes === 0) { clearInterval(this.myInterval); } else { this.setState(({ minutes }) => ({ minutes: minutes - 1, seconds: 59, })); } } }, 1000); this.setState({ isOn: true }); } stopTimer() { clearInterval(this.myInterval); this.setState({ isOn: false }); } resetTimer() { this.stopTimer(); this.setState({ minutes: 25, seconds: 0, }); } render = () => { const { minutes, seconds } = this.state; return ( <div className="timer-container"> <div className="time-display"> {minutes}:{seconds < 10 ? `0${seconds}` : seconds} </div> <div className="timer-button-container"> <TimerButton className="start-timer" buttonAction={this.startTimer} buttonValue={'Start'} /> <TimerButton className="stop-timer" buttonAction={this.stopTimer} buttonValue={'Stop'} /> <TimerButton className="reset-timer" buttonAction={this.resetTimer} buttonValue={'Reset'} /> </div> </div> ); }; } export default Timer;以前に準備したユーザーストーリーに基づいて、すべての機能が機能することがわかります。
これが、TDDを使用して基本的なReactアプリを開発した方法です。 ユーザーストーリーと受け入れ基準がより詳細である場合、テストケースをより正確に記述できるため、さらに貢献できます。
まとめ
TDDを使用してアプリケーションを開発する場合、プロジェクトを叙事詩やユーザーストーリーに分類するだけでなく、受け入れ基準に十分に備えることが非常に重要です。 この記事では、プロジェクトを分解し、準備された受け入れ基準をReactTDD開発に使用する方法を紹介したいと思います。
React TDDに関連するリソースはたくさんありますが、この記事が、ユーザーストーリーを使用したReactを使用したTDD開発について少し学ぶのに役立つことを願っています。 このアプローチをエミュレートすることを選択した場合は、ここで完全なソースコードを参照してください。