
React Test-driven Development: จากเรื่องราวของผู้ใช้สู่การผลิต
เผยแพร่แล้ว: 2022-03-11ในโพสต์นี้ เราจะพัฒนาแอป React โดยใช้การพัฒนาที่ขับเคลื่อนด้วยการทดสอบ (TDD) ตั้งแต่เรื่องราวของผู้ใช้ไปจนถึงการพัฒนา นอกจากนี้ เราจะใช้ Jest และ Enzyme สำหรับ TDD เมื่ออ่านคู่มือนี้เสร็จแล้ว คุณจะสามารถ:
- สร้างมหากาพย์และเรื่องราวของผู้ใช้ตามความต้องการ
- สร้างการทดสอบตามเรื่องราวของผู้ใช้
- พัฒนาแอพ React โดยใช้ TDD
- ใช้ Enzyme และ Jest เพื่อทดสอบแอป React
- ใช้/นำมาใช้ใหม่ตัวแปร CSS สำหรับการออกแบบที่ตอบสนอง
- สร้างส่วนประกอบ React ที่นำกลับมาใช้ใหม่ได้ซึ่งแสดงผลและทำงานแตกต่างกันตามอุปกรณ์ประกอบฉากที่ให้มา
- ตรวจสอบประเภทอุปกรณ์ประกอบฉากโดยใช้ React PropTypes
บทความนี้ถือว่าคุณมีความรู้พื้นฐานเกี่ยวกับ React หากคุณยังใหม่ต่อ React เลย ฉันแนะนำให้คุณทำตามบทช่วยสอนอย่างเป็นทางการและดูบทช่วยสอน React 2019 ของ Toptal: ตอนที่ 1 และตอนที่ 2
ภาพรวมของแอป React ที่ขับเคลื่อนด้วยการทดสอบของเรา
เราจะสร้างแอพตัวจับเวลา Pomodoro พื้นฐานที่ประกอบด้วยส่วนประกอบ UI บางอย่าง แต่ละองค์ประกอบจะมีชุดการทดสอบแยกต่างหากในไฟล์ทดสอบที่เกี่ยวข้อง ก่อนอื่น เราสามารถสร้างมหากาพย์และเรื่องราวของผู้ใช้ได้ดังนี้ตามข้อกำหนดของโปรเจ็กต์ของเรา
| มหากาพย์ | เรื่องราวของผู้ใช้ | เกณฑ์การยอมรับ |
| ในฐานะผู้ใช้ ฉันต้องใช้ตัวจับเวลาเพื่อที่ฉันจะจัดการเวลาได้ | ในฐานะผู้ใช้ ฉันต้องเริ่มจับเวลาเพื่อที่จะสามารถนับถอยหลังได้ | ตรวจสอบให้แน่ใจว่าผู้ใช้สามารถ: *เริ่มจับเวลา *ดูเวลาเริ่มนับถอยหลัง การนับถอยหลังไม่ควรถูกขัดจังหวะแม้ว่าผู้ใช้จะคลิกปุ่มเริ่มต้นมากกว่าหนึ่งครั้ง |
| ในฐานะผู้ใช้ ฉันต้องหยุดตัวจับเวลาเพื่อที่ฉันจะได้นับถอยหลังเมื่อจำเป็นเท่านั้น | ตรวจสอบให้แน่ใจว่าผู้ใช้สามารถ: *หยุดจับเวลา *ดูตัวจับเวลาหยุด ไม่ควรเกิดอะไรขึ้นแม้ว่าผู้ใช้จะคลิกปุ่มหยุดมากกว่าหนึ่งครั้ง | |
| ในฐานะผู้ใช้ ฉันต้องรีเซ็ตตัวจับเวลาเพื่อให้สามารถนับถอยหลังได้ตั้งแต่ต้น | ตรวจสอบให้แน่ใจว่าผู้ใช้สามารถ: *รีเซ็ตตัวจับเวลา *ดูตัวจับเวลารีเซ็ตเป็นค่าเริ่มต้น |
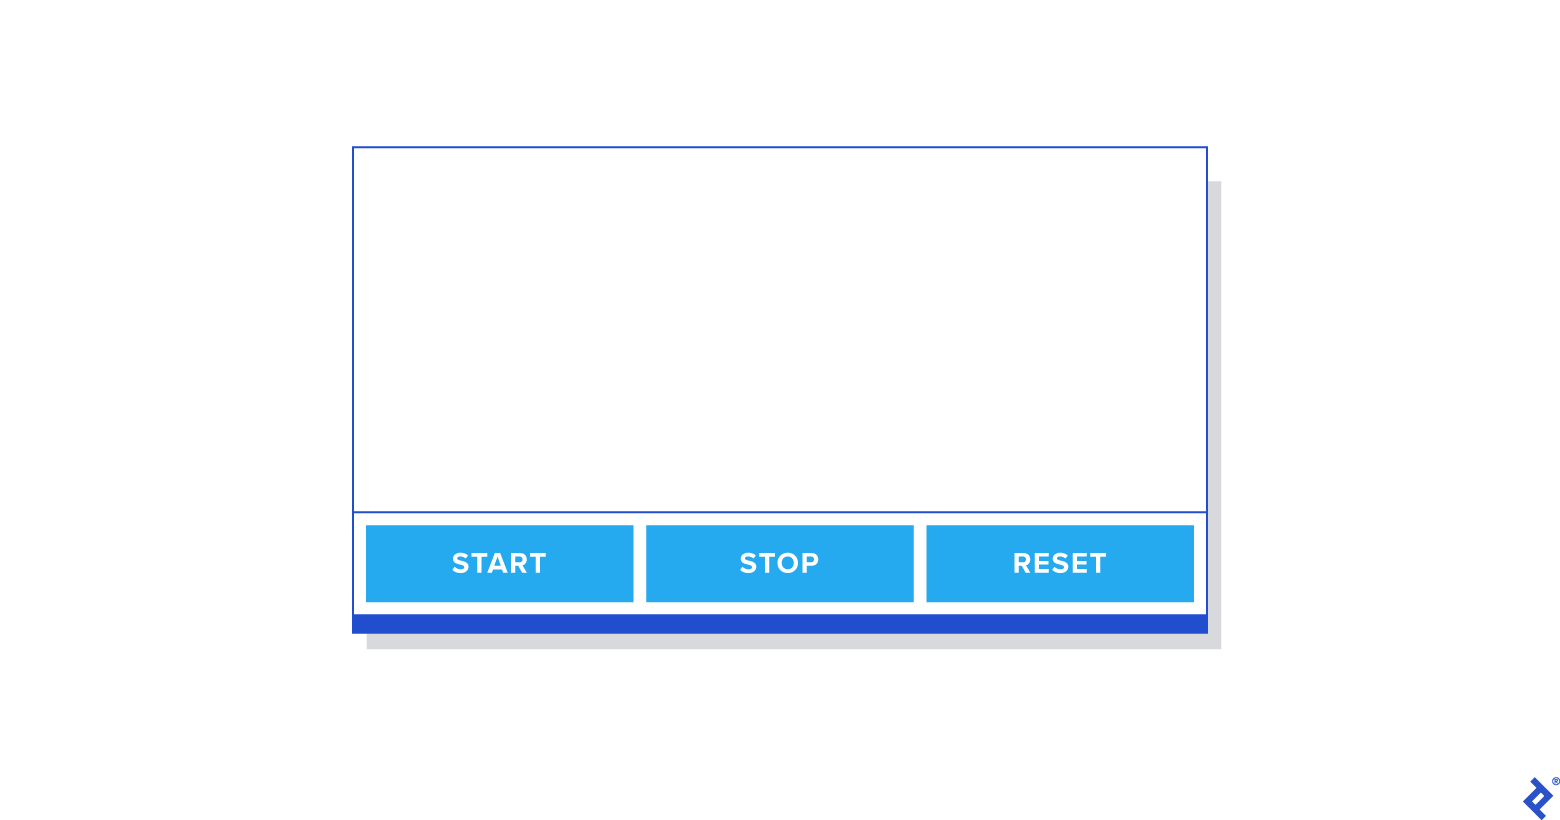
โครงลวด
การติดตั้งโครงการ
ขั้นแรก เราจะสร้างโครงการ React โดยใช้ Create React App ดังนี้:
$ npx create-react-app react-timer $ cd react-timer $ npm startคุณจะเห็นแท็บเบราว์เซอร์ใหม่เปิดอยู่ที่ URL http://localhost:3000 คุณสามารถหยุดแอป React ที่ทำงานอยู่ได้โดยใช้ Ctrl+C
ตอนนี้ เราจะเพิ่ม Jest และ Enzyme และการพึ่งพาดังต่อไปนี้:
$ npm i -D enzyme $ npm i -D react-test-renderer enzyme-adapter-react-16นอกจากนี้ เราจะเพิ่มหรืออัปเดตไฟล์ชื่อ setupTests.js ในไดเร็กทอรี src :
import { configure } from 'enzyme'; import Adapter from 'enzyme-adapter-react-16'; configure({ adapter: new Adapter() });เนื่องจาก Create React App เรียกใช้ไฟล์ setupTests.js ก่อนการทดสอบแต่ละครั้ง จึงจะดำเนินการและกำหนดค่า Enzyme อย่างเหมาะสม
การกำหนดค่า CSS
เราจะเขียนตัวแปรและรีเซ็ต CSS พื้นฐานเพราะเราต้องการให้ตัวแปร CSS ใช้งานได้ทั่วโลกในแอปพลิเคชัน เราจะกำหนดตัวแปรจากขอบเขต :root ไวยากรณ์สำหรับการกำหนดตัวแปรคือการใช้สัญกรณ์คุณสมบัติที่กำหนดเอง แต่ละอันขึ้นต้นด้วย – ตามด้วยชื่อตัวแปร
ไปที่ไฟล์ index.css และเพิ่มสิ่งต่อไปนี้:
:root { --main-font: “Roboto”, sans-serif; } body, div, p { margin: 0; padding: 0; }ตอนนี้ เราต้องนำเข้า CSS ลงในแอปพลิเคชันของเรา อัปเดตไฟล์ index.js ดังนี้:
import React from 'react'; import ReactDOM from 'react-dom'; import './index.css'; ReactDOM.render( <React.StrictMode> <App /> </React.StrictMode> document.getElementById(“root”) )การทดสอบการแสดงผลตื้น
อย่างที่คุณรู้อยู่แล้ว กระบวนการ TDD จะมีลักษณะดังนี้:
- เพิ่มการทดสอบ
- เรียกใช้การทดสอบทั้งหมด แล้วคุณจะเห็นการทดสอบล้มเหลว
- เขียนโค้ดเพื่อสอบผ่าน
- ทำการทดสอบทั้งหมด
- ปรับปรุงโครงสร้าง.
- ทำซ้ำ.
ดังนั้น เราจะเพิ่มการทดสอบแรกสำหรับการทดสอบการแสดงผลแบบตื้น แล้วเขียนโค้ดเพื่อให้ผ่านการทดสอบ เพิ่มไฟล์ spec ใหม่ที่ชื่อ App.spec.js ไปยังไดเร็กทอรี src/components/App ดังนี้:
import React from 'react'; import { shallow } from 'enzyme'; import App from './App'; describe('App', () => { it('should render a <div />', () => { const container = shallow(<App />); expect(container.find('div').length).toEqual(1); }); });จากนั้น คุณสามารถเรียกใช้การทดสอบ:
$ npm testคุณจะเห็นการทดสอบล้มเหลว
ส่วนประกอบของแอป
ตอนนี้ เราจะดำเนินการสร้างองค์ประกอบแอปเพื่อผ่านการทดสอบ ไปที่ App.jsx ในไดเร็กทอรี src/components/App และเพิ่มโค้ดดังนี้:
import React from 'react'; const App = () => <div className=”app-container” />; export default App;ตอนนี้ ทำการทดสอบอีกครั้ง
$ npm testการทดสอบครั้งแรกควรผ่าน
การเพิ่มแอป CSS
เราจะสร้างไฟล์ App.css ในไดเร็กทอรี src/components/App เพื่อเพิ่มสไตล์ให้กับองค์ประกอบ App ดังนี้:
.app-container { height: 100vh; width: 100vw; align-items: center; display: flex; justify-content: center; }ตอนนี้ เราพร้อมที่จะนำเข้า CSS ไปยังไฟล์ App.jsx แล้ว:
import React from 'react'; import './App.css'; const App = () => <div className=”app-container” />; export default App;ต่อไป เราต้องอัปเดตไฟล์ index.js เพื่อนำเข้าส่วนประกอบ App ดังนี้:
import React from "react" import ReactDOM from "react-dom" import "./index.css" import App from "./components/App/App" import * as serviceWorker from "./serviceWorker" ReactDOM.render( <React.StrictMode> <App /> </React.StrictMode>, document.getElementById("root") ) // If you want your app to work offline and load faster, you can change // unregister() to register() below. Note this comes with some pitfalls. // Learn more about service workers: https://bit.ly/CRA-PWA serviceWorker.unregister()การเพิ่มส่วนประกอบตัวจับเวลา
สุดท้าย แอปจะมีคอมโพเนนต์ตัวจับเวลา ดังนั้นเราจะอัปเดตไฟล์ App.spec.js เพื่อตรวจสอบการมีอยู่ของคอมโพเนนต์ตัวจับเวลาในแอปของเรา นอกจากนี้ เราจะประกาศตัวแปรคอนเทนเนอร์นอกกรณีทดสอบแรก เนื่องจากต้องทำการทดสอบการเรนเดอร์แบบตื้นก่อนการทดสอบแต่ละกรณี
import React from "react" import { shallow } from "enzyme" import App from "./App" import Timer from "../Timer/Timer" describe("App", () => { let container beforeEach(() => (container = shallow(<App />))) it("should render a <div />", () => { expect(container.find("div").length).toEqual(1) }) it("should render the Timer Component", () => { expect(container.containsMatchingElement(<Timer />)).toEqual(true) }) }) หากคุณรัน npm test ในขั้นตอนนี้ การทดสอบจะล้มเหลวเนื่องจากยังไม่มีคอมโพเนนต์ตัวจับเวลา
การเขียน Timer Shallow Rendering Test
ตอนนี้ เรากำลังจะสร้างไฟล์ชื่อ Timer.spec.js ในไดเร็กทอรีใหม่ชื่อ Timer ภายใต้ไดเร็กทอรี src/components
นอกจากนี้ เราจะเพิ่มการทดสอบการแสดงผลแบบตื้นในไฟล์ Timer.spec.js :
import React from "react" import { shallow } from "enzyme" import Timer from "./Timer" describe("Timer", () => { let container beforeEach(() => (container = shallow(<Timer />))) it("should render a <div />", () => { expect(container.find("div").length).toBeGreaterThanOrEqual(1) }) })การทดสอบจะล้มเหลวตามที่คาดไว้
การสร้างส่วนประกอบตัวจับเวลา
ต่อไป มาสร้างไฟล์ใหม่ชื่อ Timer.jsx และกำหนดตัวแปรและวิธีการเดียวกันตามเรื่องราวของผู้ใช้:
import React, { Component } from 'react'; class Timer extends Component { constructor(props) { super(props); this.state = { minutes: 25, seconds: 0, isOn: false }; } startTimer() { console.log('Starting timer.'); } stopTimer() { console.log('Stopping timer.'); } resetTimer() { console.log('Resetting timer.'); } render = () => { return <div className="timer-container" />; }; } export default Timer; สิ่งนี้ควรผ่านการทดสอบและ ควร แสดงผล <div /> ในไฟล์ Timer.spec.js แต่การทดสอบ ไม่ควร แสดงผลส่วนประกอบ Timer เนื่องจากเรายังไม่ได้เพิ่มส่วนประกอบ Timer ในองค์ประกอบของแอพ
เราจะเพิ่มองค์ประกอบ Timer ในไฟล์ App.jsx ดังนี้:
import React from 'react'; import './App.css'; import Timer from '../Timer/Timer'; const App = () => ( <div className="app-container"> <Timer /> </div> ); export default App;การทดสอบทั้งหมดควรผ่านเดี๋ยวนี้
การเพิ่มตัวจับเวลา CSS
เราจะเพิ่มตัวแปร CSS ที่เกี่ยวข้องกับตัวจับเวลาและเพิ่มการสืบค้นสื่อสำหรับอุปกรณ์ขนาดเล็ก
อัพเดตไฟล์ index.css ดังนี้:
:root { --timer-background-color: #FFFFFF; --timer-border: 1px solid #000000; --timer-height: 70%; --timer-width: 70%; } body, div, p { margin: 0; padding: 0; } @media screen and (max-width: 1024px) { :root { --timer-height: 100%; --timer-width: 100%; } }นอกจากนี้ เราจะสร้างไฟล์ Timer.css ภายใต้ไดเร็กทอรี component/Timer :
.timer-container { background-color: var(--timer-background-color); border: var(--timer-border); height: var(--timer-height); width: var(--timer-width); }เราต้องอัปเดต Timer.jsx เพื่อนำเข้าไฟล์ Timer.css
import React, { Component } from "react" import "./Timer.css"หากคุณเปิดแอป React ตอนนี้ คุณจะเห็นหน้าจอธรรมดาที่มีเส้นขอบบนเบราว์เซอร์ของคุณ
เขียน TimerButton Shallow Rendering Test
เราต้องการสามปุ่ม: Start, Stop และ Reset ดังนั้นเราจะสร้าง TimerButton Component

อันดับแรก เราต้องอัปเดตไฟล์ Timer.spec.js เพื่อตรวจสอบการมีอยู่ขององค์ประกอบ TimerButton ในองค์ประกอบ Timer :
it("should render instances of the TimerButton component", () => { expect(container.find("TimerButton").length).toEqual(3) })ตอนนี้ มาเพิ่มไฟล์ TimerButton.spec.js ในไดเร็กทอรีใหม่ชื่อ TimerButton ใต้ไดเร็กทอรี src/components และเพิ่มการทดสอบลงในไฟล์ดังนี้:
import React from "react" import { shallow } from "enzyme" import TimerButton from "./TimerButton" describe("TimerButton", () => { let container beforeEach(() => { container = shallow( <TimerButton buttonAction={jest.fn()} buttonValue={""} /> ) }) it("should render a <div />", () => { expect(container.find("div").length).toBeGreaterThanOrEqual(1) }) })ตอนนี้ หากคุณรันการทดสอบ คุณจะเห็นว่าการทดสอบล้มเหลว
มาสร้างไฟล์ TimerButton.jsx สำหรับคอมโพเนนต์ TimerButton กันเถอะ:
import React from 'react'; import PropTypes from 'prop-types'; const TimerButton = ({ buttonAction, buttonValue }) => ( <div className="button-container" /> ); TimerButton.propTypes = { buttonAction: PropTypes.func.isRequired, buttonValue: PropTypes.string.isRequired, }; export default TimerButton; หากคุณรัน npm test ในขั้นตอนนี้ การทดสอบ ควรแสดงอินสแตนซ์ของส่วนประกอบ TimerButton แต่จะล้มเหลวเนื่องจากเรายังไม่ได้เพิ่มส่วนประกอบ TimerButton ให้กับส่วนประกอบ Timer
มานำเข้าส่วนประกอบ TimerButton และเพิ่มส่วนประกอบ TimerButton สามตัวในวิธีการเรนเดอร์ใน Timer.jsx :
render = () => { return ( <div className="timer-container"> <div className="time-display"></div> <div className="timer-button-container"> <TimerButton buttonAction={this.startTimer} buttonValue={'Start'} /> <TimerButton buttonAction={this.stopTimer} buttonValue={'Stop'} /> <TimerButton buttonAction={this.resetTimer} buttonValue={'Reset'} /> </div> </div> ); };ปุ่มจับเวลา CSS
ถึงเวลาเพิ่มตัวแปร CSS สำหรับองค์ประกอบ TimerButton มาเพิ่มตัวแปรในขอบเขต :root ให้กับไฟล์ index.css :
:root { ... --button-border: 3px solid #000000; --button-text-size: 2em; } @media screen and (max-width: 1024px) { :root { … --button-text-size: 4em; } }นอกจากนี้ เรามาสร้างไฟล์ชื่อ TimerButton.css ในไดเร็กทอรี TimerButton ใต้ไดเร็กทอรี src/components :
.button-container { flex: 1 1 auto; text-align: center; margin: 0px 20px; border: var(--button-border); font-size: var(--button-text-size); } .button-container:hover { cursor: pointer; }มาอัปเดต TimerButton.jsx เพื่อนำเข้าไฟล์ TimerButton.css และเพื่อแสดงค่าปุ่ม:
import React from 'react'; import PropTypes from 'prop-types'; import './TimerButton.css'; const TimerButton = ({ buttonAction, buttonValue }) => ( <div className="button-container"> <p className="button-value">{buttonValue}</p> </div> ); TimerButton.propTypes = { buttonAction: PropTypes.func.isRequired, buttonValue: PropTypes.string.isRequired, }; export default TimerButton;นอกจากนี้ เราต้องอัปเดต Timer.css เพื่อจัดตำแหน่งปุ่มสามปุ่มในแนวนอน เรามาอัปเดตไฟล์ Timer.css กันด้วย:
import React from 'react'; import PropTypes from 'prop-types'; import './TimerButton.css'; const TimerButton = ({ buttonAction, buttonValue }) => ( <div className="button-container"> <p className="button-value">{buttonValue}</p> </div> ); TimerButton.propTypes = { buttonAction: PropTypes.func.isRequired, buttonValue: PropTypes.string.isRequired, }; export default TimerButton;หากคุณเปิดแอป React ตอนนี้ คุณจะเห็นหน้าจอดังนี้:
การปรับโครงสร้างตัวจับเวลาใหม่
เรากำลังจะทำการปรับโครงสร้างตัวจับเวลาใหม่ เนื่องจากเราต้องการใช้ฟังก์ชันต่างๆ เช่น startTimer, stopTimer, restartTimer และ resetTimer มาอัปเดตไฟล์ Timer.spec.js ก่อน:
describe('mounted Timer', () => { let container; beforeEach(() => (container = mount(<Timer />))); it('invokes startTimer when the start button is clicked', () => { const spy = jest.spyOn(container.instance(), 'startTimer'); container.instance().forceUpdate(); expect(spy).toHaveBeenCalledTimes(0); container.find('.start-timer').first().simulate('click'); expect(spy).toHaveBeenCalledTimes(1); }); it('invokes stopTimer when the stop button is clicked', () => { const spy = jest.spyOn(container.instance(), 'stopTimer'); container.instance().forceUpdate(); expect(spy).toHaveBeenCalledTimes(0); container.find('.stop-timer').first().simulate('click'); expect(spy).toHaveBeenCalledTimes(1); }); it('invokes resetTimer when the reset button is clicked', () => { const spy = jest.spyOn(container.instance(), 'resetTimer'); container.instance().forceUpdate(); expect(spy).toHaveBeenCalledTimes(0); container.find('.reset-timer').first().simulate('click'); expect(spy).toHaveBeenCalledTimes(1); }); });หากคุณทำการทดสอบ คุณจะเห็นว่าการทดสอบที่เพิ่มเข้ามานั้นล้มเหลว เนื่องจากเรายังไม่ได้อัปเดตองค์ประกอบ TimerButton มาอัปเดตองค์ประกอบ TimerButton เพื่อเพิ่มเหตุการณ์การคลิก:
const TimerButton = ({ buttonAction, buttonValue }) => ( <div className="button-container" onClick={() => buttonAction()}> <p className="button-value">{buttonValue}</p> </div> );ตอนนี้การทดสอบควรผ่าน
ต่อไป เราจะเพิ่มการทดสอบเพิ่มเติมเพื่อตรวจสอบสถานะเมื่อมีการเรียกใช้แต่ละฟังก์ชันในกรณีทดสอบ Timer ที่เมาท์ :
it('should change isOn state true when the start button is clicked', () => { container.instance().forceUpdate(); container.find('.start-timer').first().simulate('click'); expect(container.instance().state.isOn).toEqual(true); }); it('should change isOn state false when the stop button is clicked', () => { container.instance().forceUpdate(); container.find('.stop-timer').first().simulate('click'); expect(container.instance().state.isOn).toEqual(false); }); it('should change isOn state false when the reset button is clicked', () => { container.instance().forceUpdate(); container.find('.stop-timer').first().simulate('click'); expect(container.instance().state.isOn).toEqual(false); expect(container.instance().state.minutes).toEqual(25); expect(container.instance().state.seconds).toEqual(0); });หากคุณเรียกใช้การทดสอบ คุณจะเห็นว่าการทดสอบล้มเหลวเนื่องจากเรายังไม่ได้ใช้งานแต่ละวิธี ลองใช้แต่ละฟังก์ชันเพื่อผ่านการทดสอบ:
startTimer() { this.setState({ isOn: true }); } stopTimer() { this.setState({ isOn: false }); } resetTimer() { this.stopTimer(); this.setState({ minutes: 25, seconds: 0, }); }คุณจะเห็นการทดสอบผ่านหากคุณเรียกใช้ ตอนนี้ มาใช้งานฟังก์ชั่นที่เหลือใน Timer.jsx :
import React, { Component } from 'react'; import './Timer.css'; import TimerButton from '../TimerButton/TimerButton'; class Timer extends Component { constructor(props) { super(props); this.state = { minutes: 25, seconds: 0, isOn: false, }; this.startTimer = this.startTimer.bind(this); this.stopTimer = this.stopTimer.bind(this); this.resetTimer = this.resetTimer.bind(this); } startTimer() { if (this.state.isOn === true) { return; } this.myInterval = setInterval(() => { const { seconds, minutes } = this.state; if (seconds > 0) { this.setState(({ seconds }) => ({ seconds: seconds - 1, })); } if (seconds === 0) { if (minutes === 0) { clearInterval(this.myInterval); } else { this.setState(({ minutes }) => ({ minutes: minutes - 1, seconds: 59, })); } } }, 1000); this.setState({ isOn: true }); } stopTimer() { clearInterval(this.myInterval); this.setState({ isOn: false }); } resetTimer() { this.stopTimer(); this.setState({ minutes: 25, seconds: 0, }); } render = () => { const { minutes, seconds } = this.state; return ( <div className="timer-container"> <div className="time-display"> {minutes}:{seconds < 10 ? `0${seconds}` : seconds} </div> <div className="timer-button-container"> <TimerButton className="start-timer" buttonAction={this.startTimer} buttonValue={'Start'} /> <TimerButton className="stop-timer" buttonAction={this.stopTimer} buttonValue={'Stop'} /> <TimerButton className="reset-timer" buttonAction={this.resetTimer} buttonValue={'Reset'} /> </div> </div> ); }; } export default Timer;คุณจะเห็นฟังก์ชันทั้งหมดทำงานโดยอิงจากเรื่องราวของผู้ใช้ที่เราเตรียมไว้ก่อนหน้านี้
นั่นคือวิธีที่เราได้พัฒนาแอป React พื้นฐานโดยใช้ TDD หากเรื่องราวของผู้ใช้และเกณฑ์การยอมรับมีรายละเอียดมากขึ้น กรณีทดสอบสามารถเขียนได้แม่นยำยิ่งขึ้น ดังนั้นจึงมีส่วนร่วมมากยิ่งขึ้น
ห่อ
เมื่อพัฒนาแอปพลิเคชันโดยใช้ TDD ไม่เพียงแต่ต้องทำลายโปรเจ็กต์เป็นมหากาพย์หรือเรื่องราวของผู้ใช้เท่านั้น แต่ยังต้องเตรียมตัวให้ดีสำหรับเกณฑ์การยอมรับด้วย ในบทความนี้ ฉันต้องการแสดงให้คุณเห็นถึงวิธีการแยกย่อยโครงการและใช้เกณฑ์การยอมรับที่เตรียมไว้สำหรับการพัฒนา React TDD
แม้ว่าจะมีแหล่งข้อมูลมากมายที่เกี่ยวข้องกับ React TDD อยู่ แต่ฉันหวังว่าบทความนี้จะช่วยให้คุณเรียนรู้เล็กน้อยเกี่ยวกับการพัฒนา TDD ด้วย React โดยใช้เรื่องราวของผู้ใช้ หากคุณเลือกที่จะเลียนแบบแนวทางนี้ โปรดดูซอร์สโค้ดแบบเต็มที่นี่