
Android開発のためのReactNativeに飛び込む
公開: 2022-03-11数年前、私の同僚がReactNativeについて教えてくれました。 私は非常に懐疑的でした。 私は、これは実際の生活では決して機能しない別のクロスプラットフォームフレームワークであると主張しました。自分がどれほど間違っているかはほとんどわかりませんでした。
何年も経ち、ReactNativeのスキルが非常に求められるようになりました。 久しぶりに何か新しいことを学んだので、やってみませんか? 今日、私はReactNativeの大支持者です。
短所:
- AndroidStudioは使用できなくなりました
- React Nativeは、すべてのアプリケーションや機能に使用できるわけではありません
- React Nativeは新しいフレームワークであり、更新は現在のコードベースに悪影響を与える可能性があります
- JavaScriptは厳密に型指定された言語ではありません
- React Nativeを実行するにはJavaScriptエンジンが必要であるため、パフォーマンスが低下する可能性があります
長所:
- 簡単に学べる
- AndroidアプリとiOSアプリの間で共有されるコードベースで、プラットフォームのエクスペリエンスに合わせるためにわずかな調整が必要です。
- ライブおよびホットリロード。これにより、ビルド時間が無限になりません。
- 両方のプラットフォームのネイティブコンポーネント
- 絶えず改善
- 活発に成長しているコミュニティ
- 膨大な数の図書館
- Expoにより、iOS用に開発するためにMacを所有する必要がなくなります
- 労働力の削減—Android / iOSのネイティブ開発が必要な場合もありますが、その頻度は低くなります。
何度も続けることができますが、ここで停止して、このブログ投稿のトピックに移りましょう。 この投稿では、4つのReactNative搭載Androidアプリを作成します。
- カウンターをインクリメントおよびデクリメントするためのボタンを備えた基本的なカウンター
- r /picssubredditを検索するアプリ
- 一般的なログインページ
- r /picssubredditを閲覧するためのアプリ
IDE
上で述べたように、ReactNative開発にAndroidStudioを使用する方法はありません。 代替品が必要です。 React Nativeは、おそらくそこにある最新のテキストエディター(Atom、VS Code、Sublime Text、Bracketsなど)で開発できますが、Android Studioのエクスペリエンスを利用しているので、同じ会社によって構築されたWebStormが私のお気に入りです。 WebStormは有料アプリケーション(年間129ドル)ですが、早期アクセスバージョンをインストールできます。 WebStormのEAPビルドは無料で、非常に安定しています。 完全に無料のエディターをご希望の場合は、VSCodeをご利用ください。 Microsoftはそれのために素晴らしいReactNativeプラグインを開発しました、そしてそれは非常にうまく機能します。
新しいプロジェクトの作成
前提条件:コンピューターにインストールされているAndroid SDK、Node、およびReactNative。
新しいReactNativeプロジェクトを作成する方法は2つあります。
- 従来の方法。 WebStorm GUIまたはターミナルコマンドのいずれかを使用:
react-native init AwesomeToptalProject - より簡単な方法「ReactNativeアプリの作成」。
create-react-native-app AwesomeToptalProject
create-react-native-appを使用すると、作成されたプロジェクトはexpoでブートストラップされます。 詳細については説明しませんが、基本的には、iOSでアプリを実行するためにXcodeをインストールする必要がないことを意味します。 また、expo.ioの機能やその他の機能を使用して、クライアントを常に最新の状態に保つことも簡単です。 ただし、ネイティブコードを追加することはできません。 したがって、特定の機能を開発している場合は、エキスポからアプリを取り出して、代わりに通常のReactNativeプロジェクトを使用する必要があります。
最初の方法を使用します。
プロジェクトを実行してみましょう。 まず、エミュレータを開くか、デバイスを接続します。 WebStorm GUIを使用してプロジェクトを作成した場合、必要なのは構成を選択することだけです。 WebStormの右上隅にある[実行]ボタンの左側にあるドロップダウンをクリックし、[Android]を選択して、[実行]または[デバッグ]をクリックします。 Terminalでプロジェクトを作成した場合は、新しいReact Native構成を追加するか、Terminalを使用して実行できます。
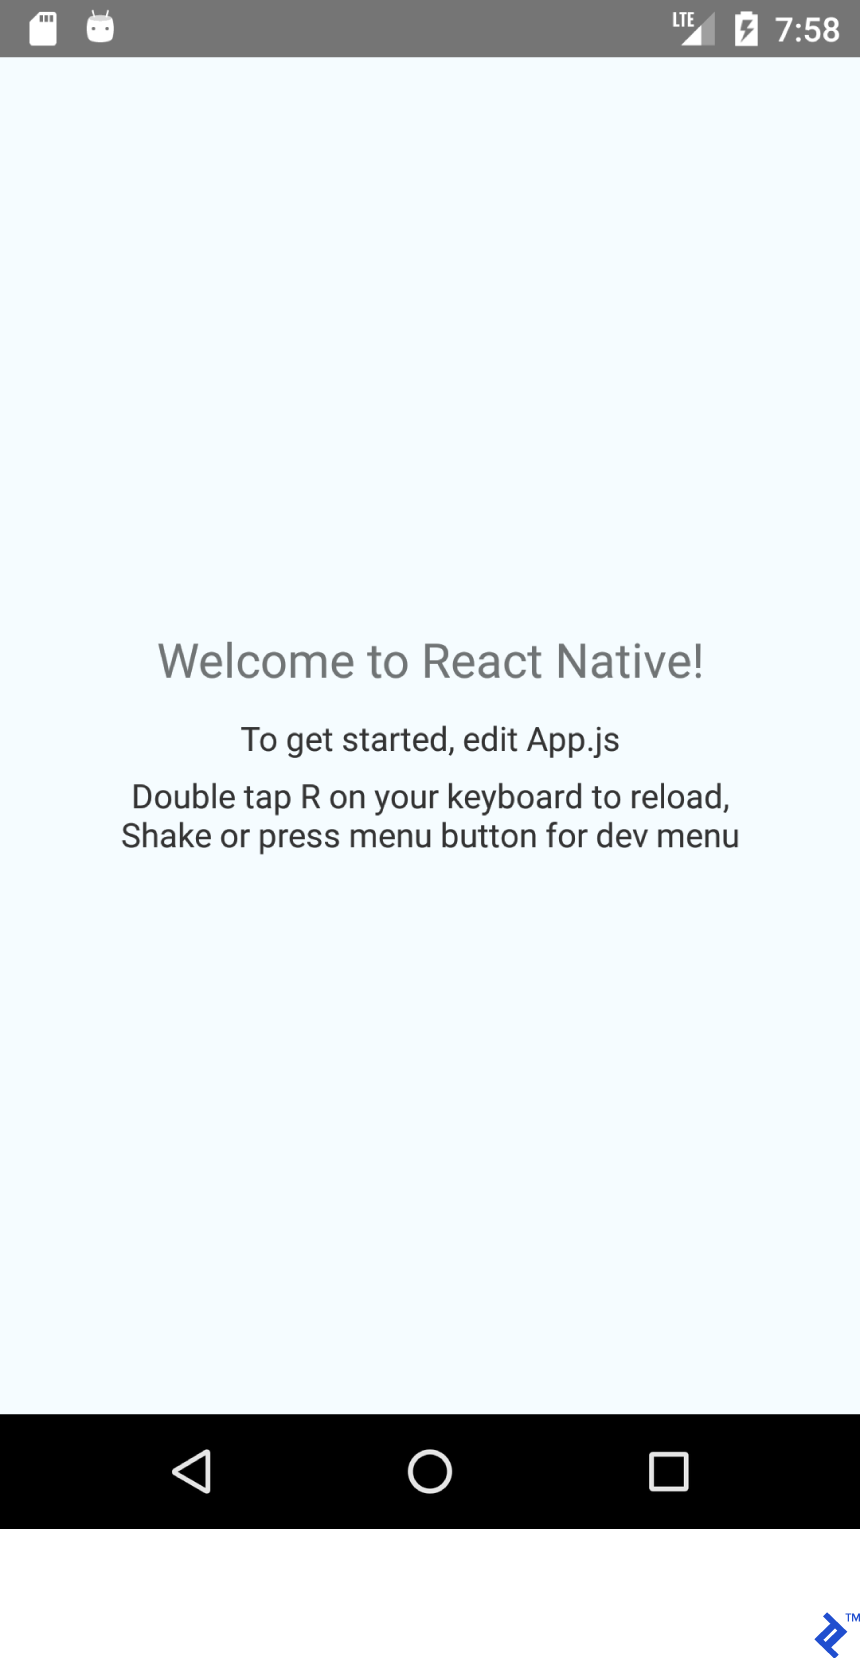
cd AwesomeToptalProject react-native run-androidすべてがうまくいけば、次の画面が表示されます。
構造と基本設定
プロジェクト内の注目すべき項目は次のとおりです。
- android-ReactNativeサポートで事前構成されたAndroidStudioプロジェクト。
- ios-ReactNativeサポートで事前構成されたXcodeプロジェクト。
- node_modules-ReactNativeフレームワークおよびその他のJavascriptライブラリを含むフォルダー。
- index.js-アプリのエントリポイント。
- App.js-ロードされた初期コンポーネント。
プロジェクトのルート内に「src」フォルダーを作成し、そこにApp.jsを移動してみましょう。 新しいApp.jsの場所と一致するようにindex.jsのインポートを更新する必要があります。
import App from './src/App';App.js内のすべてを削除し、次のコードを貼り付けます。
import React from 'react'; import {Text} from 'react-native'; export default class App extends React.Component { render() { return ( <Text>Hello TopTal</Text> ); } } 貼り付けたコードは非常に簡単です。 render()メソッドをオーバーライドしてTextコンポーネントを返すクラスApp ( React.Componentの子)を作成しました。 React.Componentは、JSXを使用してUIを構築するための基本クラスです。 export default修飾子は、クラスをpublicにします。
これで、レイアウトの設計を開始する準備が整いました。
Flexboxを使用したレイアウト
FlexboxはFlexboxに似ていLinearLayoutが、FlexboxはFlexboxの機能をLinearLayoutに超えています。
JSXのこのスニペット:
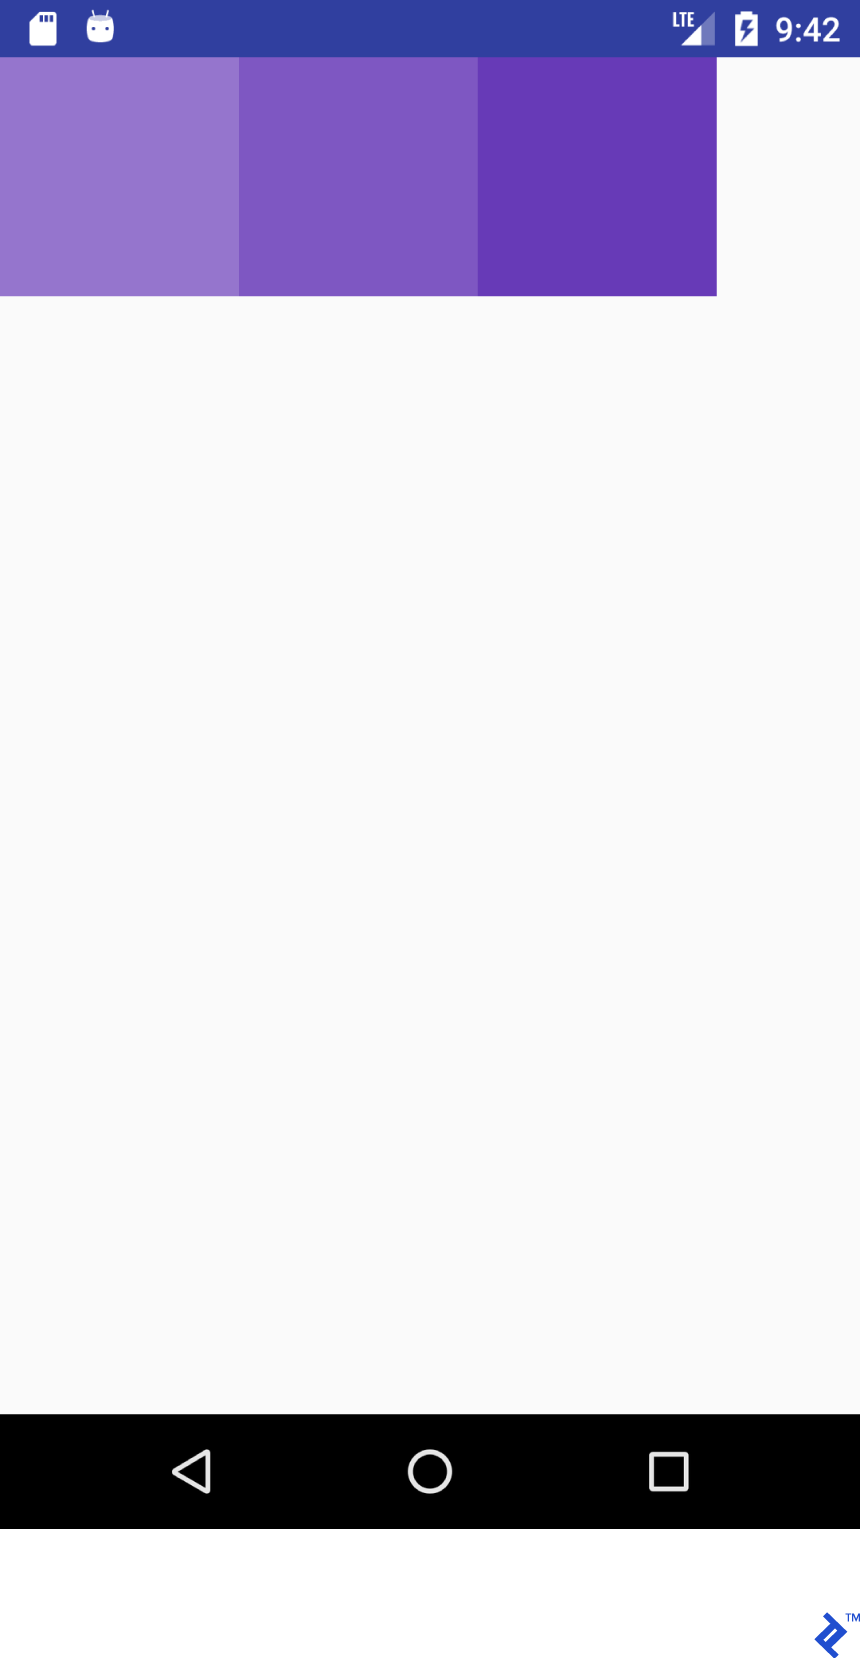
<View style={{ flex: 1, flexDirection: 'row' }}> <View style={{ width: 100, height: 100, backgroundColor: '#9575CD' }}/> <View style={{ width: 100, height: 100, backgroundColor: '#7E57C2' }}/> <View style={{ width: 100, height: 100, backgroundColor: '#673AB7' }}/> </View>このレイアウトをレンダリングします。

このXMLの場合:
<LinearLayout android:layout_width="match_parent" android:layout_height="match_parent" android:orientation="horizontal"> <View android:layout_width="100dp" android:layout_height="100dp" android:background="#9575CD" /> <View android:layout_width="100dp" android:layout_height="100dp" android:background="#7E57C2" /> <View android:layout_width="100dp" android:layout_height="100dp" android:background="#673AB7" /> </LinearLayout>これをレンダリングします:
JSXコードは見覚えがありますね! JSXとAndroidXMLで似ているレイアウトを使用して、レイアウトの「辞書」(またはチートシート)を作成しましょう。
機能は必ずしも同じではないことに注意してください。 私は、React Nativeの初心者が、ReactNativeのレイアウトシステムのアイデアを理解できるように支援しようとしています。 詳細については、公式ガイドを参照してください。
このJSXプロパティを検討してください。
flex: 1これと同等です:
android:layout_width="match_parent" android:layout_height="match_parent"JSXのこのスニペット:
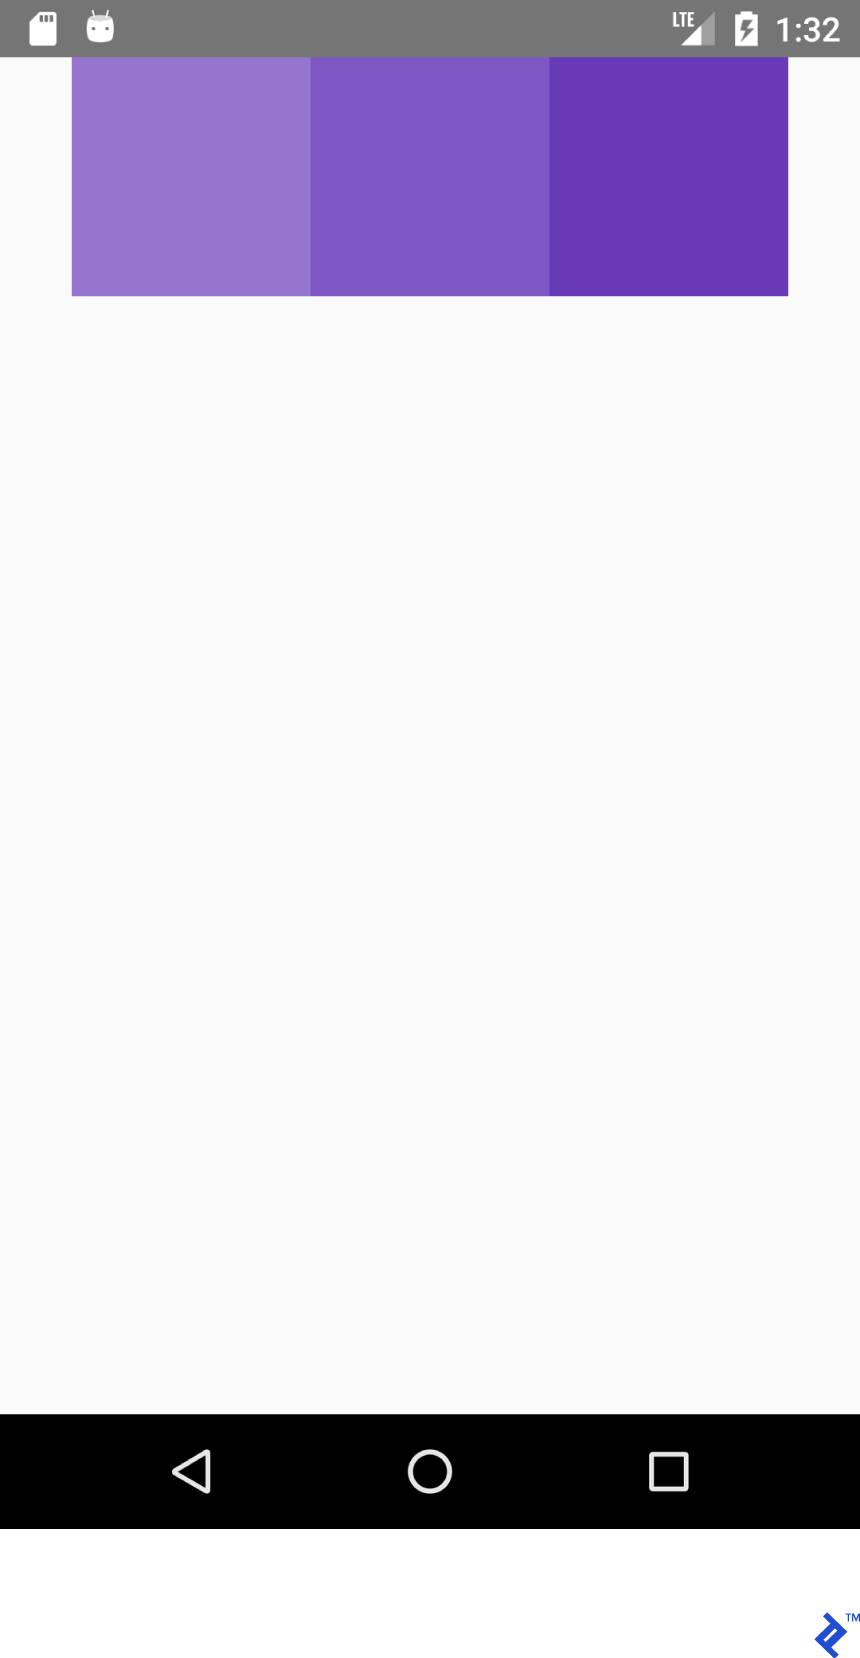
<View style={{flex: 1, flexDirection: 'row'}}> <View style={{ width: 100, height: 100, backgroundColor: '#9575CD'}}/> <View style={{ width: 100, height: 100, backgroundColor: '#7E57C2'}}/> <View style={{ width: 100, height: 100, backgroundColor: '#673AB7'}}/> </View>そしてこのXML:
<LinearLayout android:layout_width="match_parent" android:layout_height="match_parent" android:orientation="horizontal"> <View android:layout_width="100dp" android:layout_height="100dp" android:background="#9575CD" /> <View android:layout_width="100dp" android:layout_height="100dp" android:background="#7E57C2" /> <View android:layout_width="100dp" android:layout_height="100dp" android:background="#673AB7" /> </LinearLayout>どちらもこの出力を生成します。
同様に、このJSX:
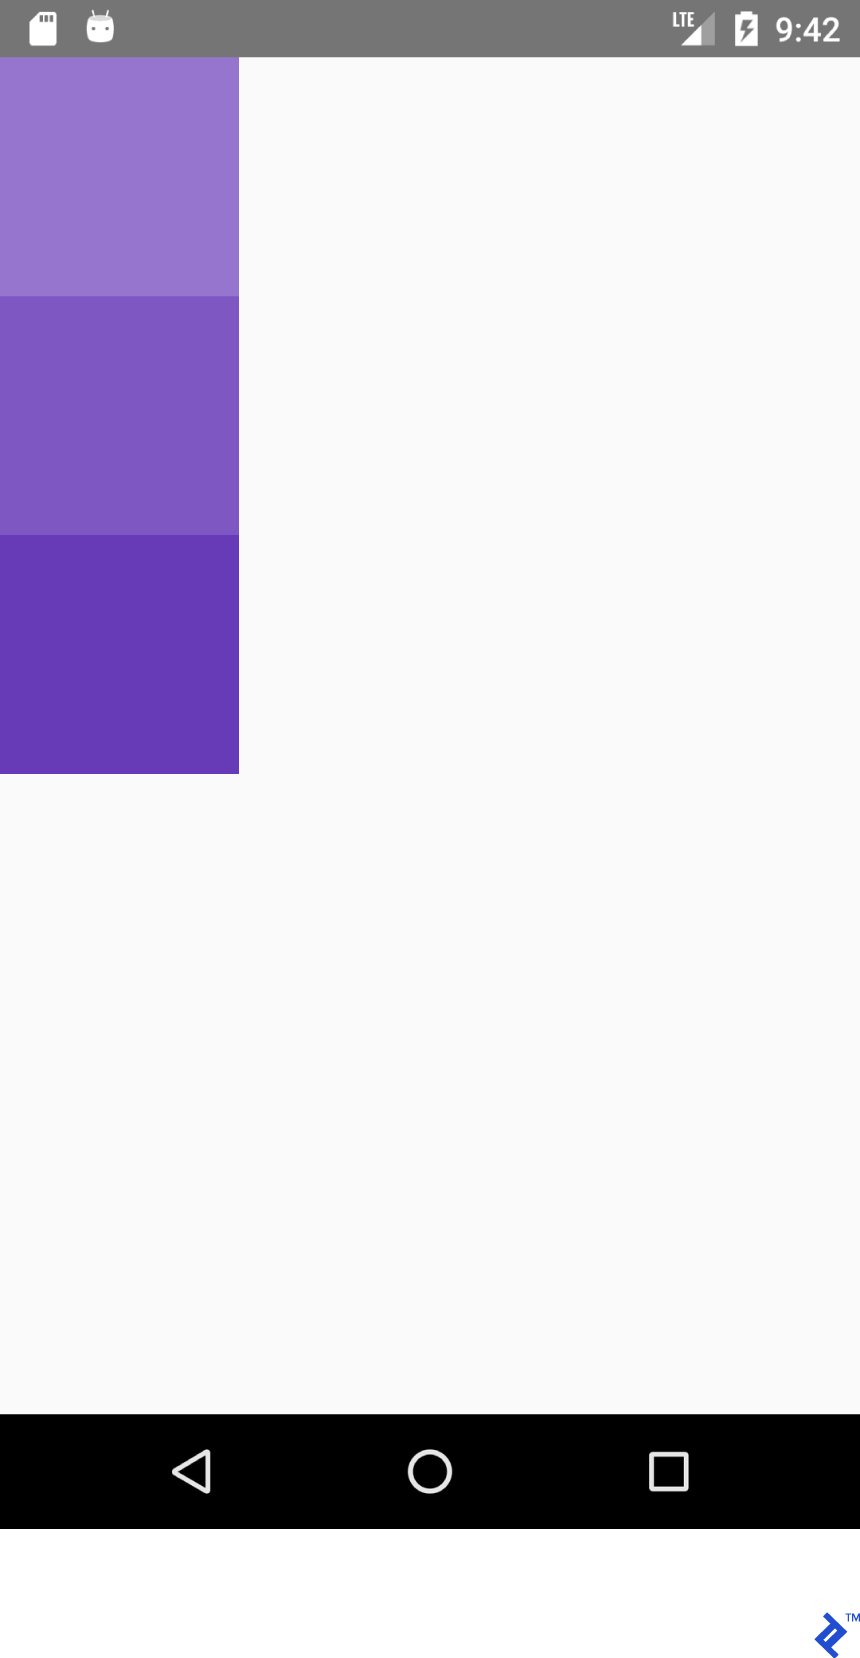
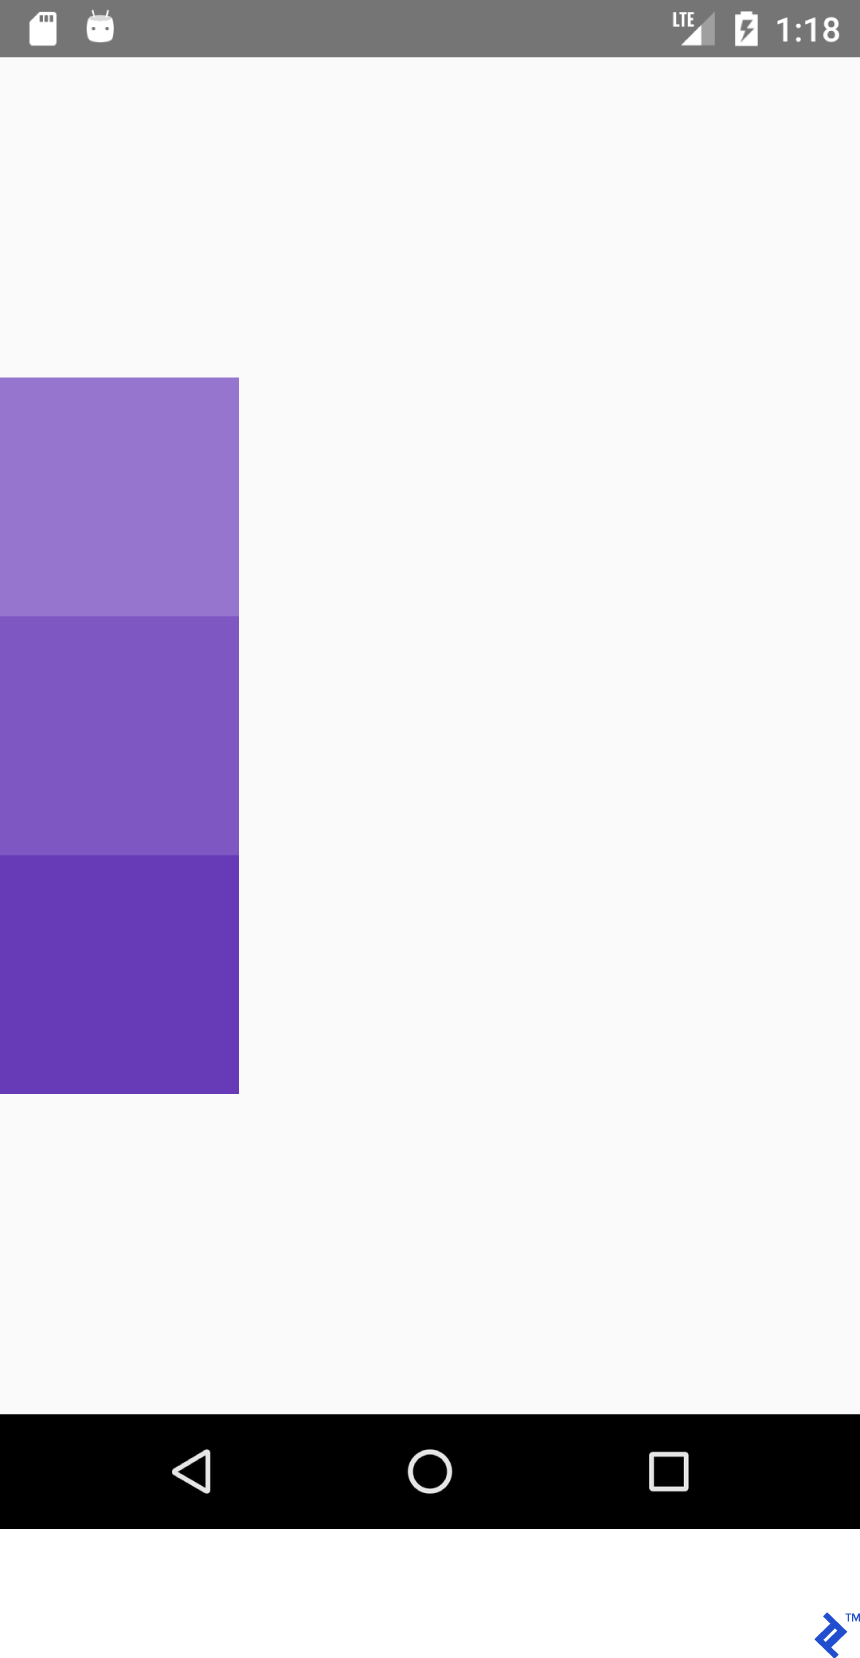
<View style={{flex: 1, flexDirection: 'column'}}> <View style={{ width: 100, height: 100, backgroundColor: '#9575CD'}}/> <View style={{ width: 100, height: 100, backgroundColor: '#7E57C2'}}/> <View style={{ width: 100, height: 100, backgroundColor: '#673AB7'}}/> </View>そしてこのXML:
<LinearLayout android:layout_width="match_parent" android:layout_height="match_parent" android:orientation="vertical"> <View android:layout_width="100dp" android:layout_height="100dp" android:background="#9575CD" /> <View android:layout_width="100dp" android:layout_height="100dp" android:background="#7E57C2" /> <View android:layout_width="100dp" android:layout_height="100dp" android:background="#673AB7" /> </LinearLayout>これを生成します:
コンテナ内の正しい位置を実現するために、最も一般的には、 flexDirection 、 alignItems 、およびjustifyContentプロパティの組み合わせを使用します。
このJSX:
<View style={{flex: 1, flexDirection: 'column', alignItems: 'center'}}> <View style={{ width: 100, height: 100, backgroundColor: '#9575CD'}}/> <View style={{ width: 100, height: 100, backgroundColor: '#7E57C2'}}/> <View style={{ width: 100, height: 100, backgroundColor: '#673AB7'}}/> </View>そしてこのXML:
<LinearLayout android:layout_width="match_parent" android:layout_height="match_parent" android:gravity="center_horizontal" android:orientation="vertical"> <View android:layout_width="100dp" android:layout_height="100dp" android:background="#9575CD" /> <View android:layout_width="100dp" android:layout_height="100dp" android:background="#7E57C2" /> <View android:layout_width="100dp" android:layout_height="100dp" android:background="#673AB7" /> </LinearLayout>このレイアウトを作成します:

このJSX:
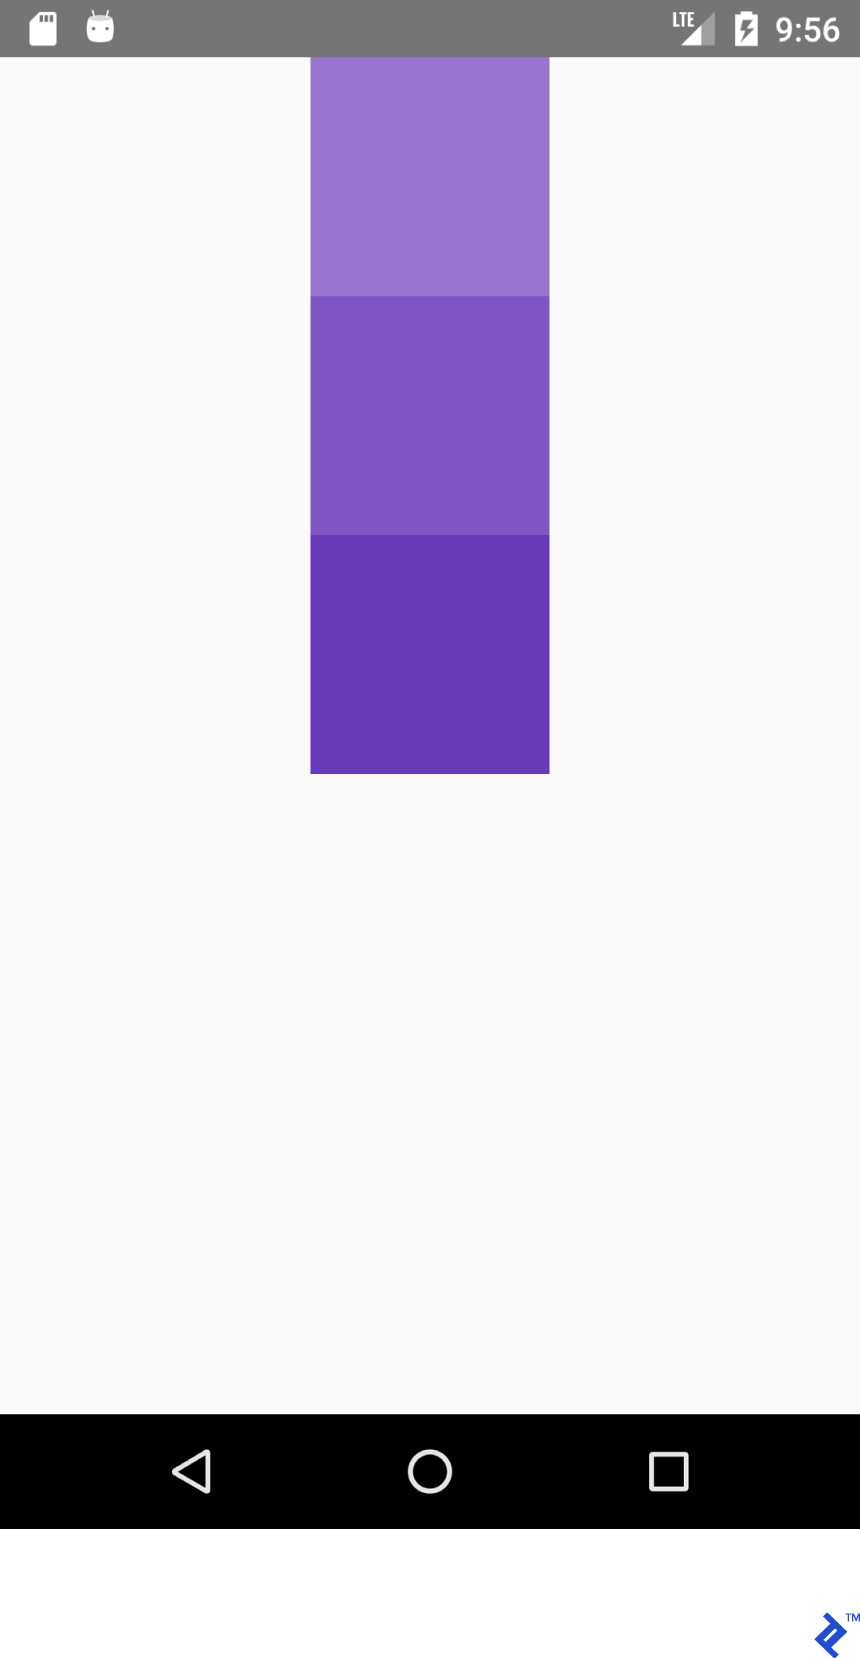
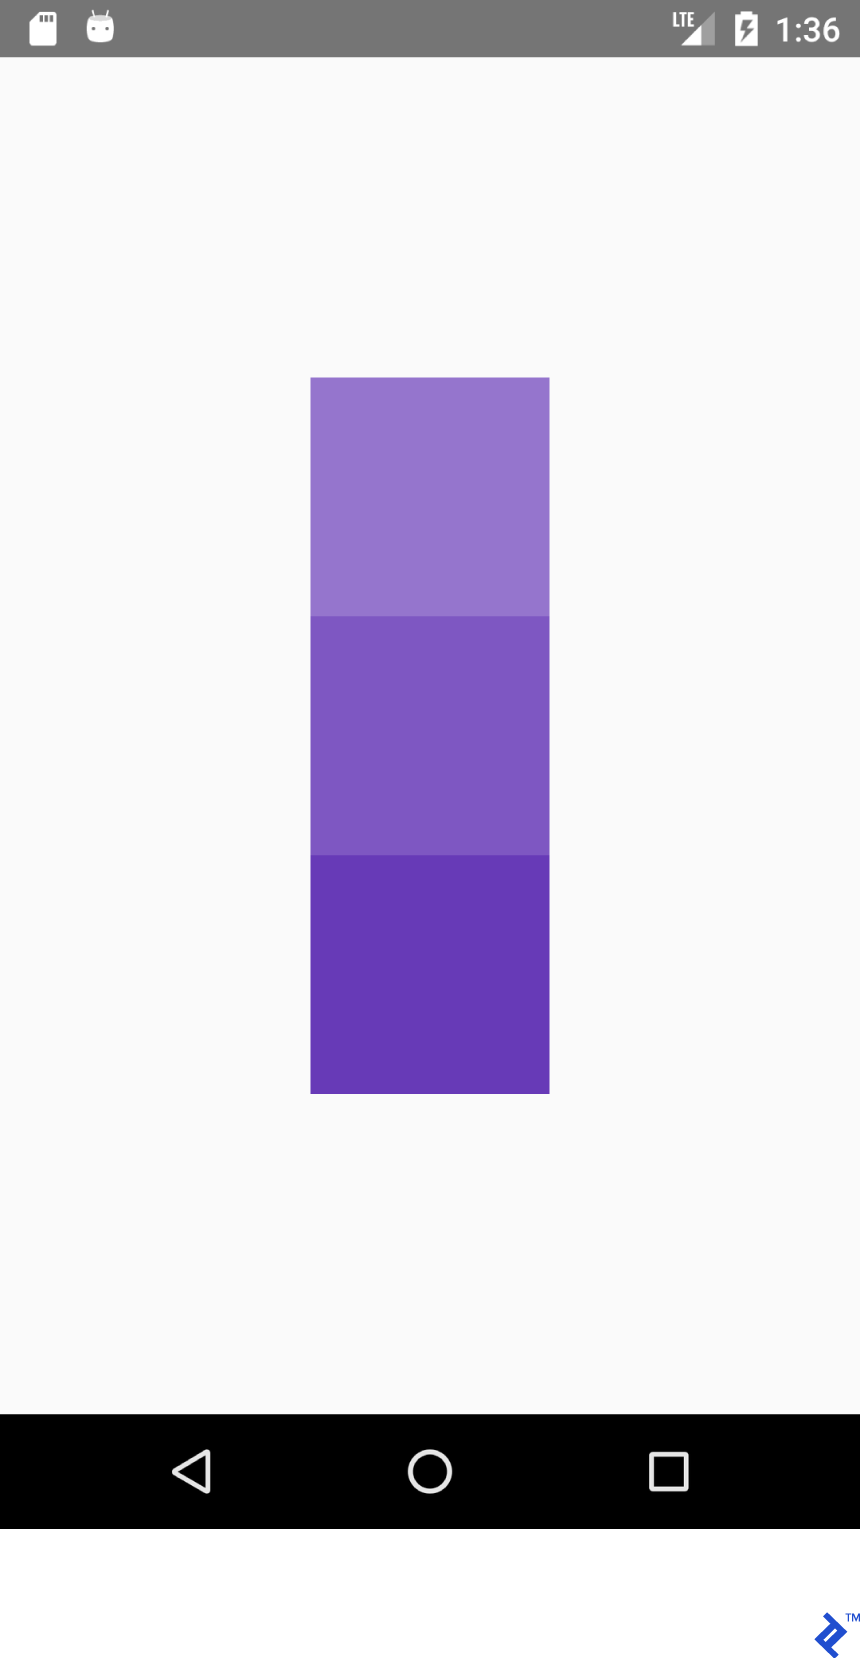
<View style={{flex: 1, flexDirection: 'column', justifyContent: 'center'}}> <View style={{ width: 100, height: 100, backgroundColor: '#9575CD'}}/> <View style={{ width: 100, height: 100, backgroundColor: '#7E57C2'}}/> <View style={{ width: 100, height: 100, backgroundColor: '#673AB7'}}/> </View>そしてこのXML
<LinearLayout android:layout_width="match_parent" android:layout_height="match_parent" android:gravity="center_vertical" android:orientation="vertical"> <View android:layout_width="100dp" android:layout_height="100dp" android:background="#9575CD" /> <View android:layout_width="100dp" android:layout_height="100dp" android:background="#7E57C2" /> <View android:layout_width="100dp" android:layout_height="100dp" android:background="#673AB7" /> </LinearLayout>このレイアウトを作成します:
このJSX:
<View style={{flex: 1, flexDirection: 'row', justifyContent: 'center'}}> <View style={{ width: 100, height: 100, backgroundColor: '#9575CD'}}/> <View style={{ width: 100, height: 100, backgroundColor: '#7E57C2'}}/> <View style={{ width: 100, height: 100, backgroundColor: '#673AB7'}}/> </View>そしてこのXML:
<LinearLayout android:layout_width="match_parent" android:layout_height="match_parent" android:gravity="center_horizontal" android:orientation="horizontal"> <View android:layout_width="100dp" android:layout_height="100dp" android:background="#9575CD" /> <View android:layout_width="100dp" android:layout_height="100dp" android:background="#7E57C2" /> <View android:layout_width="100dp" android:layout_height="100dp" android:background="#673AB7" /> </LinearLayout>このレイアウトを作成します:
このJSX:
<View style={{flex: 1, flexDirection: 'row', justifyContent: 'center', alignItems: 'center'}}> <View style={{ width: 100, height: 100, backgroundColor: '#9575CD'}}/> <View style={{ width: 100, height: 100, backgroundColor: '#7E57C2'}}/> <View style={{ width: 100, height: 100, backgroundColor: '#673AB7'}}/> </View>そしてこのXML:
<LinearLayout android:layout_width="match_parent" android:layout_height="match_parent" android:gravity="center" android:orientation="vertical"> <View android:layout_width="100dp" android:layout_height="100dp" android:background="#9575CD" /> <View android:layout_width="100dp" android:layout_height="100dp" android:background="#7E57C2" /> <View android:layout_width="100dp" android:layout_height="100dp" android:background="#673AB7" /> </LinearLayout>このレイアウトを作成します:
学ぶべき教訓: flexDirection: row', alignItems works on Y axis and justifyContent works on X axis. Everything is mirrored for works on X axis. Everything is mirrored forます:column'- justifyContentはY軸に影響し、 alignItemsはY軸に影響します。
| justifyContent:'flex-start' | 重力="開始|左" |
| alignItems:'flex-start' | 重力="開始|左" |
| justifyContent:'flex-end' | 重力="終了|右" |
| alignItems:'フレックスエンド' | 重力="終了|右" |
自分で試してみてください。 justifyContent値をspace-around 、 space-between 、およびspace-evenly設定します。
状態管理
アプリケーションの状態を更新するには、Reactのstate変数を使用します。 stateが更新されるたびに、 render()が呼び出されます。
以下のコードをアプリにコピーします。
import React from 'react'; import {Button, Text, View} from 'react-native'; export default class App extends React.Component { /* Initialize state object with variable 'number' set to 0 and variable name with value of empty string */ state = {number: 0}; render() { return ( <View style={{ flexDirection: 'row', justifyContent: 'space-between', alignItems: 'center', flex: 1, padding: 20 }}> <Button title='Decrement' color='#e57373' onPress={() => this.decrement()}/> <Text> {/* Text will be automatically updated whenever state.number has changed value */} Value = {this.state.number} </Text> <Button title='Increment' color='#64B5F6' {/* Set listener for click */} onPress={() => this.increment()}/> </View> ); } //Declaration of decrement function decrement() { //To update the state we need invoke this.setState //with new value for variable 'number' this.setState({number: this.state.number - 1}); } increment() { this.setState({number: this.state.number + 1}); } } 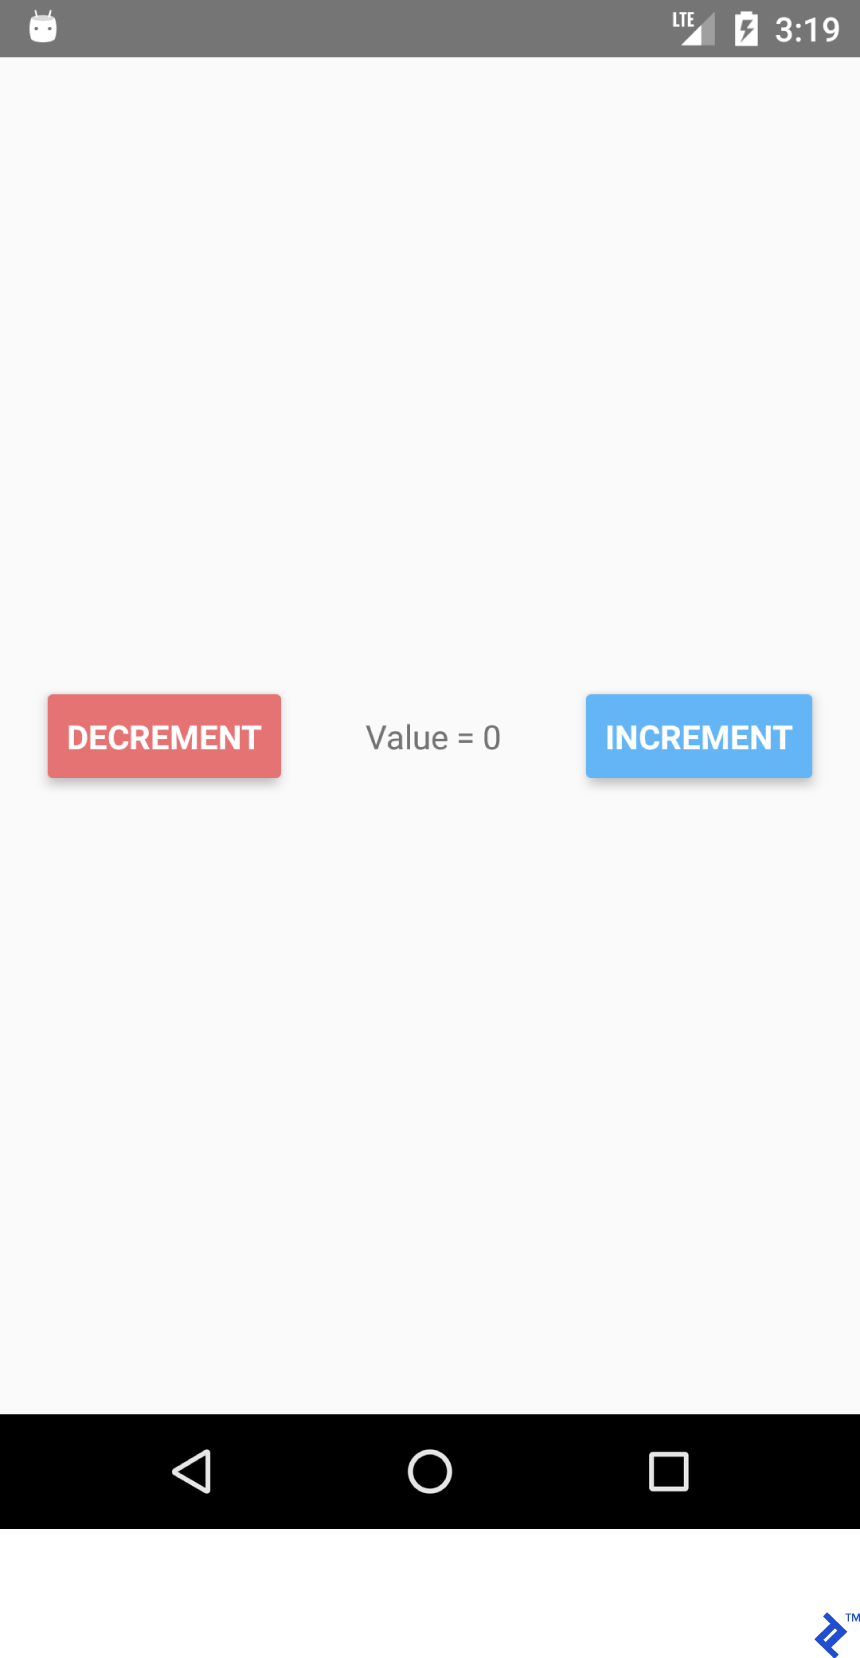
DECREMENTボタンとINCREMENTボタンをクリックすると、テキストが自動的に更新されることがわかります。 textView.setText("Value " + number)を明示的に使用する必要はありません。

状態機能は、複数の理由で便利です。
- 値の取得のしやすさ—特定の変数の値を取得する場所と方法を常に知っています。
- データは特定のウィジェットにバインドされていません。
- 共通の値の変更に依存する複数のウィジェットを持つ。
/ r/picsの検索アプリを作成する
基本を理解したので、もう少し複雑なものを作成しましょう。/r/picsの検索アプリです。 Redditは単純なJSONAPIエンドポイントを提供するため、正しく機能するために認証を取得するためにサイドクエストを行う必要はありません。
React Nativeは、組み込みのFetchAPIを提供します。 私たちのほとんどはおそらくレトロフィットとその使いやすさに慣れているので、 axiosを使用します。 ターミナルコマンドを使用してaxiosをインストールできます
yarnを使用する(私の好みの方法):
yarn add axios
またはnpmを使用します:
npm install axios
輸入:
import React from 'react'; import { TextInput, View, Text, Image, ActivityIndicator, Platform, StyleSheet } from 'react-native'; import axios from 'axios'; TextInput = EditText, ActivityIndicator = ProgressBar Platform - Platform detecting module StyleSheet - Module for creating stylesheets and moving them away from JSXクラスを作成します。
export default class App extends React.Component { }状態を初期化します。 必要なもの:
- 読み込み中-プログレスバーを表示します。
- error-RESTAPIリクエストを行うときにエラーが発生したかどうかを表示します。
- imgUrl-検索した画像をプレビューします。
- text-検索クエリ。
state = {text: '', loading: false, error: null, imgUrl: null}; JSXコードを追加します。 TextInputコンポーネントとImageコンポーネントを使用した垂直レイアウトがあります。
render() { return ( //Predefined style. See below <View style={styles.containerStyle}> {/* returnKeyType ~ imeOptions onSubmitEditing ~ et.OnEditorActionListener */} <TextInput style={styles.textInputStyle} placeholder="Enter text to search an image" returnKeyType='search' autoFocus={true} onChangeText={(text) => this.setState({text})} onSubmitEditing={() => this.searchPicture()}/> {/* Render error Image component if this.state.imgUrl is not equal to null */} { this.state.imgUrl && <Image source={{uri: this.state.imgUrl}} style={{flex: 1}}/> } </View> ); }新しいもの:
onChangeText={(text) => this.setState({text})} onSubmitEditing={() => this.searchPicture()} { this.state.imgUrl && <Image source={{uri: this.state.imgUrl}} style={{flex: 1}}/> } 最初のメソッドは、 TextWatcherコンポーネントを使用してEditTextと同様の作業を行います。 正直に言うと、ReactNativeの方がはるかに優れています。
2番目のメソッドは、 searchPicture()をトリガーした後、キーボード( et.OnEditorActionListener )でリターンキーが押されたときに呼び出されます。
'&&'演算子は最初の引数がすでにfalseの場合、2番目の引数をチェックしないため、 imgUrlがnullまたは未定義でない場合に画像がレンダリングされます。
this.state.imgUrl falseなのか疑問に思われるかもしれません。 そうですね、JavaScriptで論理演算子を使用する場合、''(空の文字列)、 0 、 false 、 null 、またはundefined以外はすべてtrueです。 特定のチェックは必要ありません。
searchPicture() { //Default state this.setState({loading: true, error: null, imgUrl: null}); axios.get('https://www.reddit.com/r/pics/search.json', { params: { //the get param map restrict_sr: 'on', //search only /r/pics limit: 1, //limit to one search item sort: 'new', //sort by creation date q: this.state.text //our search query } }).then(response => { //promise is resolved and 'then' block is triggered //set state with new values this.setState({ imgUrl: response.data.data.children[0] .data.preview.images[0].source.url, error: null, loading: false }) }).catch(error => {//Some error occurred //set error this.setState({error: error.message, loading: false, imgUrl: null}) }) }どうぞ。 アプリケーションは期待どおりに機能するはずです。 検索文字列を入力して、Returnキーを押します。
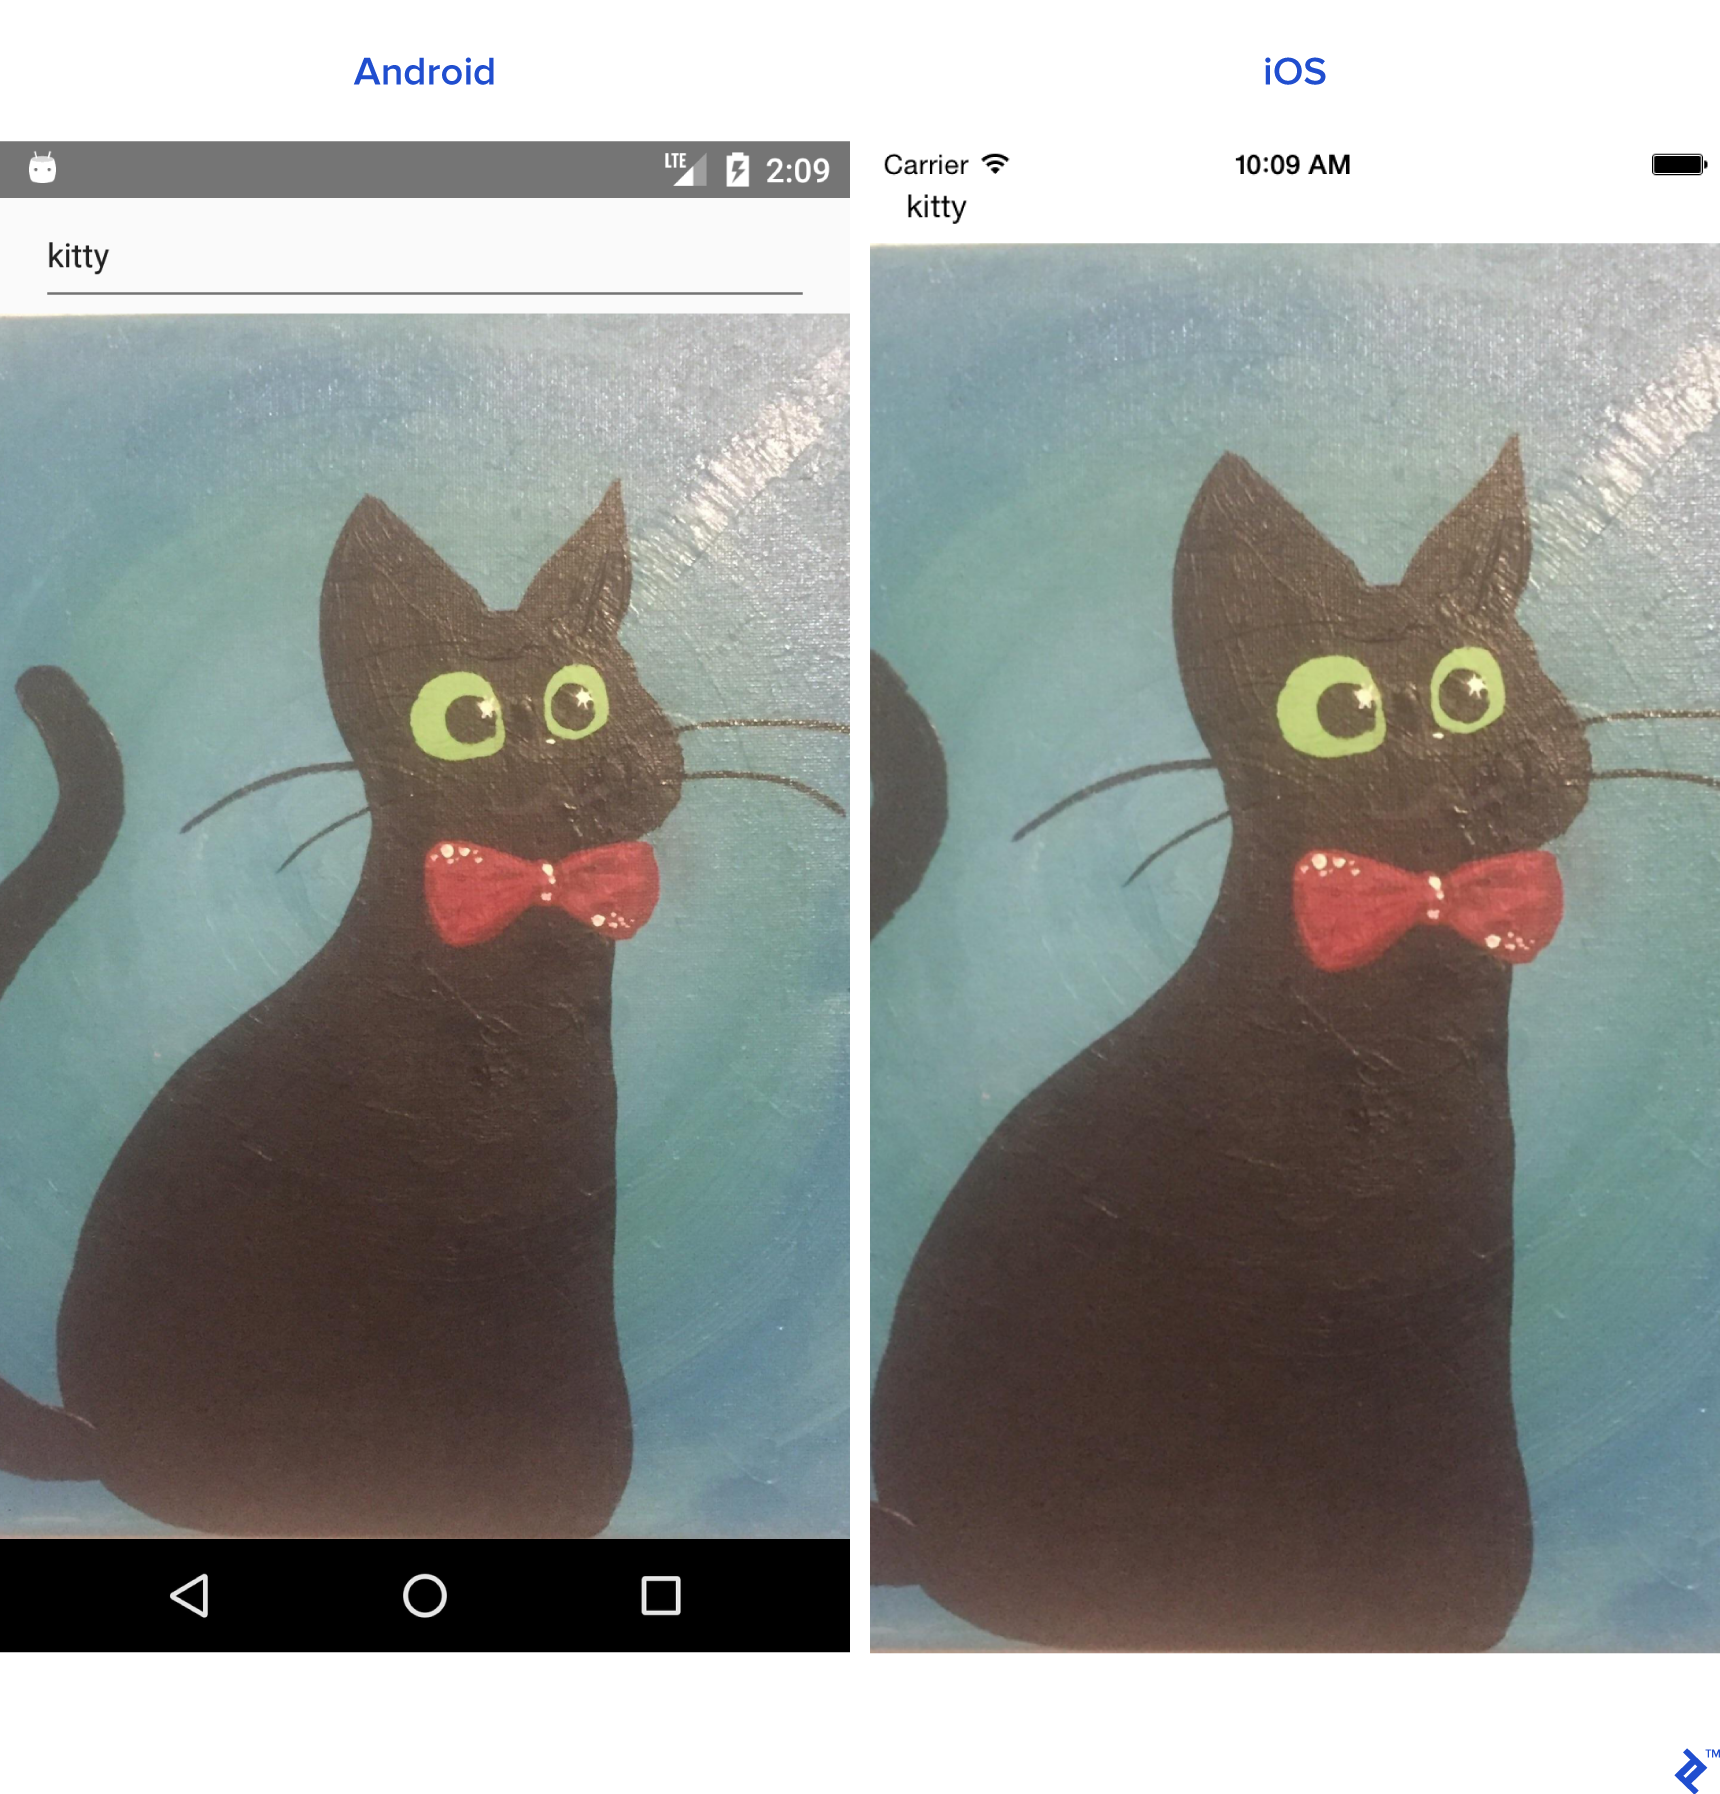
アプリケーションもActivityIndicatorとエラーをレンダリングする準備ができているため、 Imageコンポーネントの後にさらにコードを追加する必要があります。
{ //Separate method this.renderProgress() } {/* Render error Text component if this.state.error is not equal to null */} { this.state.error && <Text style={{margin: 16, color: 'red'}}> {this.state.error} </Text> } メインのrender()メソッドの外にレンダーコンポーネントを移動することもできます。
renderProgress() { //If this.state.loading is true //return View containing a progressbar //View takes style array if (this.state.loading === true) { return ( <View style={ [styles.containerStyle, {justifyContent: 'center'}]}> <ActivityIndicator color='#e57373'/> </View> ); } } 残っているのはスタイルだけです。 これらをAppクラスの外に置きます。
const styles = StyleSheet.create({ containerStyle: { flexDirection: 'column', flex: 1, //Since React Native is cross platform //let's handle both platforms. //Add top margin to fix status bar overlap marginTop: Platform.OS === 'ios' ? 20 : 0, }, textInputStyle: { marginLeft: 16, marginRight: 16, height: Platform.OS === 'ios' ? 30 : undefined } });アプリケーションの起動時にソフトキーボードを自動的に開くなど、さらに微調整を加えることができるようになりました。
TextInputを自動的にフォーカスさせる簡単な方法( autoFocus={true} prop )があることに注意してください。ただし、この例では、これを使用しません。
propを使用してTextInputへの参照を追加します。
ref={ref => this.searchInput = ref}
そして、次のようにcomponentDidMount()ライフサイクルメソッドをオーバーライドします。
componentDidMount(){ this.searchInput.focus(); }アプリをリロードすると、キーボードが自動的に開きます。
コンポーネントライフサイクルメソッド
すでにコンポーネントを作成しましたが、コンポーネントの寿命を見ていきましょう。
Reactのライフサイクルフローは次のとおりです。
-
constructor()-コンストラクターは、アプリケーションの開始時に常に呼び出されます static _getDerivedStateFromProps_(props, state)-レンダリング前と更新後に呼び出されます。 状態を更新するためのオブジェクトを返します。 何も更新しない場合はnullを返します。-
render()-レンダリングはすべてのReactComponentクラスに必要です。 ビューをレンダリングするために使用されます。 -
componentDidMount()-コンポーネントがレンダリングされてビューツリーにマウントされた後に呼び出されます。 -
shouldComponentUpdate(nextProps, nextState)-状態または小道具が変更された後に呼び出されます。 状態が更新されるたびに、デフォルトでtrueが返されます。 trueを返す場合、render()を呼び出します。 -
getSnapshotBeforeUpdate(prevProps, prevState)-レンダリングされた出力がコミットされる直前に呼び出されます。 -
componentDidUpdate(prevProps, prevState, snapshot)-新しい更新をレンダリングした後に呼び出されます。 最初のrender()の後には呼び出されません。 -
componentWillUnmount()-コンポーネントがマウント解除されて破棄される直前に呼び出されます。
再利用可能なコンポーネント
プロジェクトで作業するときに、再利用可能なコンポーネントを作成する必要があることがよくあります。 コンポーネントを作成するには、次の2つの方法があります。
-
React.Componentを拡張するクラスを作成します。 ライフサイクルメソッドが必要な場合は、このメソッドを使用する必要があります。 - より単純な構文のViewを返す関数を作成する。
すでにComponentクラスを作成しているので、このインスタンスの関数を作成しましょう。
<CardView>のアナログが必要だとします。 ./srcディレクトリの下に「common」フォルダを作成します。
CardView.jsを作成します。
import React from "react"; import {View} from "react-native"; export default CardView = (props) => { return ( //Style will be merged from default containerStyle //and props.style. props.style attributes will override //values if parameters are same. <View style={{...styles.containerStyle, ...props.style}}> {/* props.children contain subviews add this line if the component is container */} {props.children} </View> ); }; const styles = { containerStyle: { borderRadius: 4, margin: 5, padding: 5, elevation: 5, shadowColor: 'black', shadowRadius: 5, shadowOpacity: 0.5, shadowOffset: {width: 0, height: 3}, backgroundColor: 'white' } }; 新しいLoginFormレイアウトを使用したCardView :
import React from "react"; import {TextInput, Platform, Button, StyleSheet} from "react-native"; import CardView from "../common/components/CardView"; export default class LoginForm extends React._Component _{ render() { return ( //Override default style <CardView style={{ borderRadius: 4, backgroundColor: '#fff' }}> <TextInput placeholder="Email" style={styles.textInputStyle}/> <TextInput placeholder="Password" style={styles.textInputStyle} secureTextEntry={true}/> <Button color="#841584" title="Login" onPress={() => console.log("onLoginPress")} buttonStyle={styles.buttonStyle}/> </CardView> ); } } const styles = StyleSheet.create({ buttonStyle: { elevation: 5, height: 40 }, textInputStyle: { padding: 10, //Additional params to make //iOS inputs prettier ...Platform.select({ ios: { borderRadius: 2, marginTop: 5, backgroundColor: '#eeeeee' } }) } }); LoginFormクラスをAppクラスにインポートし、 Viewでラップします
<View style={{flex: 1, justifyContent: 'center'}}> <LoginForm/> </View>スタイルのパラメーターを微調整すると、より見栄えのするものを得ることができます。
ナビゲーション
さまざまなシーンへのナビゲーションは、ほとんどのアプリケーションにとって不可欠な部分です。 Reddit / r/picsブラウザーアプリを作成します。
ReactNativeでナビゲーションを作成するのはかなり簡単です。
前提条件
yarnまたはnpmを使用したreact-navigationをインストールしますyarnまたはnpmでaxiosをインストールします
2つの異なるコンポーネントを作成することから始めましょう。
注:以下のコードのほとんどは、すでにおなじみのはずです。 クラス全体を貼り付けます。
PictureList.js:
import React from 'react'; import { ActivityIndicator, FlatList, Image, Text, TouchableHighlight, View } from "react-native"; import axios from "axios"; import CardView from "../common/CardView"; export default class PictureList extends React.Component { state = {loading: true, error: null, posts: null}; componentDidMount() { axios.get('https://www.reddit.com/r/pics.json') .then(response => { this.setState({ posts: response.data.data.children, loading: false }) }).catch(error => { this.setState({ error: error.message, loading: false }) }) } render() { return ( <View style={{flex: 1, justifyContent: 'center'}}> // FlatList ~ ListView // data - DataSource for the List // renderItem - function returns View item // keyExtractor - Unique id for items {this.state.posts && <FlatList data={this.state.posts} renderItem={this.renderItem.bind(this)} keyExtractor={(item) => (item.data.id + '')}/>} {this.state.loading && <ActivityIndicator size="large" color="#f4511e"/>} </View> ); } navigateToPicture(title, url) { this.props.navigation.navigate('PicturePreview', { 'title': title, 'url': url }) } renderItem(item) { //Destructuring values from item //Read more 'ES6 destructuring' const {data} = item.item; const {title} = data; const {url} = data.preview.images[0].source; return ( //Clickable view <TouchableHighlight onPress={() => this.navigateToPicture(title, url)}> {/Reusing our CardView/} <CardView> <Image style={{height: 150}} source={{uri: url}}/> <Text style={{padding: 5}}>{title}</Text> </CardView> </TouchableHighlight> ) } } PicturePreview.js :
import React from 'react'; import {Image} from "react-native"; export default class PicturePreview extends React.Component { //Destructure navigation //Set title to header static _navigationOptions = ({navigation}) => ({ title: navigation.state.params.title }); render() { const {url} = this.props.navigation.state.params; return (<Image style={{flex: 1}} source={{uri: url}}/>) } } navigationOptionsは、React-Navigationによって自動的に呼び出されます。
それでは、 App.jsに移動しましょう
注:React-Navigationには多くのナビゲーションタイプがあります。 今日は、 StackNavigationに焦点を当てます。 詳細は公式サイトをご覧ください。
import React from 'react'; import {createStackNavigator} from "react-navigation"; import PictureList from "./components/PictureList"; import PicturePreview from "./components/PicturePreview"; export default class App extends React.Component { render() { return ( <Router/> ); } } //Customize the header_ const NavigationOptions = { headerTintColor: '#fff', headerStyle: { backgroundColor: '#f4511e', } }; //Create the router. const Router = createStackNavigator({ //Name the screen 'PictureList': { //Link the Component screen: PictureList, //Additional navigation options navigationOptions: { title: '/r/pics Browser', ...NavigationOptions } }, 'PicturePreview': { screen: PicturePreview, navigationOptions: NavigationOptions } }, { //Root initialRouterName: 'PictureList' } );ご覧のとおり、ナビゲーションルーターを作成し、アプリにレンダリングさせるだけです。 すべてがうまくいけば、機能的なReddit / r/picsブラウザーアプリができあがります。
アンドロイド:
iOS:
React Nativeは素晴らしいです!
プログラミングを始めて以来、私は純粋にモバイル開発の経験を積んでいます。 しかし今では、モバイル、デスクトップ、Webなど、Reactを使用してほとんどすべてのコードを作成できます。
React Nativeを使用して次のすばらしいアプリケーションの開発を開始することにした場合、そこには癖といくつかのバグがあることに気付くでしょうが、React Nativeは非常に機能的で、ほとんどのプロジェクトに理想的です。