
Android 개발을 위한 React Native에 대해 알아보기
게시 됨: 2022-03-11몇 년 전 제 동료가 React Native에 대해 말했습니다. 저는 매우 회의적이었습니다. 나는 그것이 실생활에서 결코 작동하지 않을 또 다른 플랫폼 간 프레임워크일 뿐이라고 주장했습니다. 내가 얼마나 틀렸는지 거의 알지 못했습니다.
몇 년이 흐르고 React Native 기술에 대한 수요가 매우 높아졌습니다. 오랜만에 새로운 것을 배웠으니 한 번 도전해 보지 않겠습니까? 오늘, 저는 거대한 React Native 옹호자입니다.
단점:
- 더 이상 Android Studio를 사용할 수 없습니다.
- React Native는 모든 애플리케이션이나 기능에 사용할 수 없습니다.
- React Native는 새로운 프레임워크이며 업데이트는 현재 코드베이스에 부정적인 영향을 미칠 수 있습니다.
- JavaScript는 엄격한 형식의 언어가 아닙니다.
- React Native를 실행하려면 JavaScript 엔진이 필요하므로 성능이 저하될 수 있습니다.
장점:
- 배우기 쉬움
- 플랫폼 경험을 일치시키는 데 필요한 약간의 조정만으로 Android와 iOS 앱 간의 공유 코드베이스
- 더 이상 무한한 빌드 시간을 의미하지 않는 라이브 및 핫 리로딩
- 두 플랫폼의 기본 구성 요소
- 지속적으로 개선
- 활발하게 성장하는 커뮤니티
- 엄청난 수의 라이브러리
- iOS용으로 개발하기 위해 Mac을 소유할 필요가 없는 Expo
- 노동 자원 감소 - 여전히 일부 Android/iOS 기본 개발이 필요할 수 있지만 드물 것입니다.
계속 진행할 수 있지만 여기에서 멈추고 이 블로그 게시물의 주제로 이동하겠습니다. 이 게시물에서는 4개의 React Native 기반 Android 앱을 만들 것입니다.
- 카운터를 증가 및 감소시키는 버튼이 있는 기본 카운터
- r/pics 하위 레딧을 검색하는 앱
- 일반 로그인 페이지
- r/pics 하위 레딧을 탐색하는 앱
IDE
위에서 언급했듯이 React Native 개발에 Android Studio를 사용할 수 있는 방법은 없습니다. 우리는 대안이 필요합니다. React Native는 아마도 시중에 나와 있는 모든 최신 텍스트 편집기(Atom, VS Code, Sublime Text, Brackets 등)에서 개발할 수 있지만 Android Studio 경험과 함께 제공되기 때문에 내가 가장 좋아하는 것은 같은 회사에서 구축한 WebStorm입니다. WebStorm은 유료 애플리케이션(연간 129$)이지만 Early Access 버전을 설치할 수 있습니다. WebStorm의 EAP 빌드는 무료이며 매우 안정적입니다. 완전히 무료인 편집기를 선호한다면 VS Code로 이동하십시오. Microsoft는 심지어 이를 위한 놀라운 React Native 플러그인을 개발했으며 매우 잘 작동합니다.
새 프로젝트 만들기
전제 조건: Android SDK, Node 및 React Native가 컴퓨터에 설치되어 있어야 합니다.
새로운 React Native 프로젝트를 만드는 방법에는 두 가지가 있습니다.
- 기존 방식. WebStorm GUI 또는 터미널 명령 사용:
react-native init AwesomeToptalProject - 더 쉬운 방법은 "React Native App 만들기"입니다.
create-react-native-app AwesomeToptalProject
create-react-native-app 을 사용하면 생성된 프로젝트가 expo로 부트스트랩됩니다. 자세히 설명하지는 않겠지만 기본적으로 iOS에서 앱을 실행하기 위해 Xcode를 설치할 필요가 없다는 의미입니다. 또한 expo.io의 기능 및 기타 기능을 통해 클라이언트를 항상 최신 상태로 유지하는 것이 더 쉽습니다. 하지만 네이티브 코드는 추가할 수 없습니다. 따라서 특정 기능을 개발하는 경우 엑스포에서 앱을 꺼내고 대신 일반 React Native 프로젝트를 사용해야 할 수도 있습니다.
나는 첫 번째 방법을 사용할 것입니다.
프로젝트를 실행해 봅시다. 먼저 에뮬레이터를 열거나 장치를 연결하십시오. WebStorm GUI로 프로젝트를 생성했다면 구성을 선택하기만 하면 됩니다. WebStorm의 오른쪽 상단 모서리에서 실행 버튼 왼쪽에 있는 드롭다운을 클릭하고 Android를 선택한 다음 실행 또는 디버그를 클릭합니다. 터미널을 사용하여 프로젝트를 만든 경우 새 React Native 구성을 추가하거나 터미널을 사용하여 실행할 수 있습니다.
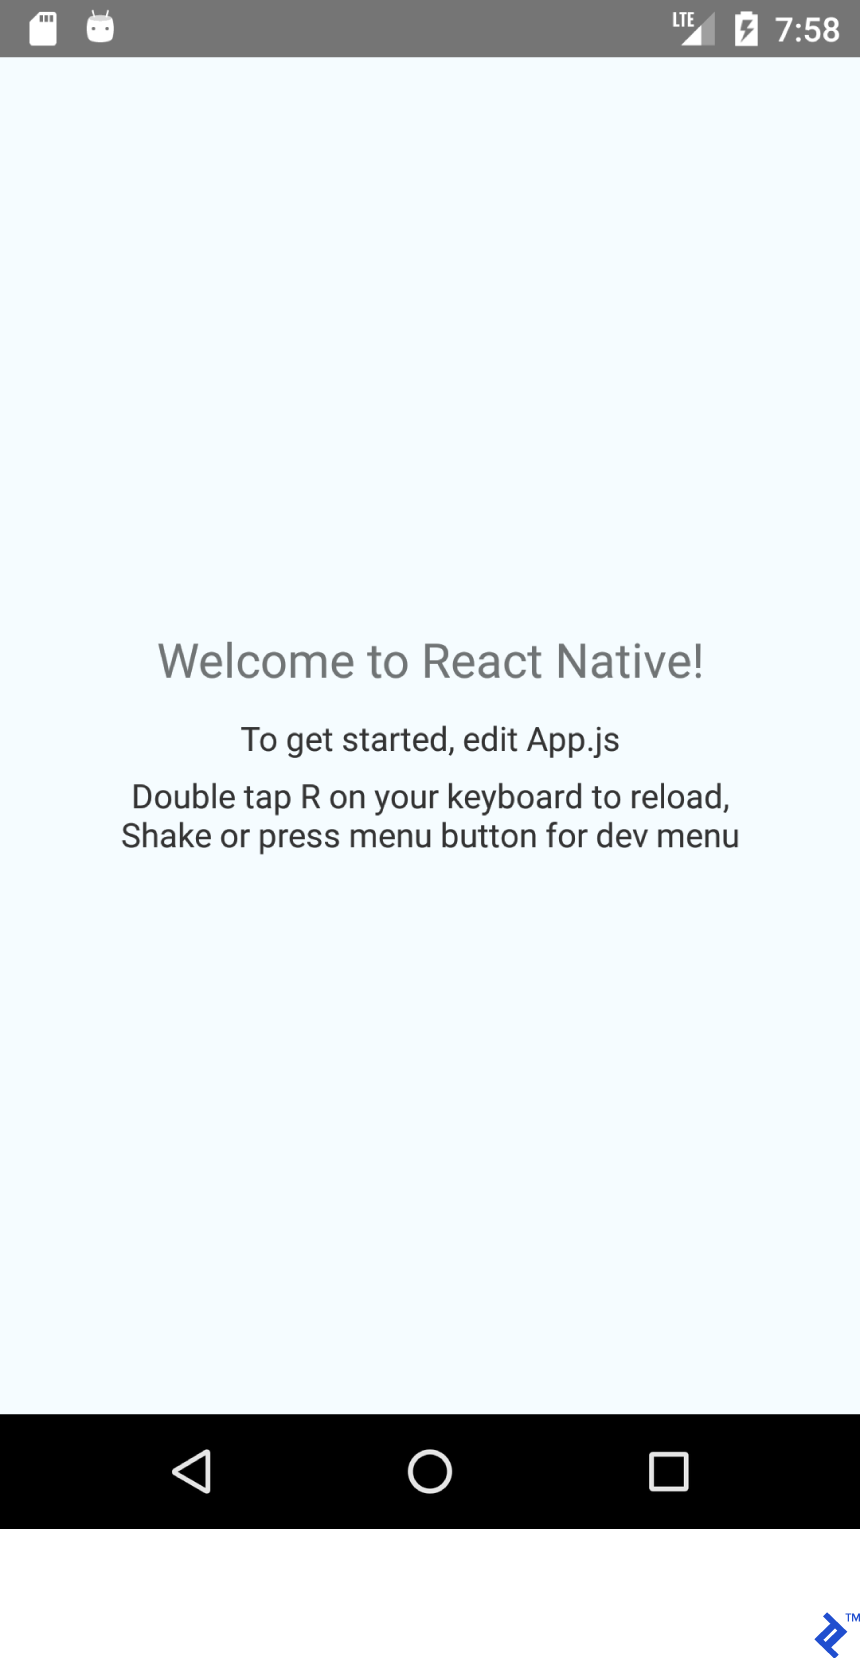
cd AwesomeToptalProject react-native run-android모든 것이 잘 되었다면 다음과 같은 화면이 나타날 것입니다.
구조 및 기본 설정
프로젝트 내에서 주목할만한 항목은 다음과 같습니다.
- android - React Native 지원으로 미리 구성된 Android Studio 프로젝트입니다.
- ios - React Native 지원으로 미리 구성된 Xcode 프로젝트.
- node_modules - React Native 프레임워크 및 기타 Javascript 라이브러리가 포함된 폴더입니다.
- index.js - 앱의 진입점입니다.
- App.js - 초기 구성 요소가 로드되었습니다.
프로젝트의 루트 안에 "src" 폴더를 만들고 거기에 App.js를 옮겨봅시다. 새 App.js 위치와 일치하도록 index.js 가져오기를 업데이트해야 합니다.
import App from './src/App';App.js 내부의 모든 것을 삭제하고 다음 코드를 붙여넣습니다.
import React from 'react'; import {Text} from 'react-native'; export default class App extends React.Component { render() { return ( <Text>Hello TopTal</Text> ); } } 우리가 붙여넣은 코드는 매우 간단합니다. render() 메서드를 재정의하고 Text 구성 요소를 반환하는 클래스 App ( React.Component 의 자식)을 만들었습니다. React.Component 는 JSX를 사용하여 UI를 빌드하기 위한 기본 클래스입니다. export default 수정자는 클래스를 public 으로 만듭니다.
이제 레이아웃 디자인을 시작할 준비가 되었습니다.
Flexbox를 사용한 레이아웃
Flexbox 는 LinearLayout 과 유사하지만 Flexbox 는 LinearLayout 의 능력을 훨씬 뛰어넘습니다.
이 JSX 스니펫:
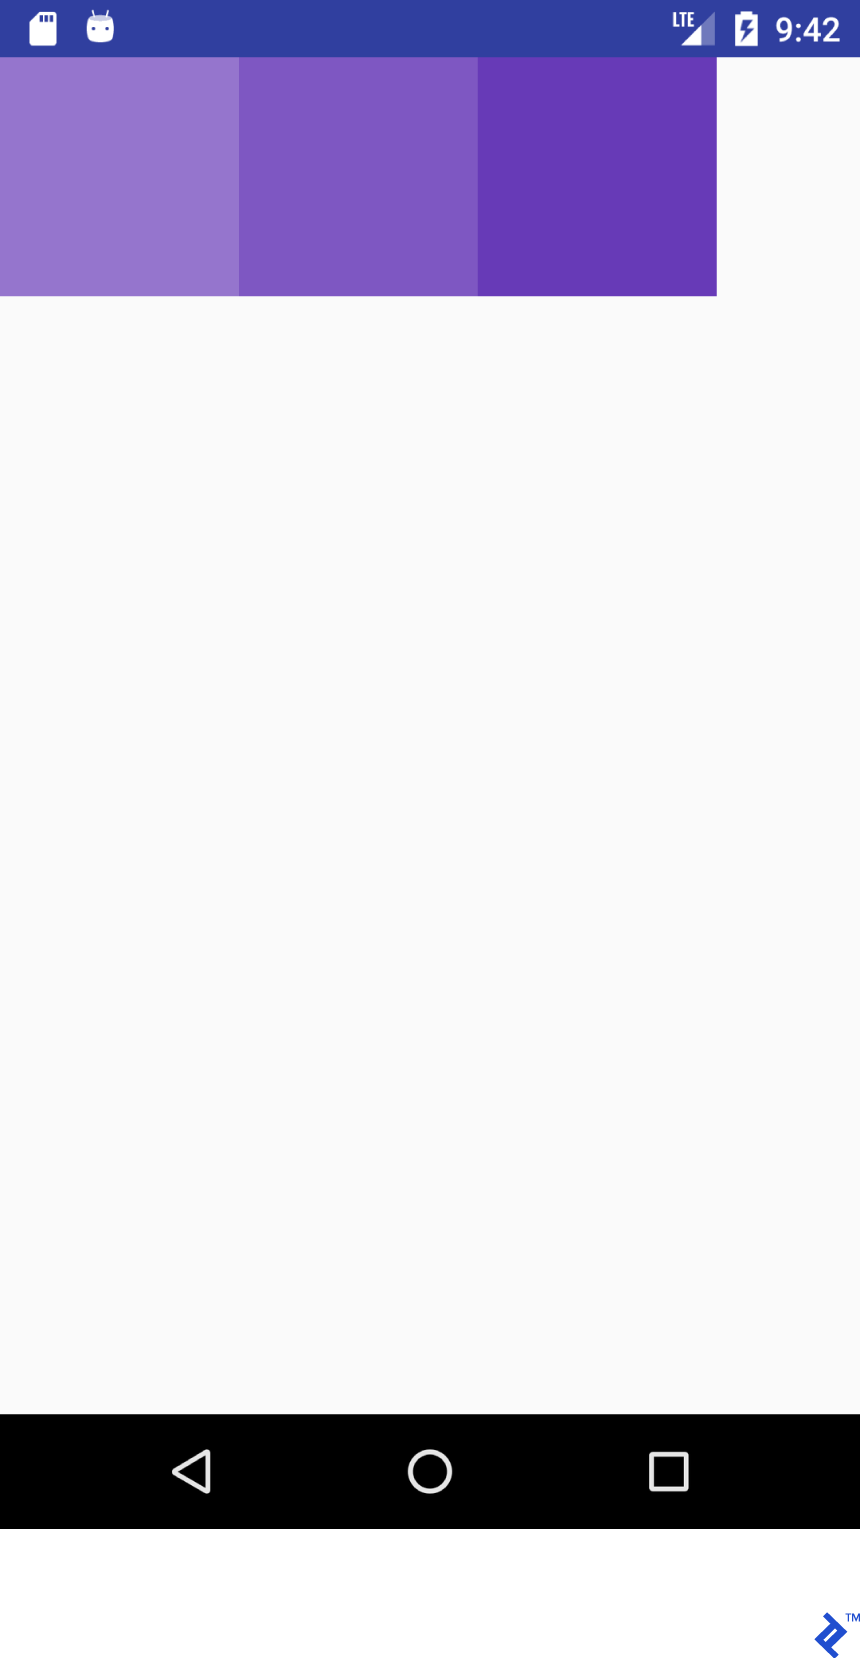
<View style={{ flex: 1, flexDirection: 'row' }}> <View style={{ width: 100, height: 100, backgroundColor: '#9575CD' }}/> <View style={{ width: 100, height: 100, backgroundColor: '#7E57C2' }}/> <View style={{ width: 100, height: 100, backgroundColor: '#673AB7' }}/> </View>다음 레이아웃을 렌더링합니다.

이 XML 동안:
<LinearLayout android:layout_width="match_parent" android:layout_height="match_parent" android:orientation="horizontal"> <View android:layout_width="100dp" android:layout_height="100dp" android:background="#9575CD" /> <View android:layout_width="100dp" android:layout_height="100dp" android:background="#7E57C2" /> <View android:layout_width="100dp" android:layout_height="100dp" android:background="#673AB7" /> </LinearLayout>다음을 렌더링합니다.
JSX 코드가 친숙해 보이죠? JSX와 Android XML에서 비슷하게 보이는 레이아웃을 사용하여 "사전"(또는 치트시트)을 만들어 보겠습니다.
기능이 반드시 같지는 않습니다. React Native 초보자가 React Native의 레이아웃 시스템에 대한 아이디어를 이해할 수 있도록 도와주려고 합니다. 자세한 내용은 공식 가이드를 참조하십시오.
다음 JSX 속성을 고려하십시오.
flex: 1다음과 같습니다.
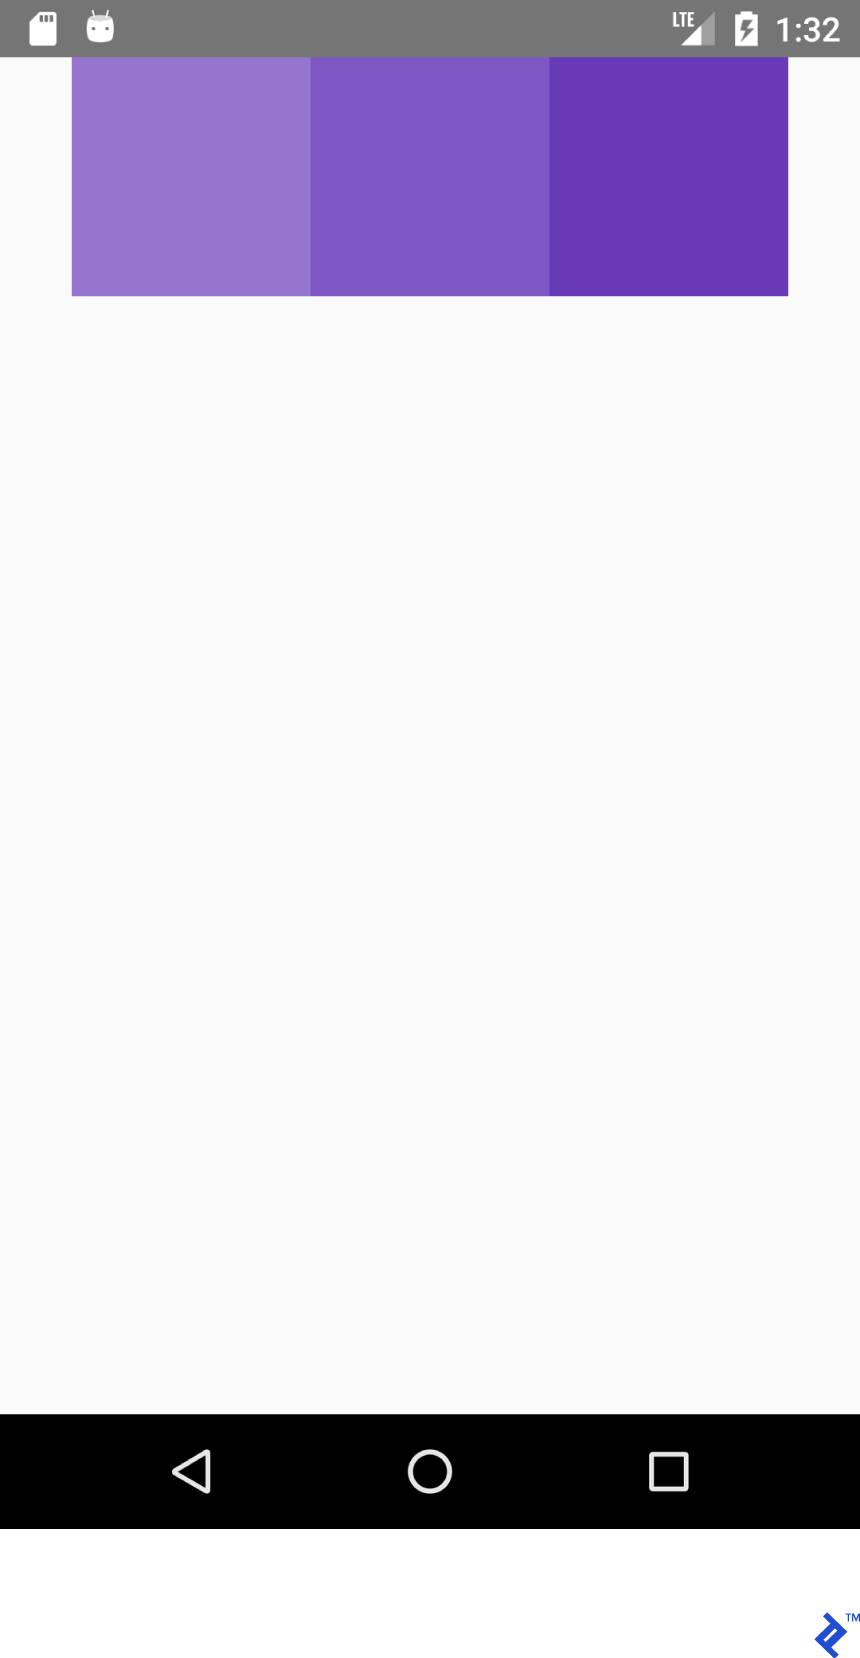
android:layout_width="match_parent" android:layout_height="match_parent"이 JSX 스니펫:
<View style={{flex: 1, flexDirection: 'row'}}> <View style={{ width: 100, height: 100, backgroundColor: '#9575CD'}}/> <View style={{ width: 100, height: 100, backgroundColor: '#7E57C2'}}/> <View style={{ width: 100, height: 100, backgroundColor: '#673AB7'}}/> </View>그리고 이 XML:
<LinearLayout android:layout_width="match_parent" android:layout_height="match_parent" android:orientation="horizontal"> <View android:layout_width="100dp" android:layout_height="100dp" android:background="#9575CD" /> <View android:layout_width="100dp" android:layout_height="100dp" android:background="#7E57C2" /> <View android:layout_width="100dp" android:layout_height="100dp" android:background="#673AB7" /> </LinearLayout>둘 다 다음 출력을 생성합니다.
마찬가지로 이 JSX:
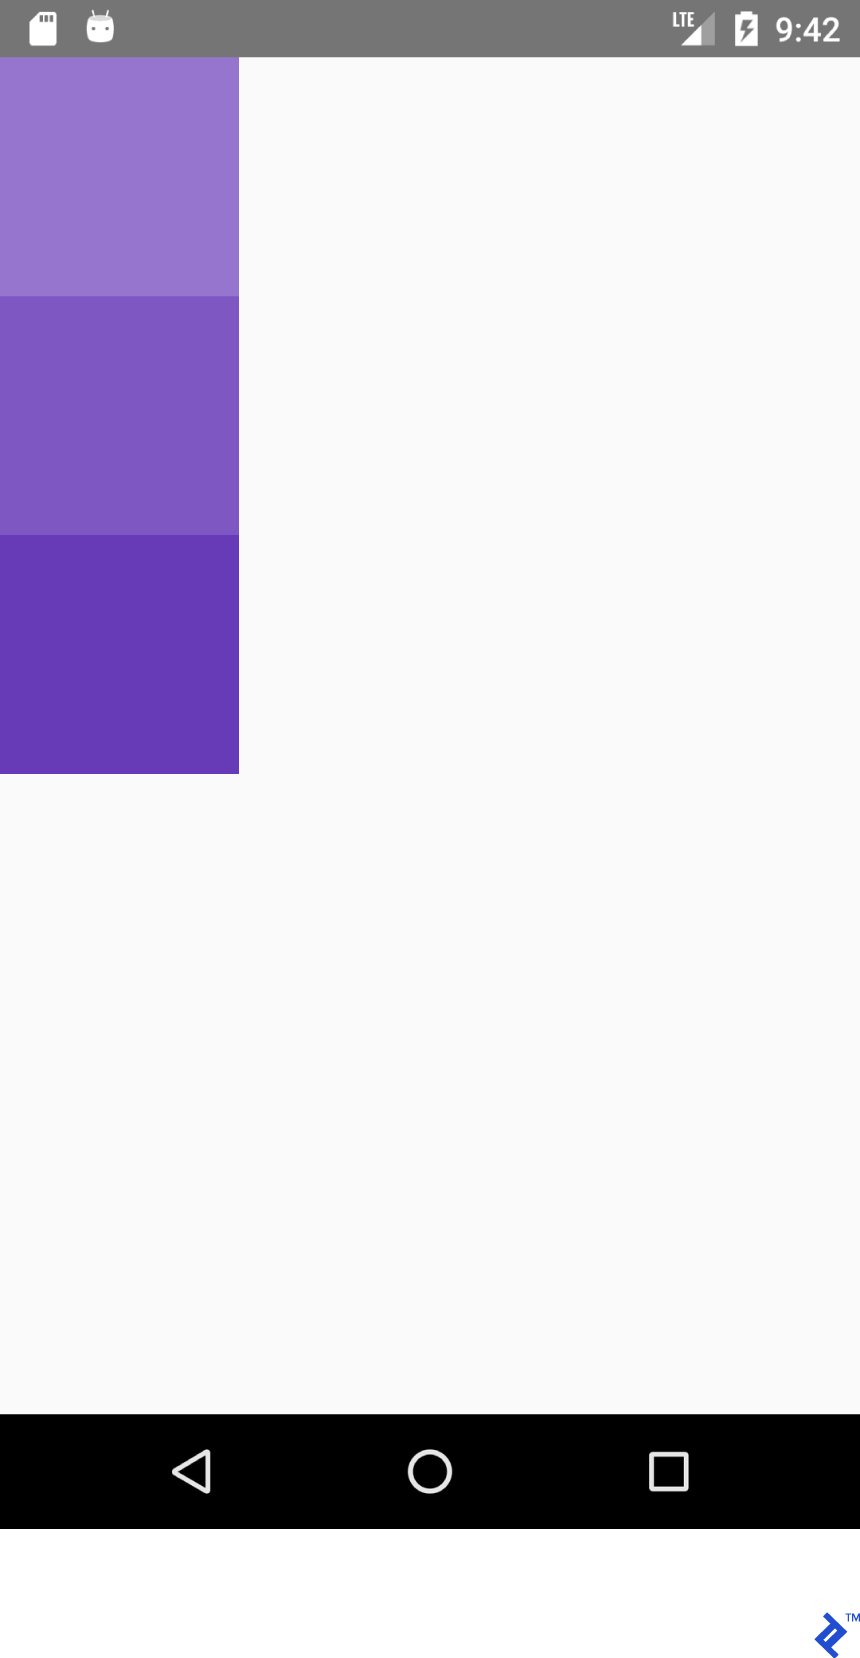
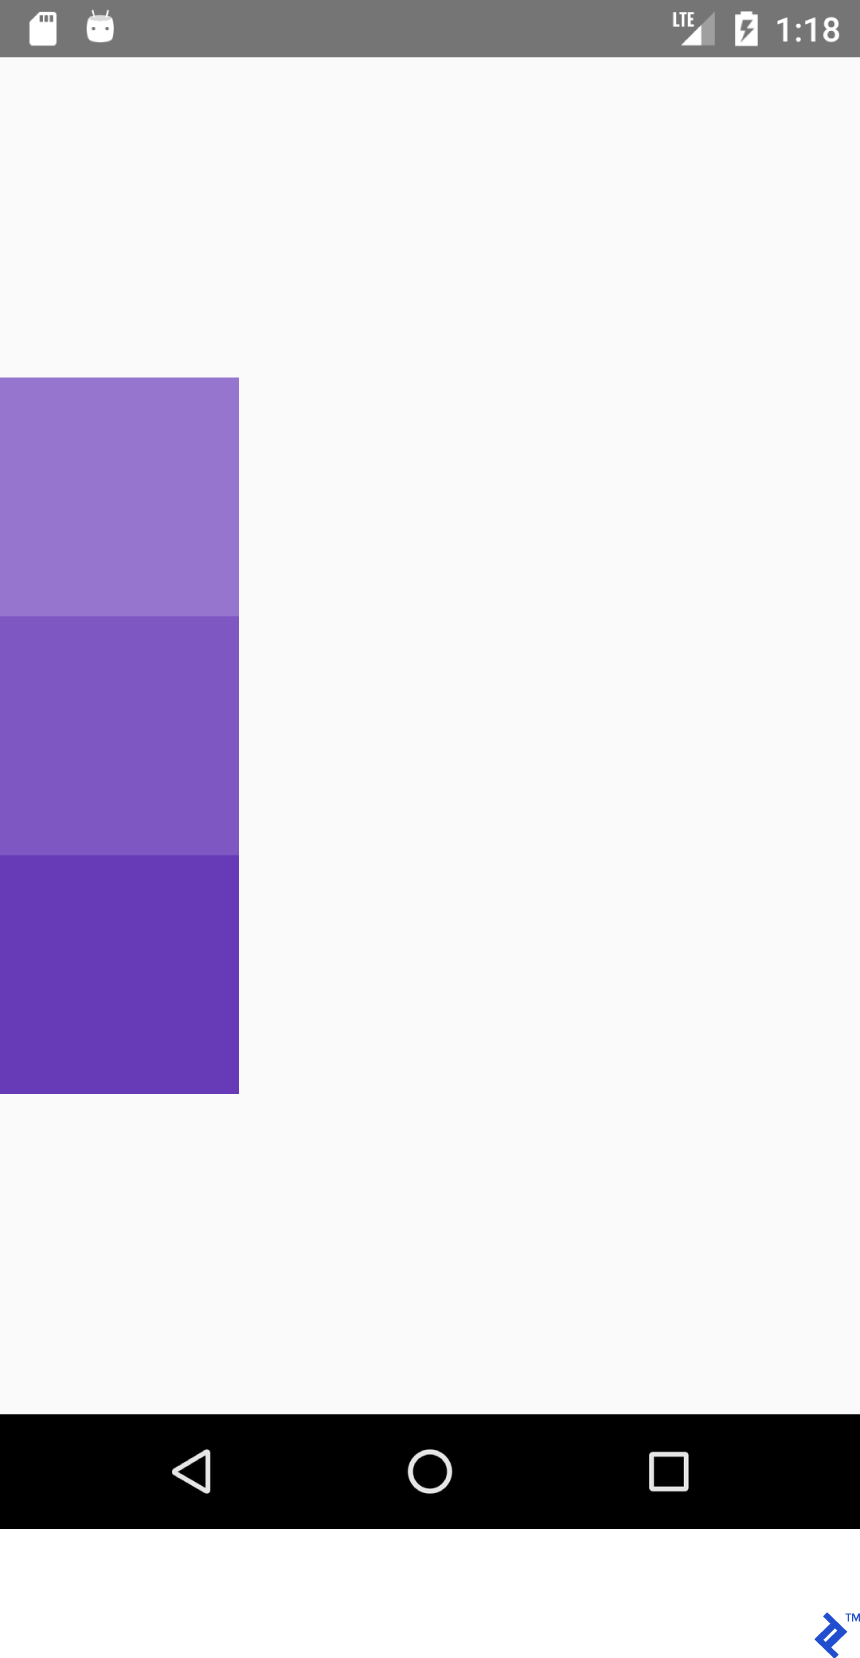
<View style={{flex: 1, flexDirection: 'column'}}> <View style={{ width: 100, height: 100, backgroundColor: '#9575CD'}}/> <View style={{ width: 100, height: 100, backgroundColor: '#7E57C2'}}/> <View style={{ width: 100, height: 100, backgroundColor: '#673AB7'}}/> </View>그리고 이 XML:
<LinearLayout android:layout_width="match_parent" android:layout_height="match_parent" android:orientation="vertical"> <View android:layout_width="100dp" android:layout_height="100dp" android:background="#9575CD" /> <View android:layout_width="100dp" android:layout_height="100dp" android:background="#7E57C2" /> <View android:layout_width="100dp" android:layout_height="100dp" android:background="#673AB7" /> </LinearLayout>이것을 생성하십시오:
컨테이너 내부의 올바른 위치를 달성하기 위해 가장 일반적으로 flexDirection , alignItems 및 justifyContent 속성의 조합을 사용합니다.
이 JSX:
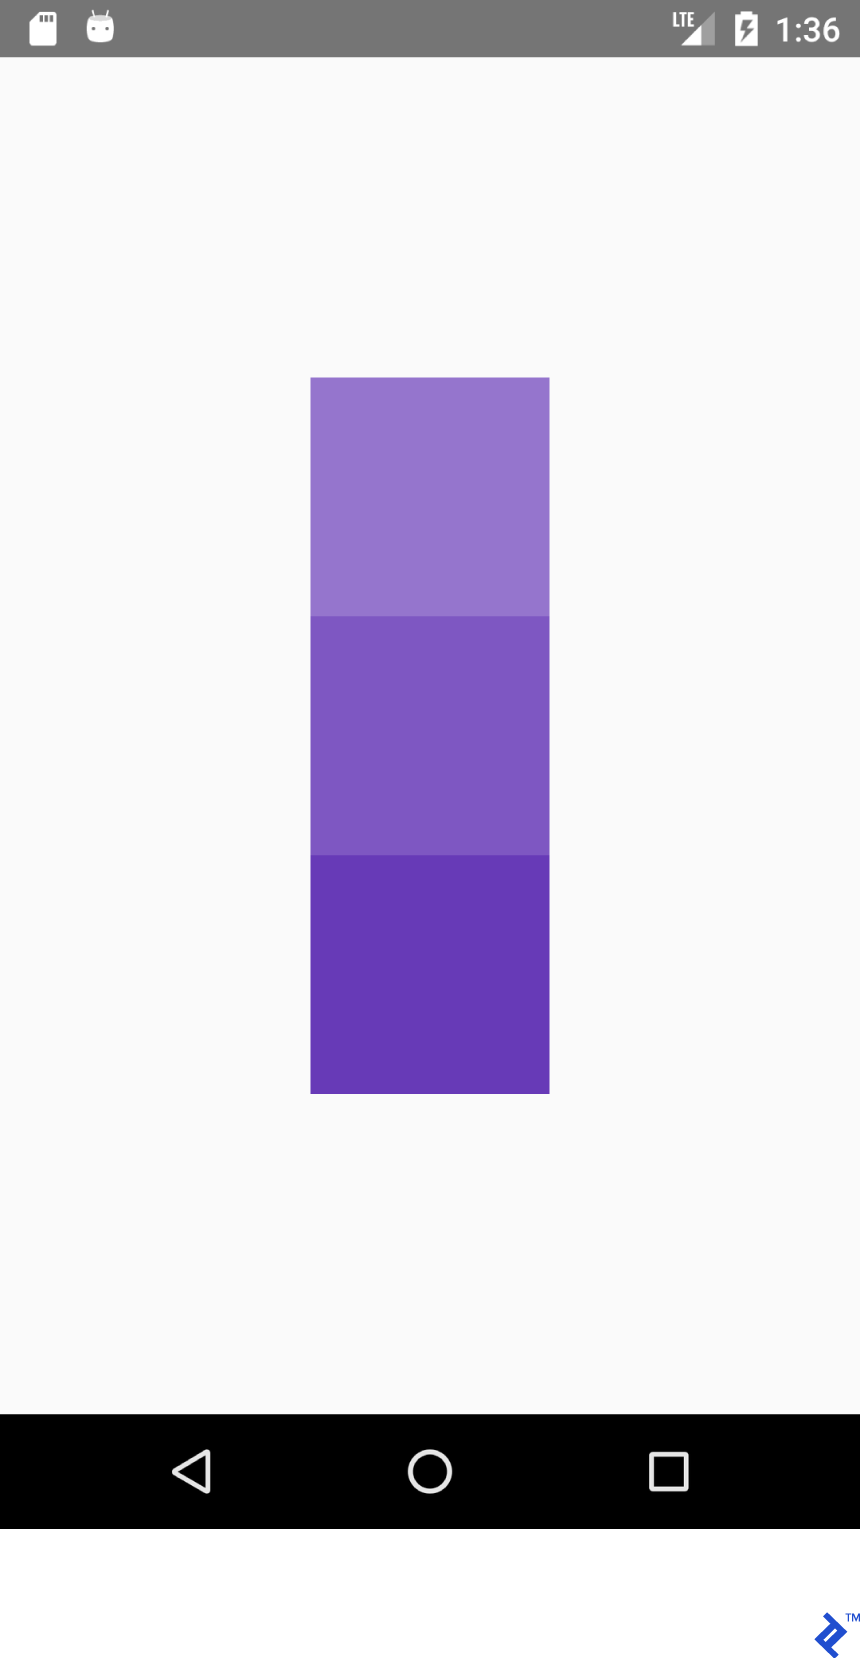
<View style={{flex: 1, flexDirection: 'column', alignItems: 'center'}}> <View style={{ width: 100, height: 100, backgroundColor: '#9575CD'}}/> <View style={{ width: 100, height: 100, backgroundColor: '#7E57C2'}}/> <View style={{ width: 100, height: 100, backgroundColor: '#673AB7'}}/> </View>그리고 이 XML:
<LinearLayout android:layout_width="match_parent" android:layout_height="match_parent" android:gravity="center_horizontal" android:orientation="vertical"> <View android:layout_width="100dp" android:layout_height="100dp" android:background="#9575CD" /> <View android:layout_width="100dp" android:layout_height="100dp" android:background="#7E57C2" /> <View android:layout_width="100dp" android:layout_height="100dp" android:background="#673AB7" /> </LinearLayout>다음 레이아웃을 생성합니다.

이 JSX:
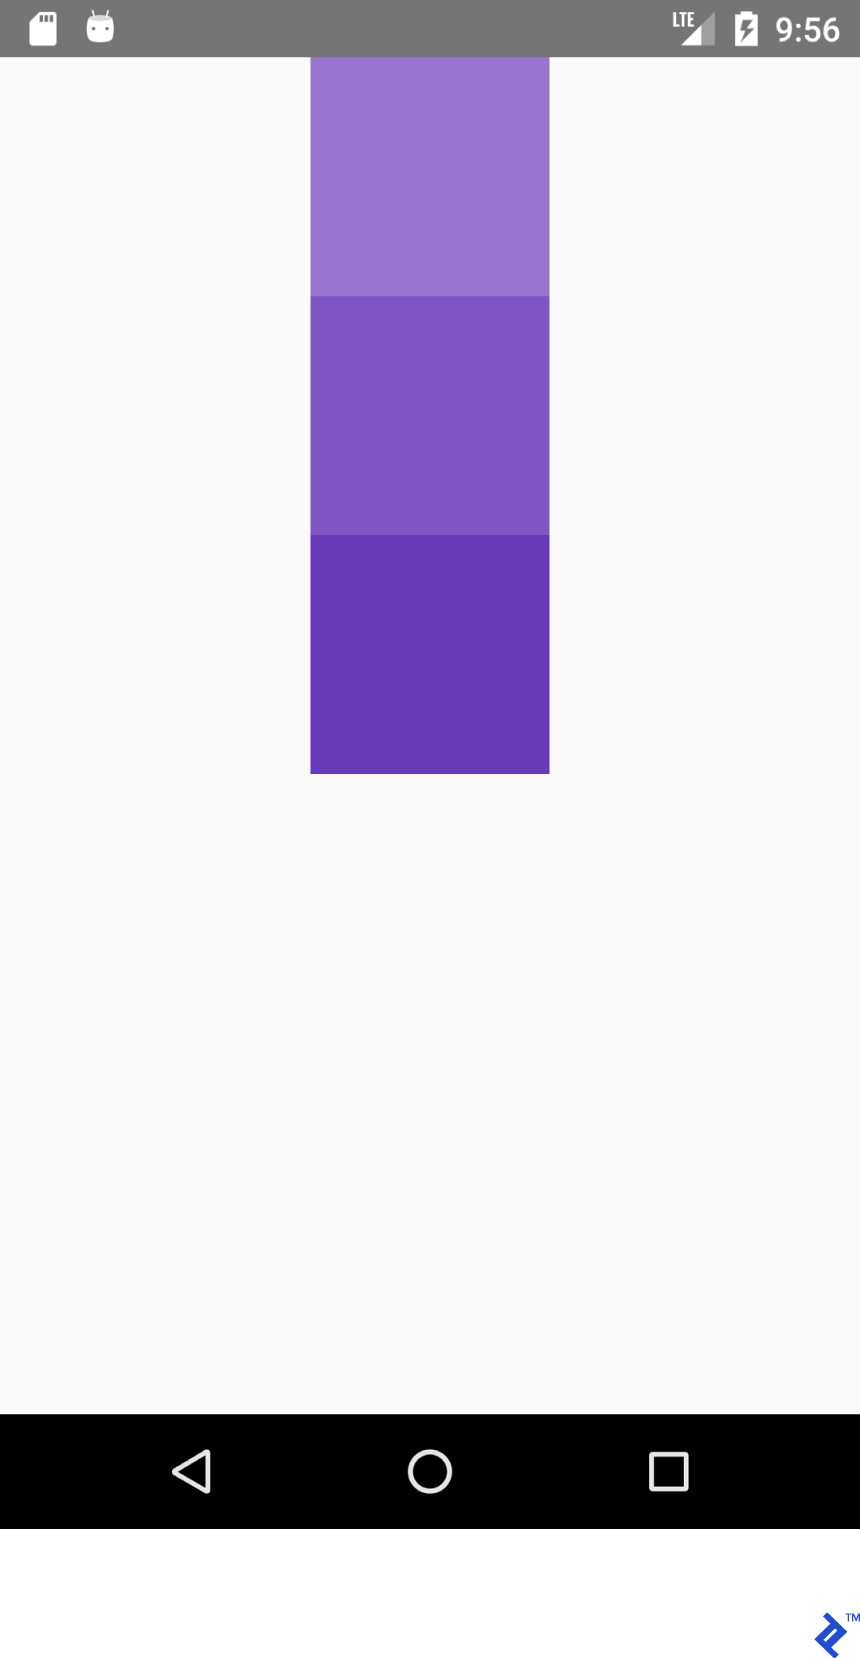
<View style={{flex: 1, flexDirection: 'column', justifyContent: 'center'}}> <View style={{ width: 100, height: 100, backgroundColor: '#9575CD'}}/> <View style={{ width: 100, height: 100, backgroundColor: '#7E57C2'}}/> <View style={{ width: 100, height: 100, backgroundColor: '#673AB7'}}/> </View>그리고 이 XML
<LinearLayout android:layout_width="match_parent" android:layout_height="match_parent" android:gravity="center_vertical" android:orientation="vertical"> <View android:layout_width="100dp" android:layout_height="100dp" android:background="#9575CD" /> <View android:layout_width="100dp" android:layout_height="100dp" android:background="#7E57C2" /> <View android:layout_width="100dp" android:layout_height="100dp" android:background="#673AB7" /> </LinearLayout>다음 레이아웃을 생성합니다.
이 JSX:
<View style={{flex: 1, flexDirection: 'row', justifyContent: 'center'}}> <View style={{ width: 100, height: 100, backgroundColor: '#9575CD'}}/> <View style={{ width: 100, height: 100, backgroundColor: '#7E57C2'}}/> <View style={{ width: 100, height: 100, backgroundColor: '#673AB7'}}/> </View>그리고 이 XML:
<LinearLayout android:layout_width="match_parent" android:layout_height="match_parent" android:gravity="center_horizontal" android:orientation="horizontal"> <View android:layout_width="100dp" android:layout_height="100dp" android:background="#9575CD" /> <View android:layout_width="100dp" android:layout_height="100dp" android:background="#7E57C2" /> <View android:layout_width="100dp" android:layout_height="100dp" android:background="#673AB7" /> </LinearLayout>다음 레이아웃을 생성합니다.
이 JSX:
<View style={{flex: 1, flexDirection: 'row', justifyContent: 'center', alignItems: 'center'}}> <View style={{ width: 100, height: 100, backgroundColor: '#9575CD'}}/> <View style={{ width: 100, height: 100, backgroundColor: '#7E57C2'}}/> <View style={{ width: 100, height: 100, backgroundColor: '#673AB7'}}/> </View>그리고 이 XML:
<LinearLayout android:layout_width="match_parent" android:layout_height="match_parent" android:gravity="center" android:orientation="vertical"> <View android:layout_width="100dp" android:layout_height="100dp" android:background="#9575CD" /> <View android:layout_width="100dp" android:layout_height="100dp" android:background="#7E57C2" /> <View android:layout_width="100dp" android:layout_height="100dp" android:background="#673AB7" /> </LinearLayout>다음 레이아웃을 생성합니다.
배울 교훈: flexDirection: row', 가 있는 경우 alignItems works on Y axis and works on X axis. Everything is mirrored for works on X axis. Everything is mirrored for 됩니다. - justifyContent 는 Y축에 영향을 미치고 alignItems 은 Y축에 영향을 줍니다.
| justifyContent: '플렉스 시작' | 중력="시작|왼쪽" |
| alignItems: '플렉스 시작' | 중력="시작|왼쪽" |
| justifyContent: '플렉스 엔드' | 중력="끝|오른쪽" |
| alignItems: '플렉스 엔드' | 중력="끝|오른쪽" |
직접 해보십시오. justifyContent 값을 space-around , space- space-between , space-evenly 설정합니다.
상태 관리
애플리케이션 상태를 업데이트하기 위해 React의 state 변수를 사용할 것입니다. state 가 업데이트될 때마다 render() 가 호출됩니다.
아래 코드를 앱에 복사합니다.
import React from 'react'; import {Button, Text, View} from 'react-native'; export default class App extends React.Component { /* Initialize state object with variable 'number' set to 0 and variable name with value of empty string */ state = {number: 0}; render() { return ( <View style={{ flexDirection: 'row', justifyContent: 'space-between', alignItems: 'center', flex: 1, padding: 20 }}> <Button title='Decrement' color='#e57373' onPress={() => this.decrement()}/> <Text> {/* Text will be automatically updated whenever state.number has changed value */} Value = {this.state.number} </Text> <Button title='Increment' color='#64B5F6' {/* Set listener for click */} onPress={() => this.increment()}/> </View> ); } //Declaration of decrement function decrement() { //To update the state we need invoke this.setState //with new value for variable 'number' this.setState({number: this.state.number - 1}); } increment() { this.setState({number: this.state.number + 1}); } }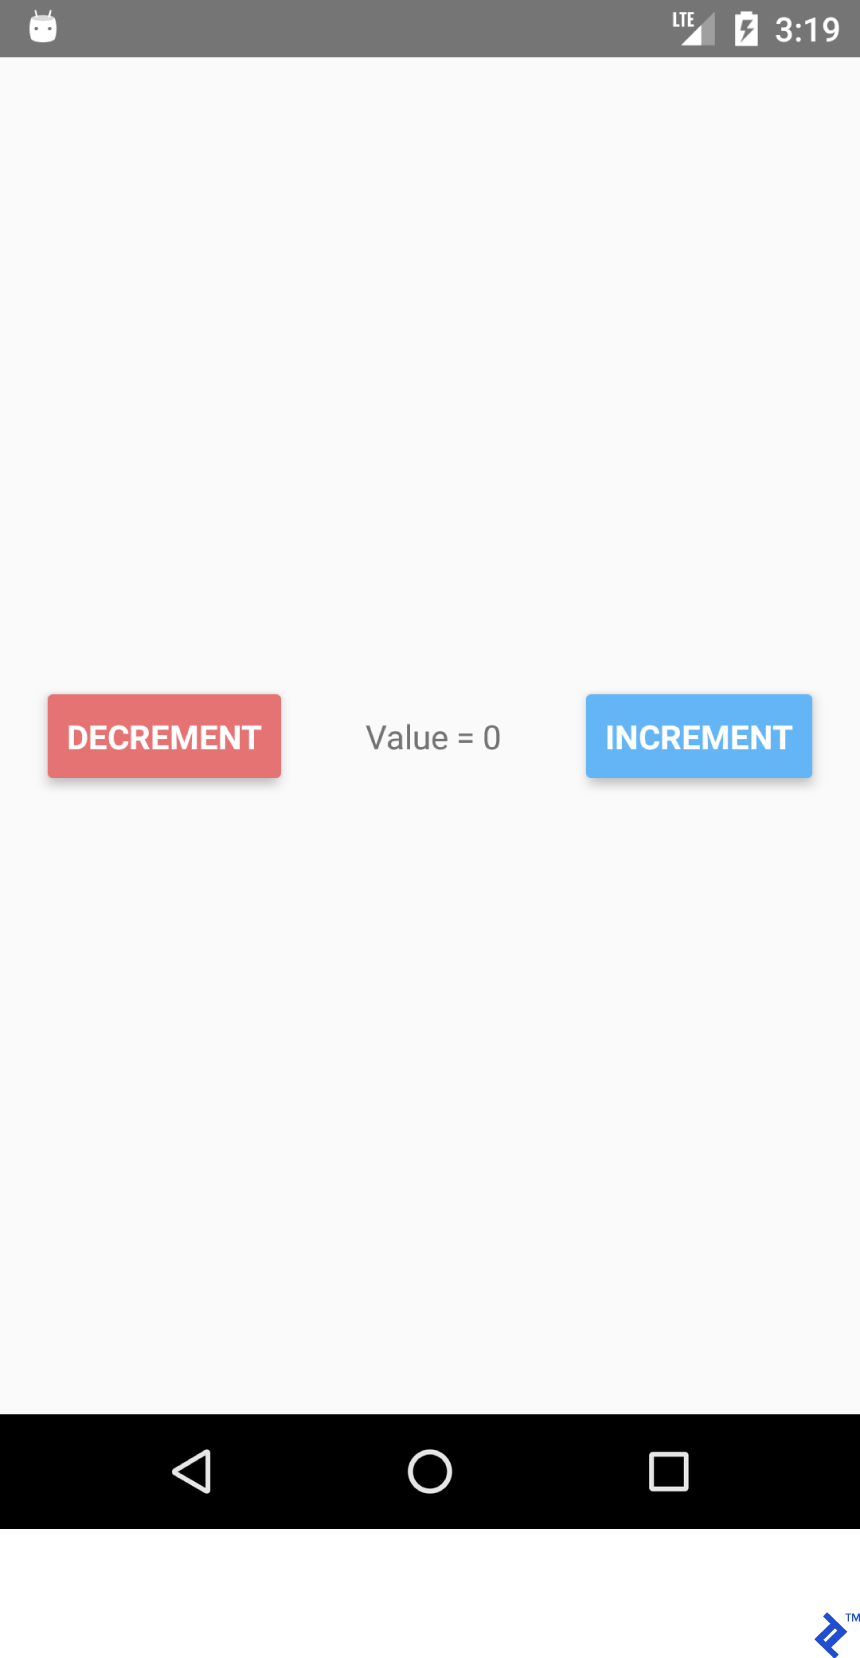
DECREMENT 및 INCREMENT 버튼을 클릭하면 텍스트가 자동으로 업데이트되는 것을 볼 수 있습니다. 명시적으로 textView.setText("Value " + number) 를 사용할 필요가 없습니다.

상태 기능은 여러 가지 이유로 유용합니다.
- 값을 쉽게 얻을 수 있습니다. 특정 변수에 대한 값을 어디서 어떻게 얻을 수 있는지 항상 알고 있습니다.
- 데이터는 특정 위젯에 바인딩되지 않습니다.
- 공통 값 변경에 따라 여러 위젯이 있습니다.
/r/pics용 검색 앱 만들기
이제 기본 사항을 다루었으므로 조금 더 복잡한 /r/pics 검색 앱을 만들어 보겠습니다. Reddit은 간단한 JSON API 엔드포인트를 제공하므로 제대로 작동하기 위해 인증을 받기 위해 부수적인 퀘스트를 수행할 필요가 없습니다.
React Native는 내장된 Fetch API를 제공합니다. 우리 대부분은 Retrofit 과 사용 편의성에 익숙할 것이므로 axios 를 사용할 것입니다. 터미널 명령을 통해 axios 를 설치할 수 있습니다.
yarn 사용(내가 선호하는 방법):
yarn add axios
또는 npm 사용 :
npm install axios
수입품:
import React from 'react'; import { TextInput, View, Text, Image, ActivityIndicator, Platform, StyleSheet } from 'react-native'; import axios from 'axios'; TextInput = EditText, ActivityIndicator = ProgressBar Platform - Platform detecting module StyleSheet - Module for creating stylesheets and moving them away from JSX클래스 생성:
export default class App extends React.Component { }상태를 초기화합니다. 다음이 필요합니다.
- loading - 진행률 표시줄을 표시합니다.
- error - REST API 요청을 할 때 일부 오류가 발생했는지 표시합니다.
- imgUrl - 검색된 이미지를 미리 봅니다.
- 텍스트 - 검색어.
state = {text: '', loading: false, error: null, imgUrl: null}; JSX 코드를 추가합니다. TextInput 및 Image 구성 요소가 있는 세로 레이아웃이 있습니다.
render() { return ( //Predefined style. See below <View style={styles.containerStyle}> {/* returnKeyType ~ imeOptions onSubmitEditing ~ et.OnEditorActionListener */} <TextInput style={styles.textInputStyle} placeholder="Enter text to search an image" returnKeyType='search' autoFocus={true} onChangeText={(text) => this.setState({text})} onSubmitEditing={() => this.searchPicture()}/> {/* Render error Image component if this.state.imgUrl is not equal to null */} { this.state.imgUrl && <Image source={{uri: this.state.imgUrl}} style={{flex: 1}}/> } </View> ); }새로운 것:
onChangeText={(text) => this.setState({text})} onSubmitEditing={() => this.searchPicture()} { this.state.imgUrl && <Image source={{uri: this.state.imgUrl}} style={{flex: 1}}/> } 첫 번째 방법은 TextWatcher 구성 요소가 있는 EditText 와 유사한 작업을 수행합니다. 솔직히 말하면 React Native가 훨씬 좋습니다.
두 번째 메서드는 searchPicture() 를 트리거한 후 키보드( et.OnEditorActionListener )에서 리턴 키를 누르면 호출됩니다.
첫 번째 인수가 이미 false인 경우 '&&' 연산자가 두 번째 인수를 확인하지 않기 때문에 imgUrl 이 null이 아니거나 정의되지 않은 경우 이미지가 렌더링됩니다.
this.state.imgUrl 이 false인 이유가 궁금할 것입니다. 글쎄, JavaScript에서 논리 연산자를 사용할 때 ''(빈 문자열), 0 , false , null 또는 undefined 를 제외한 모든 것이 true입니다. 특별한 검사가 필요하지 않습니다.
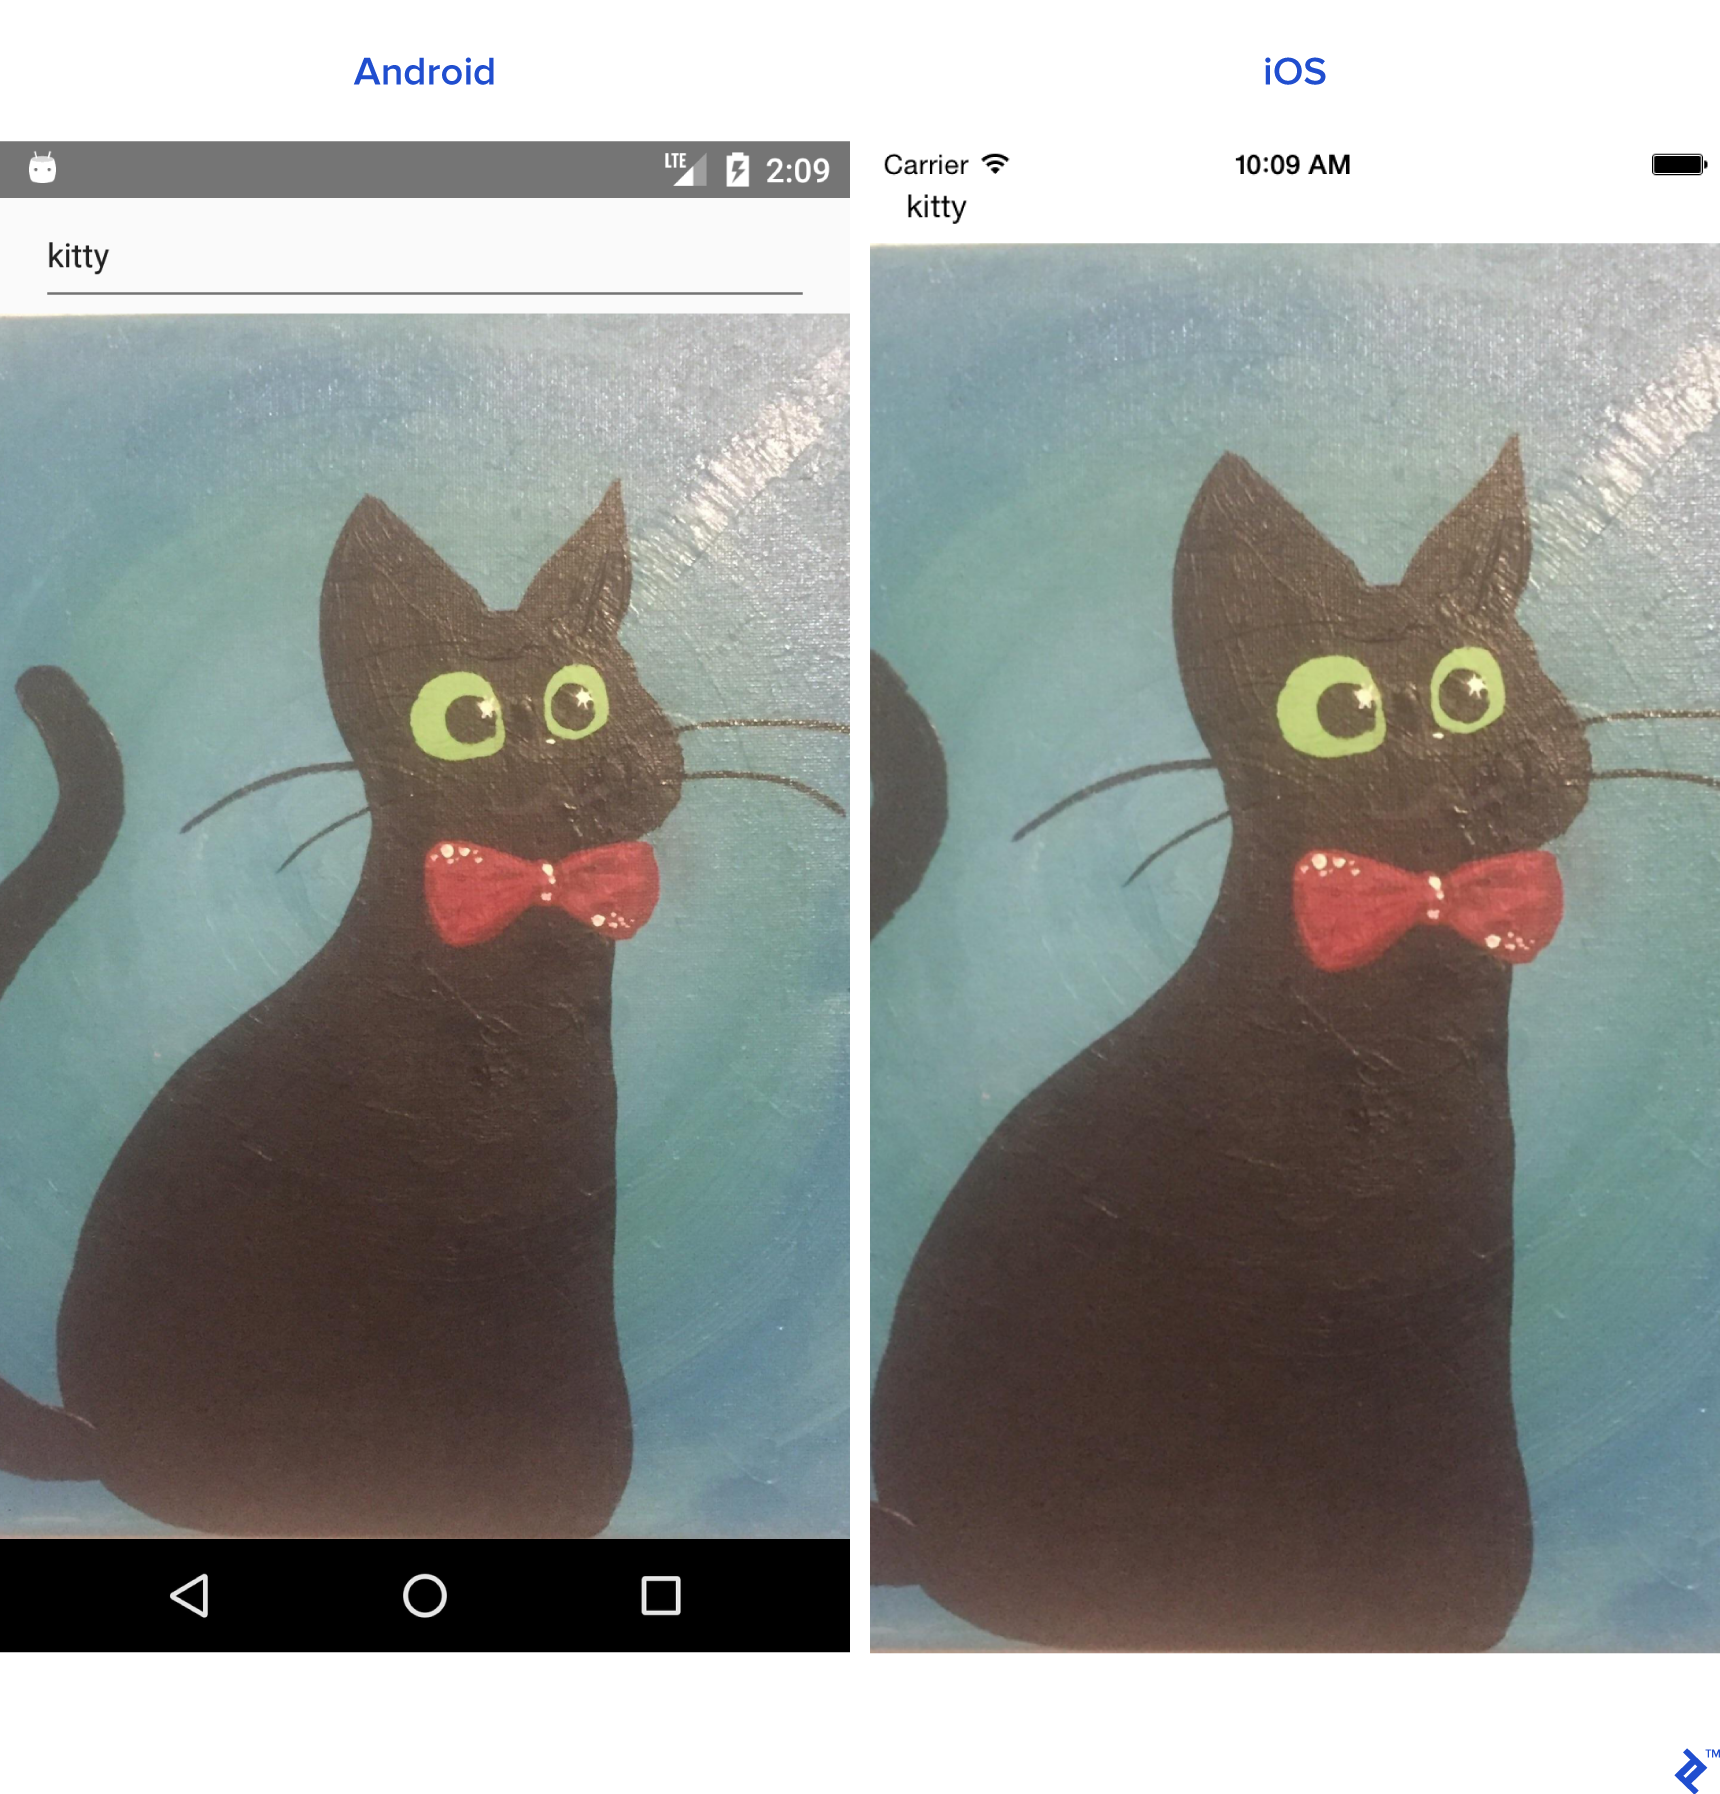
searchPicture() { //Default state this.setState({loading: true, error: null, imgUrl: null}); axios.get('https://www.reddit.com/r/pics/search.json', { params: { //the get param map restrict_sr: 'on', //search only /r/pics limit: 1, //limit to one search item sort: 'new', //sort by creation date q: this.state.text //our search query } }).then(response => { //promise is resolved and 'then' block is triggered //set state with new values this.setState({ imgUrl: response.data.data.children[0] .data.preview.images[0].source.url, error: null, loading: false }) }).catch(error => {//Some error occurred //set error this.setState({error: error.message, loading: false, imgUrl: null}) }) }여기 우리가 간다. 이제 응용 프로그램이 예상대로 작동해야 합니다. 검색 문자열을 입력하고 리턴을 누르십시오.
우리 애플리케이션은 ActivityIndicator 와 오류를 렌더링할 준비가 되었기 때문에 Image 구성 요소 뒤에 몇 가지 코드를 더 추가해야 합니다.
{ //Separate method this.renderProgress() } {/* Render error Text component if this.state.error is not equal to null */} { this.state.error && <Text style={{margin: 16, color: 'red'}}> {this.state.error} </Text> } 기본 render() 메서드 외부에서도 렌더 구성 요소를 이동할 수 있습니다.
renderProgress() { //If this.state.loading is true //return View containing a progressbar //View takes style array if (this.state.loading === true) { return ( <View style={ [styles.containerStyle, {justifyContent: 'center'}]}> <ActivityIndicator color='#e57373'/> </View> ); } } 스타일만 남았다. 이것들을 App 클래스 외부에 두십시오.
const styles = StyleSheet.create({ containerStyle: { flexDirection: 'column', flex: 1, //Since React Native is cross platform //let's handle both platforms. //Add top margin to fix status bar overlap marginTop: Platform.OS === 'ios' ? 20 : 0, }, textInputStyle: { marginLeft: 16, marginRight: 16, height: Platform.OS === 'ios' ? 30 : undefined } });이제 응용 프로그램이 시작될 때 소프트 키보드를 자동으로 여는 것과 같은 몇 가지 조정을 더 추가할 수 있습니다.
TextInput 이 자동으로 초점을 맞추도록 하는 더 쉬운 방법( autoFocus={true} prop )이 있지만 이 예에서는 사용하지 않습니다.
prop을 사용하여 TextInput 에 대한 참조를 추가합니다.
ref={ref => this.searchInput = ref}
다음과 같이 componentDidMount() 수명 주기 메서드를 재정의합니다.
componentDidMount(){ this.searchInput.focus(); }앱을 새로고침하면 키보드가 자동으로 열립니다.
구성 요소 수명 주기 방법
이미 구성 요소를 만들었지만 구성 요소의 수명을 살펴보겠습니다.
다음은 React의 수명 주기 흐름입니다.
-
constructor()- 생성자는 응용 프로그램이 시작될 때 항상 호출됩니다. -
static _getDerivedStateFromProps_(props, state)- 렌더링 전과 업데이트 후에 호출됩니다. 상태 업데이트를 위한 객체를 반환합니다. 아무것도 업데이트하지 않으려면 null을 반환합니다. -
render()- 모든 React Component 클래스에 대해 Render가 필요합니다. View를 렌더링하는 데 사용됩니다. -
componentDidMount()- 구성 요소가 렌더링되고 뷰 트리에 탑재된 후 호출됩니다. -
shouldComponentUpdate(nextProps, nextState)- state 또는 props가 변경된 후에 호출됩니다. 모든 상태 업데이트 후 반환은 기본적으로 true로 설정됩니다. true를 반환하면render()를 호출합니다. -
getSnapshotBeforeUpdate(prevProps, prevState)- 렌더링된 출력이 커밋되기 직전에 호출됩니다. -
componentDidUpdate(prevProps, prevState, snapshot)- 새 업데이트를 렌더링한 후 호출됩니다. 첫 번째render()이후에는 호출되지 않습니다. -
componentWillUnmount()- 컴포넌트가 마운트 해제되고 파괴되기 직전에 호출됩니다.
재사용 가능한 구성 요소
프로젝트에서 작업할 때 재사용 가능한 구성 요소를 만들어야 하는 경우가 많습니다. 구성 요소를 만드는 방법에는 두 가지가 있습니다.
-
React.Component를 확장하는 클래스 만들기. 수명 주기 메서드가 필요한 경우 이 메서드를 사용해야 합니다. - 더 간단한 구문을 위해 View를 반환하는 함수를 작성합니다.
이미 Component 클래스를 생성했으므로 이 인스턴스에 대한 함수를 생성해 보겠습니다.
<CardView> 에 대한 아날로그가 필요하다고 가정합니다. ./src 디렉토리 아래에 "common" 폴더를 만듭니다.
CardView.js 를 만듭니다.
import React from "react"; import {View} from "react-native"; export default CardView = (props) => { return ( //Style will be merged from default containerStyle //and props.style. props.style attributes will override //values if parameters are same. <View style={{...styles.containerStyle, ...props.style}}> {/* props.children contain subviews add this line if the component is container */} {props.children} </View> ); }; const styles = { containerStyle: { borderRadius: 4, margin: 5, padding: 5, elevation: 5, shadowColor: 'black', shadowRadius: 5, shadowOpacity: 0.5, shadowOffset: {width: 0, height: 3}, backgroundColor: 'white' } }; 새로운 CardView 레이아웃을 사용하는 LoginForm :
import React from "react"; import {TextInput, Platform, Button, StyleSheet} from "react-native"; import CardView from "../common/components/CardView"; export default class LoginForm extends React._Component _{ render() { return ( //Override default style <CardView style={{ borderRadius: 4, backgroundColor: '#fff' }}> <TextInput placeholder="Email" style={styles.textInputStyle}/> <TextInput placeholder="Password" style={styles.textInputStyle} secureTextEntry={true}/> <Button color="#841584" title="Login" onPress={() => console.log("onLoginPress")} buttonStyle={styles.buttonStyle}/> </CardView> ); } } const styles = StyleSheet.create({ buttonStyle: { elevation: 5, height: 40 }, textInputStyle: { padding: 10, //Additional params to make //iOS inputs prettier ...Platform.select({ ios: { borderRadius: 2, marginTop: 5, backgroundColor: '#eeeeee' } }) } }); App 클래스에서 LoginForm 클래스를 가져오고 View 로 래핑합니다.
<View style={{flex: 1, justifyContent: 'center'}}> <LoginForm/> </View>스타일에서 매개변수를 조정하면 훨씬 더 멋지게 보일 수 있습니다.
항해
다른 장면으로의 탐색은 대부분의 응용 프로그램에서 필수적인 부분입니다. Reddit /r/pics 브라우저 앱을 만들 것입니다.
React Native에서 탐색을 만드는 것은 상당히 쉽습니다.
전제 조건
-
yarn또는npm으로react-navigation설치 -
yarn또는npm으로axios설치
두 개의 다른 구성 요소를 만드는 것으로 시작하겠습니다.
참고: 아래 코드의 대부분은 이미 익숙할 것입니다. 나는 전체 수업을 붙여 넣을 것입니다.
PictureList.js:
import React from 'react'; import { ActivityIndicator, FlatList, Image, Text, TouchableHighlight, View } from "react-native"; import axios from "axios"; import CardView from "../common/CardView"; export default class PictureList extends React.Component { state = {loading: true, error: null, posts: null}; componentDidMount() { axios.get('https://www.reddit.com/r/pics.json') .then(response => { this.setState({ posts: response.data.data.children, loading: false }) }).catch(error => { this.setState({ error: error.message, loading: false }) }) } render() { return ( <View style={{flex: 1, justifyContent: 'center'}}> // FlatList ~ ListView // data - DataSource for the List // renderItem - function returns View item // keyExtractor - Unique id for items {this.state.posts && <FlatList data={this.state.posts} renderItem={this.renderItem.bind(this)} keyExtractor={(item) => (item.data.id + '')}/>} {this.state.loading && <ActivityIndicator size="large" color="#f4511e"/>} </View> ); } navigateToPicture(title, url) { this.props.navigation.navigate('PicturePreview', { 'title': title, 'url': url }) } renderItem(item) { //Destructuring values from item //Read more 'ES6 destructuring' const {data} = item.item; const {title} = data; const {url} = data.preview.images[0].source; return ( //Clickable view <TouchableHighlight onPress={() => this.navigateToPicture(title, url)}> {/Reusing our CardView/} <CardView> <Image style={{height: 150}} source={{uri: url}}/> <Text style={{padding: 5}}>{title}</Text> </CardView> </TouchableHighlight> ) } } PicturePreview.js :
import React from 'react'; import {Image} from "react-native"; export default class PicturePreview extends React.Component { //Destructure navigation //Set title to header static _navigationOptions = ({navigation}) => ({ title: navigation.state.params.title }); render() { const {url} = this.props.navigation.state.params; return (<Image style={{flex: 1}} source={{uri: url}}/>) } } navigationOptions 는 React-Navigation에 의해 자동으로 호출됩니다.
이제 App.js 로 이동하겠습니다.
참고: React-Navigation에는 많은 탐색 유형이 있습니다. 오늘, 우리는 StackNavigation 에 초점을 맞출 것입니다. 자세한 내용은 공식 웹사이트를 참조하세요.
import React from 'react'; import {createStackNavigator} from "react-navigation"; import PictureList from "./components/PictureList"; import PicturePreview from "./components/PicturePreview"; export default class App extends React.Component { render() { return ( <Router/> ); } } //Customize the header_ const NavigationOptions = { headerTintColor: '#fff', headerStyle: { backgroundColor: '#f4511e', } }; //Create the router. const Router = createStackNavigator({ //Name the screen 'PictureList': { //Link the Component screen: PictureList, //Additional navigation options navigationOptions: { title: '/r/pics Browser', ...NavigationOptions } }, 'PicturePreview': { screen: PicturePreview, navigationOptions: NavigationOptions } }, { //Root initialRouterName: 'PictureList' } );보시다시피 탐색 라우터를 만들고 앱 에서 렌더링하도록 하기만 하면 됩니다. 모든 것이 잘 되었다면 Reddit /r/pics 브라우저 앱이 작동할 것입니다.
기계적 인조 인간:
iOS:
React Native는 놀랍습니다!
프로그래밍을 시작한 이후로 순전히 모바일 개발 경험이 있었습니다. 하지만 이제 모바일, 데스크톱, 웹 등 React로 거의 모든 것을 코딩할 수 있습니다.
React Native를 사용하여 다음 놀라운 애플리케이션 개발을 시작하기로 결정했다면 여기 저기에 단점과 몇 가지 버그가 있지만 React Native는 대부분의 프로젝트에 매우 기능적이고 이상적입니다.