
Servlet Tutorial: การเริ่มต้นใช้งาน JSP – Servlet Example
เผยแพร่แล้ว: 2013-07-16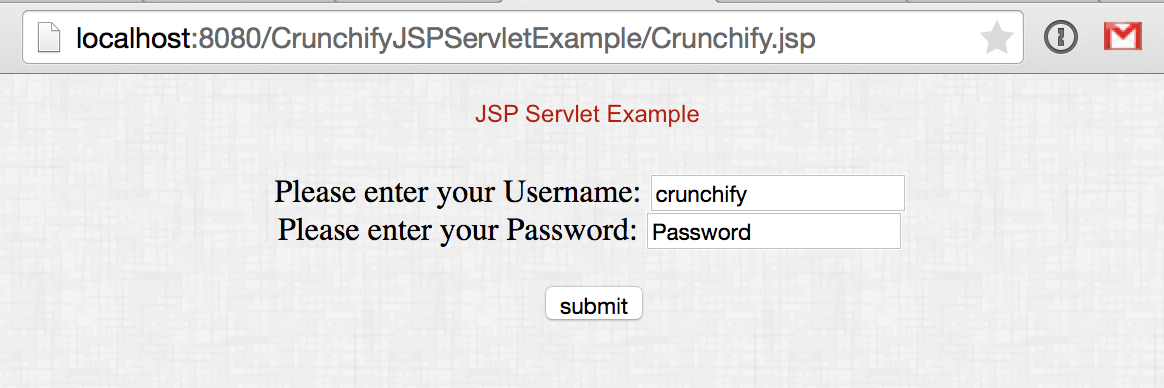
นี่คือตัวอย่าง JSP – Servlet อย่างง่ายพร้อมคำแนะนำทีละขั้นตอน ฉันจะสาธิตวิธีดึงพารามิเตอร์คำขอในตัวอย่าง JSP – Servlet
นี่คือขั้นตอนที่เราจะดำเนินการ:
- เปิด Eclipse IDE
- สร้างโครงการเว็บไดนามิก CrunchifyJSPServletExample ใหม่
- สร้างไฟล์ HelloCrunchify.java ขยาย HttpServlet (รายชื่อ 200 ตัวอย่าง Java ทั้งหมด)
- สร้างไฟล์ Crunchify.jsp
- ไฟล์ web.xml (ไฟล์ตัวอธิบายการทำให้ใช้งานได้)
- หากคุณไม่เห็นไฟล์ web.xml ให้ค้นหาวิธีแก้ปัญหาที่นี่
- เพิ่มและเรียกใช้โครงการบน Tomcat Web Server
นี่คือโครงสร้างโครงการที่สมบูรณ์:

ขั้นตอนที่ 1
สร้างไฟล์ HelloCrunchify.java
|
1 2 3 4 5 6 7 8 9 10 11 12 13 14 15 16 17 18 19 20 21 22 23 24 25 26 27 28 29 30 31 32 33 34 35 36 37 |
package com . crunchify . jsp . servlet ; import java . io . IOException ; import javax . servlet . ServletException ; import javax . servlet . http . HttpServlet ; import javax . servlet . http . HttpServletRequest ; import javax . servlet . http . HttpServletResponse ; import java . io . PrintWriter ; /** * @author Crunchify.com */ public class HelloCrunchify extends HttpServlet { protected void doGet ( HttpServletRequest request , HttpServletResponse response ) throws ServletException , IOException { // reading the user input String username = request . getParameter ( "username" ) ; String password = request . getParameter ( "password" ) ; PrintWriter out = response . getWriter ( ) ; out . println ( "<!DOCTYPE html PUBLIC \"-//W3C//DTD HTML 4.01 Transitional//EN\" +" + "http://www.w3.org/TR/html4/loose.dtd\">\n" + "<html> \n" + "<head> \n" + "<meta http-equiv=\"Content-Type\" content=\"text/html; " + "charset=ISO-8859-1\"> \n" + "<title> Crunchify.com JSP Servlet Example </title> \n" + "</head> \n" + "<body> <div align='center'> \n" + "<style= \"font-size=\"12px\" color='black'\"" + "\">" + "Username: " + username + " <br> " + "Password: " + password + "</font></body> \n" + "</html>" ) ; } } |
ต้องอ่านอีก:
- วิธีเรียกใช้โปรแกรม Java โดยอัตโนมัติบน Tomcat Startup
- วิธีใช้ AJAX, jQuery ใน Spring Web MVC (.jsp) – ตัวอย่าง
ขั้นตอนที่ 2
สร้างไฟล์ Crunchify.jsp :
|
1 2 3 4 5 6 7 8 9 10 11 12 13 14 15 16 17 18 19 20 21 22 23 24 25 26 27 28 29 30 |
<% @ page language = "java" contentType = "text/html; charset=ISO-8859-1" pageEncoding = "ISO-8859-1" %> < ! DOCTYPE html PUBLIC "-//W3C//DTD HTML 4.01 Transitional//EN" "http://www.w3.org/TR/html4/loose.dtd" > < html > <style type ="text/css"> body { background-image : url ( 'https://cdn.crunchify.com/wp-content/uploads/2013/03/Crunchify.bg_.300.png' ) ; } </style> < head > < meta http - equiv = "Content-Type" content = "text/html; charset=ISO-8859-1" > < title > Crunchify JSP Servlet Example < / title > < / head > < body > < div align = "center" style = "margin-top: 50px;" > < form action = "CrunchifyServlet" > Please enter your Username : < input type = "text" name = "username" size = "20px" > < br > Please enter your Password : < input type = "text" name = "password" size = "20px" > < br > < br > < input type = "submit" value = "submit" > < / form > < / div > < / body > < / html > |

ขั้นตอนที่ 3
อัปเดตไฟล์ web.xml :
|
1 2 3 4 5 6 7 8 9 10 11 12 13 14 15 16 17 18 19 20 21 22 23 |
<? xml version = "1.0" encoding = "UTF-8" ?> < web - app xmlns : xsi = "http://www.w3.org/2001/XMLSchema-instance" xmlns = "http://java.sun.com/xml/ns/javaee" xmlns : web = "http://java.sun.com/xml/ns/javaee/web-app_2_5.xsd" xsi : schemaLocation = "http://java.sun.com/xml/ns/javaee http://java.sun.com/xml/ns/javaee/web-app_3_0.xsd" version = "3.0" > < display - name > CrunchifyJSPServletExample < / display - name > < welcome - file - list > < welcome - file > index . html < / welcome - file > < welcome - file > index . htm < / welcome - file > < welcome - file > index . jsp < / welcome - file > < welcome - file > default . html < / welcome - file > < welcome - file > default . htm < / welcome - file > < welcome - file > default . jsp < / welcome - file > < / welcome - file - list > < servlet > < servlet - name > Hello < / servlet - name > < servlet - class > com . crunchify . jsp . servlet . HelloCrunchify < / servlet - class > < / servlet > < servlet - mapping > < servlet - name > Hello < / servlet - name > < url - pattern > / CrunchifyServlet < / url - pattern > < / servlet - mapping > < / web - app > |
ขั้นตอนที่ 4
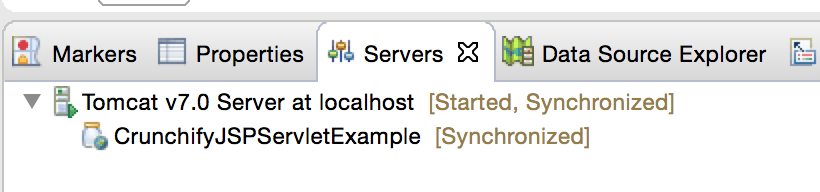
ปรับใช้และเรียกใช้ CrunchifyJSPServletExample บน Tomcat
ขั้นตอนที่ -5
ชี้ URL ของคุณไปที่ http://localhost:8080/CrunchifyJSPServletExample/Crunchify.jsp
ขั้นตอนที่ 6
ผลการเช็คเอาต์ URL ของคุณควรมีลักษณะดังนี้: http://localhost:8080/CrunchifyJSPServletExample/CrunchifyServlet?username=crunchify&password=Password

โปรดทราบว่าเซิร์ฟเวอร์ไม่รู้จักการเปลี่ยนแปลงใน “ web.xml ” ยกเว้นว่าคุณรีสตาร์ทหรือเริ่มเซิร์ฟเวอร์