
A Splash of EarlGrey – UI 测试 Toptal Talent 应用程序
已发表: 2022-03-11作为一名测试人员,你可以做的最重要的事情之一就是让你的工作更高效、更快速地自动化你正在测试的应用程序。 仅仅依靠手动测试是不可行的,因为您需要每天运行全套测试,有时一天多次,测试推送到应用程序代码的每一个更改。
本文将描述我们的团队如何将 Google 的 EarlGrey 1.0 确定为在自动化 iOS Toptal Talent 应用程序方面最适合我们的工具。 我们使用它的事实并不意味着 EarlGrey 是适合每个人的最佳测试工具 - 它恰好是适合我们需求的工具。
为什么我们过渡到 EarlGrey
多年来,我们的团队在 iOS 和 Android 上构建了不同的移动应用程序。 一开始,我们考虑使用一个跨平台的 UI 测试工具,它允许我们编写一组测试并在不同的移动操作系统上执行它们。 首先,我们选择了 Appium,这是最流行的开源选项。
但随着时间的推移,Appium 的局限性越来越明显。 在我们的案例中,Appium 的两个主要缺点是:
- 该框架有问题的稳定性导致了许多测试片。
- 相对缓慢的更新过程阻碍了我们的工作。
为了减轻 Appium 的第一个缺点,我们编写了各种代码调整和技巧,以使测试更加稳定。 然而,我们无法解决第二个问题。 每次发布新版本的 iOS 或 Android 时,Appium 都需要很长时间才能赶上。 很多时候,由于有很多错误,初始更新无法使用。 结果,我们经常被迫继续在旧平台版本上执行我们的测试,或者完全关闭它们,直到有可用的 Appium 更新可用。
这种方法远非理想,由于这些问题以及我们不会详细介绍的其他问题,我们决定寻找替代方案。 新测试工具的首要标准是提高稳定性和加快更新速度。 经过一番调查,我们决定为每个平台使用原生测试工具。
因此,我们为 Android 项目转换为 Espresso,为 iOS 开发转换为 EarlGrey 1.0。 事后看来,我们现在可以说这是一个很好的决定。 由于需要编写和维护两组不同的测试,一个用于每个平台,“损失”的时间完全是由于不需要调查这么多不稳定的测试并且没有任何版本更新的停机时间而弥补的。
本地项目结构
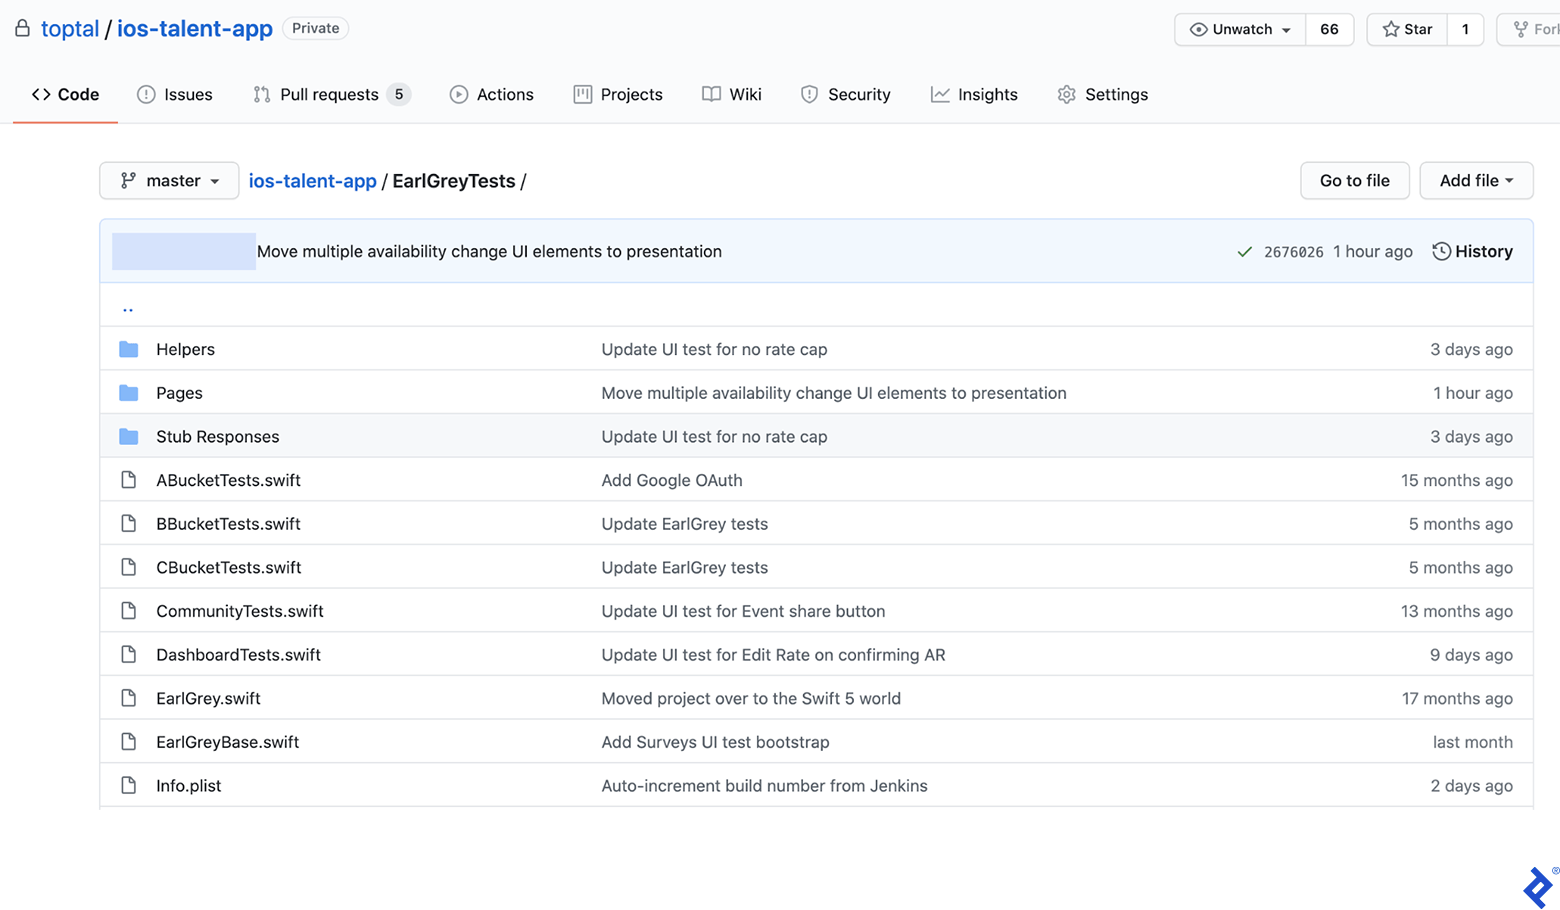
您需要将框架包含在与您正在开发的应用程序相同的 Xcode 项目中。 因此,我们在根目录中创建了一个文件夹来托管 UI 测试。 安装测试框架时必须创建EarlGrey.swift文件,其内容是预定义的。
EarlGreyBase是所有测试类的父类。 它包含从XCTestCase扩展的通用setUp和tearDown方法。 在setUp中,我们加载了大多数测试通常使用的存根(稍后会详细介绍存根),我们还设置了一些配置标志,我们注意到这些标志提高了测试的稳定性:
// Turn off EarlGrey's network requests tracking since we don't use it and it can block tests execution GREYConfiguration.sharedInstance().setValue([".*"], forConfigKey: kGREYConfigKeyURLBlacklistRegex) GREYConfiguration.sharedInstance().setValue(false, forConfigKey: kGREYConfigKeyAnalyticsEnabled)我们使用页面对象设计模式——应用程序中的每个屏幕都有一个对应的类,其中定义了所有 UI 元素及其可能的交互。 此类称为“页面”。 测试方法按位于页面中的单独文件和类中的功能进行分组。
为了让您更好地了解所有内容的显示方式,以下是我们应用程序中登录和忘记密码屏幕的外观以及页面对象如何表示它们。
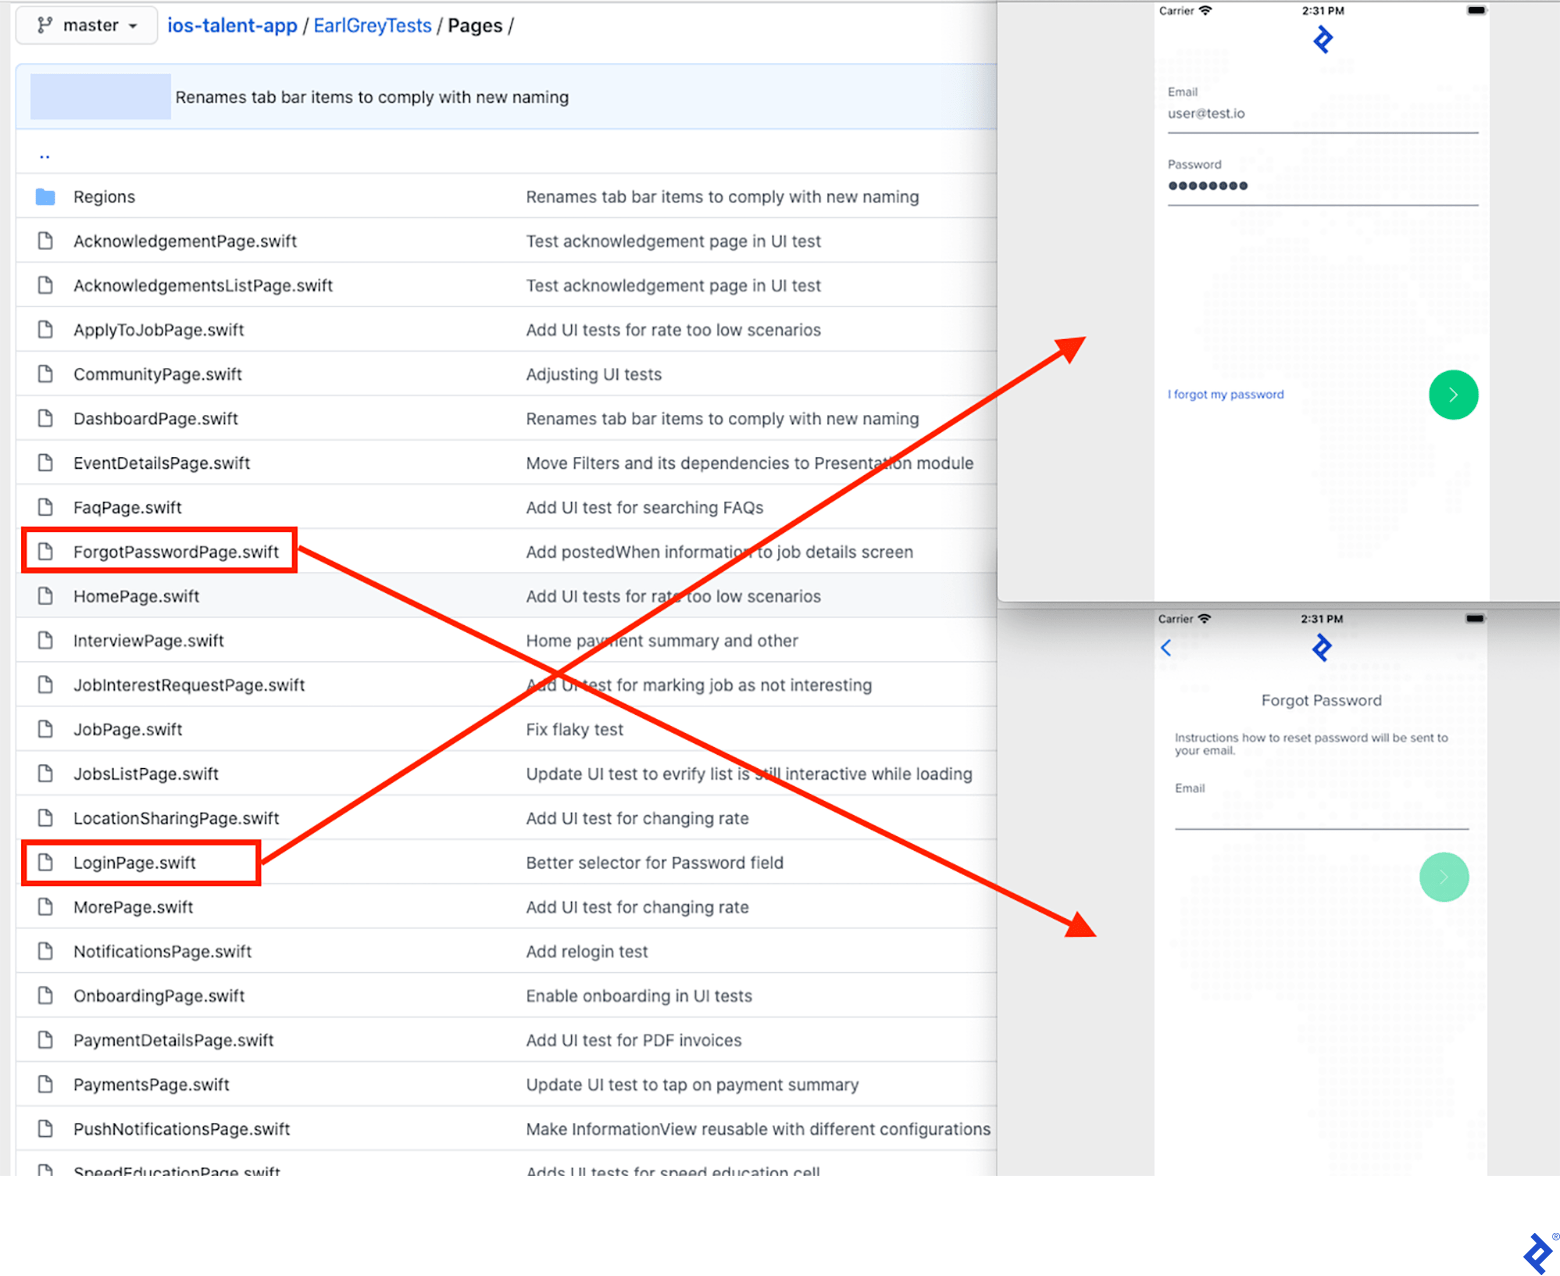
在本文后面,我们将展示登录页面对象的代码内容。
自定义实用方法
EarlGrey 将测试操作与应用程序同步的方式并不总是完美的。 例如,它可能会尝试单击 UI 层次结构中尚未加载的按钮,从而导致测试失败。 为了避免这个问题,我们创建了自定义方法来等待元素出现在所需的状态,然后再与它们进行交互。
这里有一些例子:
static func asyncWaitForVisibility(on element: GREYInteraction) { // By default, EarlGrey blocks test execution while // the app is animating or doing anything in the background. //https://github.com/google/EarlGrey/blob/master/docs/api.md#synchronization GREYConfiguration.sharedInstance().setValue(false, forConfigKey: kGREYConfigKeySynchronizationEnabled) element.assert(grey_sufficientlyVisible()) GREYConfiguration.sharedInstance().setValue(true, forConfigKey: kGREYConfigKeySynchronizationEnabled) } static func waitElementVisibility(for element: GREYInteraction, timeout: Double = 15.0) -> Bool { GREYCondition(name: "Wait for element to appear", block: { var error: NSError? element.assert(grey_notNil(), error: &error) return error == nil }).wait(withTimeout: timeout, pollInterval: 0.5) if !elementVisible(element) { XCTFail("Element didn't appear") } return true }EarlGrey 自己没有做的另一件事是滚动屏幕直到所需的元素变得可见。 我们可以这样做:
static func elementVisible(_ element: GREYInteraction) -> Bool { var error: NSError? element.assert(grey_notVisible(), error: &error) if error != nil { return true } else { return false } } static func scrollUntilElementVisible(_ scrollDirection: GREYDirection, _ speed: String, _ searchedElement: GREYInteraction, _ actionElement: GREYInteraction) -> Bool { var swipes = 0 while !elementVisible(searchedElement) && swipes < 10 { if speed == "slow" { actionElement.perform(grey_swipeSlowInDirection(scrollDirection)) } else { actionElement.perform(grey_swipeFastInDirection(scrollDirection)) } swipes += 1 } if swipes >= 10 { return false } else { return true } }我们发现 EarlGrey 的 API 中缺少的其他实用方法是计数元素和读取文本值。 这些实用程序的代码可在 GitHub 上找到:此处和此处。
存根 API 调用
为了确保避免后端服务器问题导致的错误测试结果,我们使用OHHTTPStubs库来模拟服务器调用。 他们主页上的文档非常简单,但我们将介绍如何在我们的应用程序中存根响应,该应用程序使用 GraphQL API。
class StubsHelper { static let testURL = URL(string: "https://[our backend server]")! static func setupOHTTPStub(for request: StubbedRequest, delayed: Bool = false) { stub(condition: isHost(testURL.host!) && hasJsonBody(request.bodyDict())) { _ in let fix = appFixture(forRequest: request) if delayed { return fix.requestTime(0.1, responseTime: 7.0) } else { return fix } } } static let stubbedEmail = "[email protected]" static let stubbedPassword = "password" enum StubbedRequest { case login func bodyDict() -> [String: Any] { switch self { case .login: return EmailPasswordSignInMutation( email: stubbedTalentLogin, password: stubbedTalentPassword ).makeBodyIdentifier() } } func statusCode() -> Int32 { return 200 } func jsonFileName() -> String { let fileName: String switch self { case .login: fileName = "login" } return "\(fileName).json" } } private extension GraphQLOperation { func makeBodyIdentifier() -> [String: Any] { let body: GraphQLMap = [ "query": queryDocument, "variables": variables, "operationName": operationName ] // Normalize values like enums here, otherwise body comparison will fail guard let normalizedBody = body.jsonValue as? [String: Any] else { fatalError() } return normalizedBody } } 通过调用setupOHTTPStub方法来加载存根:

StubsHelper.setupOHTTPStub(for: .login)把所有东西放在一起
本节将演示我们如何使用上述所有原理来编写实际的端到端登录测试。
import EarlGrey final class LoginPage { func login() -> HomePage { fillLoginForm() loginButton().perform(grey_tap()) return HomePage() } func fillLoginForm() { ElementsHelper.waitElementVisibility(emailField()) emailField().perform(grey_replaceText(StubsHelper.stubbedTalentLogin)) passwordField().perform(grey_tap()) passwordField().perform(grey_replaceText(StubsHelper.stubbedTalentPassword)) } func clearAllInputs() { if ElementsHelper.elementVisible(passwordField()) { passwordField().perform(grey_tap()) passwordField().perform(grey_replaceText("")) } emailField().perform(grey_tap()) emailField().perform(grey_replaceText("")) } } private extension LoginPage { func emailField(file: StaticString = #file, line: UInt = #line) -> GREYInteraction { return EarlGrey.selectElement(with: grey_accessibilityLabel("Email"), file: file, line: line) } func passwordField(file: StaticString = #file, line: UInt = #line) -> GREYInteraction { return EarlGrey.selectElement( with: grey_allOf([ grey_accessibilityLabel("Password"), grey_sufficientlyVisible(), grey_userInteractionEnabled() ]), file: file, line: line ) } func loginButton(file: StaticString = #file, line: UInt = #line) -> GREYInteraction { return EarlGrey.selectElement(with: grey_accessibilityID("login_button"), file: file, line: line) } } class BBucketTests: EarlGreyBase { func testLogin() { StubsHelper.setupOHTTPStub(for: .login) LoginPage().clearAllInputs() let homePage = LoginPage().login() GREYAssertTrue( homePage.assertVisible(), reason: "Home screen not displayed after successful login" ) } }在 CI 中运行测试
我们使用 Jenkins 作为我们的持续集成系统,并在每个拉取请求中为每个提交运行 UI 测试。
我们使用fastlane scan在 CI 中执行测试并生成报告。 对于失败的测试,将屏幕截图附加到这些报告中很有用。 不幸的是, scan不提供这个功能,所以我们不得不定制它。
在tearDown()函数中,我们检测测试是否失败,如果失败则保存 iOS 模拟器的屏幕截图。
import EarlGrey import XCTest import UIScreenCapture override func tearDown() { if testRun!.failureCount > 0 { // name is a property of the XCTest instance // https://developer.apple.com/documentation/xctest/xctest/1500990-name takeScreenshotAndSave(as: name) } super.tearDown() } func takeScreenshotAndSave(as testCaseName: String) { let imageData = UIScreenCapture.takeSnapshotGetJPEG() let paths = NSSearchPathForDirectoriesInDomains(.documentDirectory, .userDomainMask, true) let filePath = "\(paths[0])/\(testCaseName).jpg" do { try imageData?.write(to: URL.init(fileURLWithPath: filePath)) } catch { XCTFail("Screenshot not written.") } } 屏幕截图保存在 Simulator 文件夹中,您需要从那里获取它们以便将它们附加为构建工件。 我们使用Rake来管理我们的 CI 脚本。 这就是我们收集测试工件的方式:
def gather_test_artifacts(booted_sim_id, destination_folder) app_container_on_sim = `xcrun simctl get_app_container #{booted_sim_id} [your bundle id] data`.strip FileUtils.cp_r "#{app_container_on_sim}/Documents", destination_folder end关键要点
如果您正在寻找一种快速可靠的方式来自动化您的 iOS 测试,那么 EarlGrey 就是您的不二之选。 它由 Google 开发和维护(需要我多说吗?),并且在许多方面,它优于当今可用的其他工具。
您需要对框架进行一些修改,以准备实用方法来提高测试稳定性。 为此,您可以从我们的自定义实用程序方法示例开始。
我们建议对存根数据进行测试,以确保您的测试不会失败,因为后端服务器没有您期望它拥有的所有测试数据。 使用OHHTTPStubs或类似的本地 Web 服务器来完成工作。
在 CI 中运行测试时,请确保提供失败案例的屏幕截图,以便于调试。
您可能想知道为什么我们还没有迁移到 EarlGrey 2.0,这里有一个简单的解释。 新版本于去年发布,它承诺在 v1.0 上进行一些增强。 不幸的是,当我们采用 EarlGrey 时,v2.0 并不是特别稳定。 因此,我们还没有过渡到 v2.0。 但是,我们的团队正在热切地等待新版本的错误修复,以便我们将来可以迁移我们的基础架构。
在线资源
如果您正在考虑项目的测试框架,那么 GitHub 主页上的 EarlGrey 入门指南是您想要开始的地方。 在那里,您将找到一个易于使用的安装指南、该工具的 API 文档和一个方便的备忘单,该备忘单以在编写测试时易于使用的方式列出了所有框架的方法。
有关为 iOS 编写自动化测试的更多信息,您还可以查看我们之前的一篇博客文章。