Spring Framework 4.3.4 @Order 注解教程——注解 Bean 组件的排序顺序
已发表: 2017-03-04
Web MVC 框架——Spring 是基于 Java 的编程企业应用程序的最佳 Web 控制器框架和配置模型。
到目前为止,我们确实有超过 40 个关于 Crunchify 的 Spring MVC 教程。 在本教程中,我们将@Order Annotation 。 春季使用@Order 有什么用? 使用Spring AOP和MVC排序方面。
以下是简短的步骤:
- 我们将创建动态 Web 项目
- 创建 Spring Config 文件
crunchify-bean.xml - 将其转换为 Maven 项目
- 使用订单注释创建 Bean
- 创建测试用例并执行
详细步骤:让我们开始吧
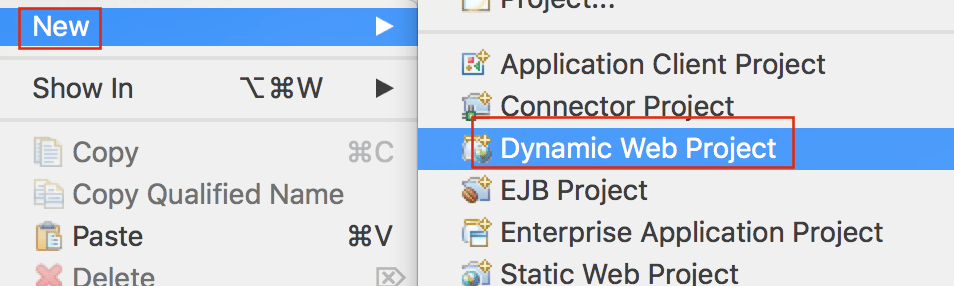
第1步
- 转到日食
- 点击
File - 点击
New - 单击
Dynamic Web Project
第2步
- 提供项目名称:
CrunchifySpringMVC4OrderAnnotation - 提供目标运行时。 主要是 Eclipse 中的 Apache Tomcat 位置。
- 选择动态 Web 模块版本:
3.1

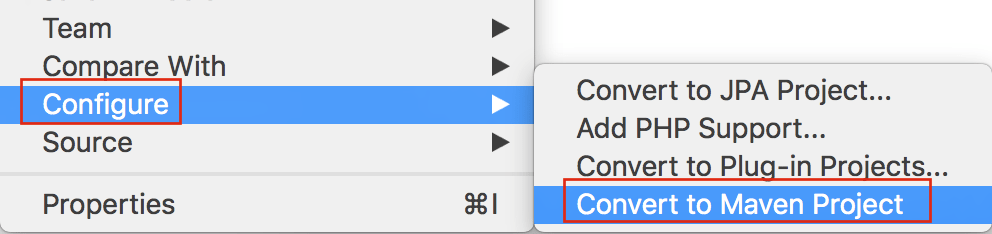
第三步
- 右键单击项目
- 点击配置
- 将项目转换为 Maven 项目
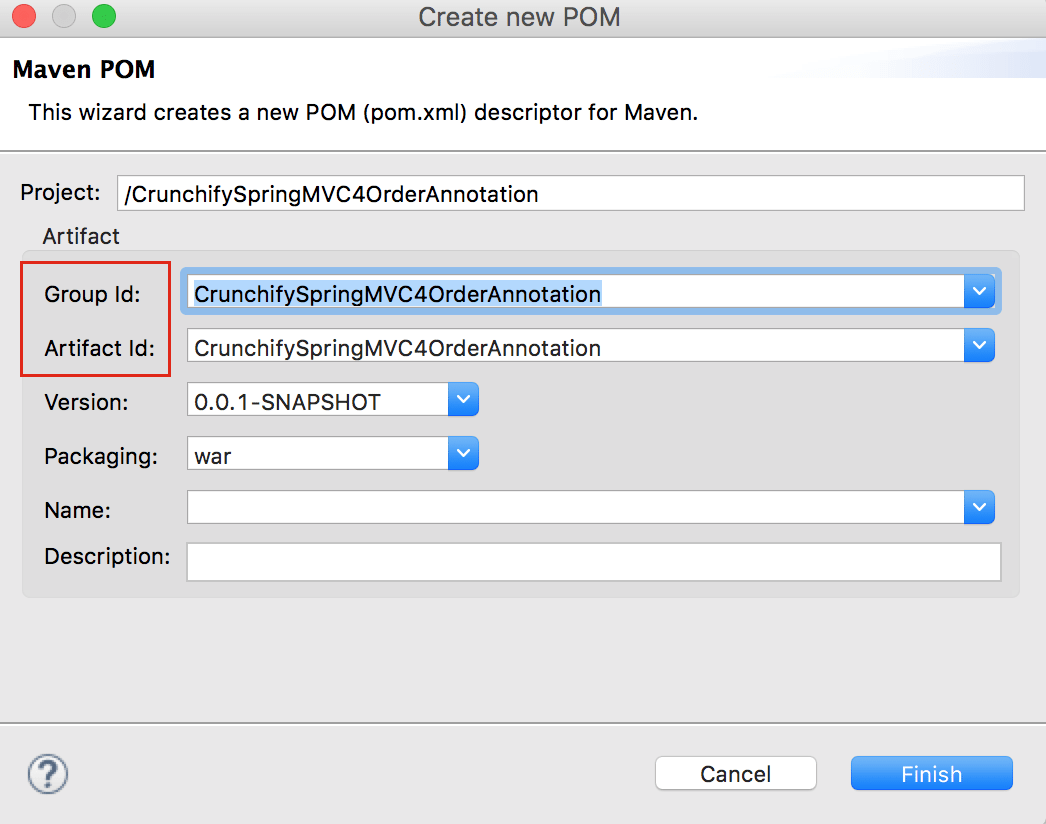
第四步
选择默认设置并单击Finish 。
第 5 步
这是我们开始之前的项目结构。
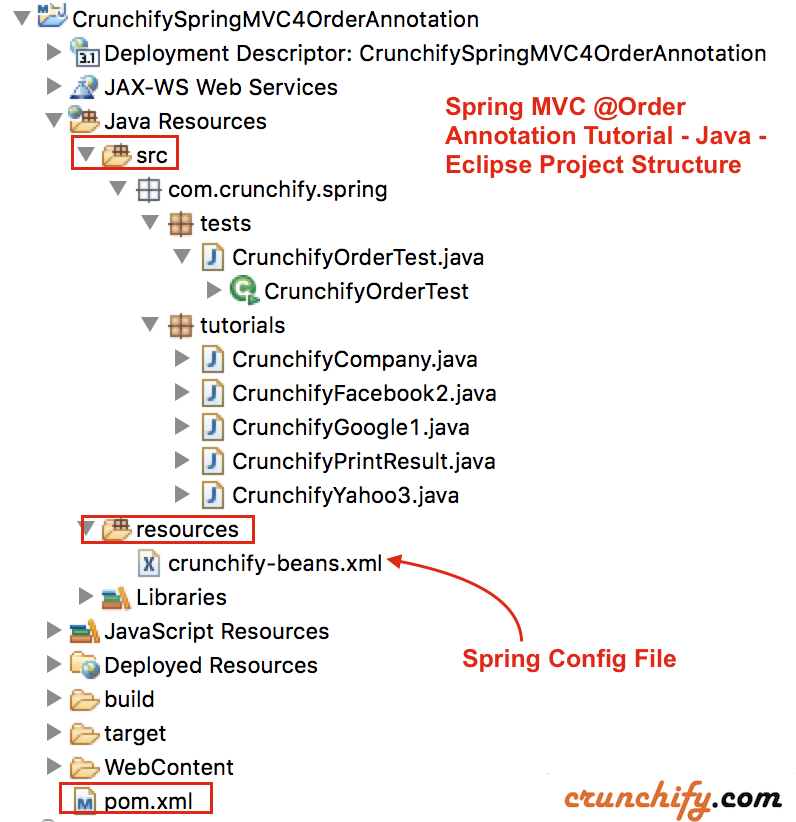
打开 pom.xml 文件并添加 Spring MVC 4.3.4 依赖项。
|
1 2 3 4 5 |
< dependency > < groupId > org . springframework < / groupId > < artifactId > spring - context < / artifactId > < version > 4.3.4.RELEASE < / version > < / dependency > |
这是我完整的pom.xml文件
|
1 2 3 4 5 6 7 8 9 10 11 12 13 14 15 16 17 18 19 20 21 22 23 24 25 26 27 28 29 30 31 32 33 34 35 |
< project xmlns = "http://maven.apache.org/POM/4.0.0" xmlns : xsi = "http://www.w3.org/2001/XMLSchema-instance" xsi : schemaLocation = "http://maven.apache.org/POM/4.0.0 http://maven.apache.org/xsd/maven-4.0.0.xsd" > < modelVersion > 4.0.0 < / modelVersion > < groupId > CrunchifySpringMVC4OrderAnnotation < / groupId > < artifactId > CrunchifySpringMVC4OrderAnnotation < / artifactId > < version > 0.0.1 - SNAPSHOT < / version > < packaging > war < / packaging > < build > < sourceDirectory > src < / sourceDirectory > < plugins > < plugin > < artifactId > maven - compiler - plugin < / artifactId > < version > 3.3 < / version > < configuration > < source > 1.8 < / source > < target > 1.8 < / target > < / configuration > < / plugin > < plugin > < artifactId > maven - war - plugin < / artifactId > < version > 2.6 < / version > < configuration > < warSourceDirectory > WebContent < / warSourceDirectory > < failOnMissingWebXml > false < / failOnMissingWebXml > < / configuration > < / plugin > < / plugins > < / build > < dependencies > < dependency > < groupId > org . springframework < / groupId > < artifactId > spring - context < / artifactId > < version > 4.3.4.RELEASE < / version > < / dependency > < / dependencies > < / project > |
第 6 步
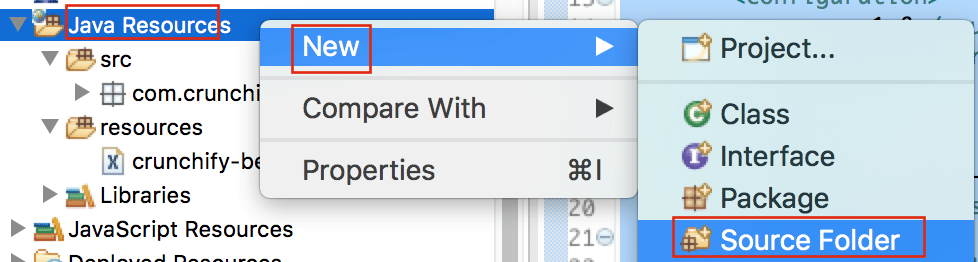
- 右键单击 Java 资源
- 点击新建
- 单击源文件夹并提供名称:
resources
第 7 步
在资源文件夹下创建文件crunchify-bean.xml文件。 这是完整的文件内容。
|
1 2 3 4 5 6 7 8 9 10 11 12 13 14 15 16 17 |
<? xml version = "1.0" encoding = "UTF-8" ?> < beans xmlns = "http://www.springframework.org/schema/beans" xmlns : xsi = "http://www.w3.org/2001/XMLSchema-instance" xmlns : p = "http://www.springframework.org/schema/p" xmlns : context = "http://www.springframework.org/schema/context" xsi : schemaLocation = "http://www.springframework.org/schema/beans http://www.springframework.org/schema/beans/spring-beans-4.0.xsd http://www.springframework.org/schema/context http://www.springframework.org/schema/context/spring-context-4.0.xsd" > < context : annotation - config / > < ! -- Specify Bean ID "orders" -- > < bean id = "orders" class = "com.crunchify.spring.tutorials.CrunchifyPrintResult" / > < ! -- This is required and loads each class under below package -- > < context : component - scan base - package = "com.crunchify.spring.tutorials" / > < / beans > |
步骤 8
现在我们将创建 5 个带有@Order注释的文件。
- CrunchifyCompany.java 接口
- CrunchifyGoogle1.java ==> 使用
@Order(1) - CrunchifyFacebook2.java ==> 使用
@Order(2) - CrunchifyYahoo3.java ==> 使用
@Order(3) - CrunchifyPrintResult.java
CrunchifyCompany.java
|
1 2 3 4 5 6 7 8 9 10 |
package com . crunchify . spring . tutorials ; /** * @author Crunchify.com * */ public interface CrunchifyCompany { // do nothing here } |
CrunchifyGoogle1.java
|
1 2 3 4 5 6 7 8 9 10 11 12 13 14 15 16 17 18 19 20 21 22 |
package com . crunchify . spring . tutorials ; import org . springframework . core . annotation . Order ; import org . springframework . stereotype . Component ; /** * @author Crunchify.com * */ @Component @Order ( 1 ) // @Order defines the sort order for an annotated component. The value() is optional and represents an order value as // defined in the Ordered interface. Lower values have higher priority. The default value is // Ordered.LOWEST_PRECEDENCE, indicating lowest priority (losing to any other specified order value). public class CrunchifyGoogle1 implements CrunchifyCompany { private String order = "Crunchify Google with Order-1" ; public String toString ( ) { return "Class Name: " + this . getClass ( ) . getSimpleName ( ) + " - Result: " + this . order ; } } |

CrunchifyFacebook2.java
|
1 2 3 4 5 6 7 8 9 10 11 12 13 14 15 |
package com . crunchify . spring . tutorials ; import org . springframework . core . annotation . Order ; import org . springframework . stereotype . Component ; @Component @Order ( 2 ) public class CrunchifyFacebook2 implements CrunchifyCompany { private String order = "Crunchify Facebook with Order-2" ; public String toString ( ) { return "Class Name: " + this . getClass ( ) . getSimpleName ( ) + " - Result: " + this . order ; } } |
CrunchifyYahoo3.java
|
1 2 3 4 5 6 7 8 9 10 11 12 13 14 15 |
package com . crunchify . spring . tutorials ; import org . springframework . core . annotation . Order ; import org . springframework . stereotype . Component ; @Component @Order ( 3 ) public class CrunchifyYahoo3 implements CrunchifyCompany { private String order = "Crunchify Yahoo with Order-3" ; public String toString ( ) { return "Class Name: " + this . getClass ( ) . getSimpleName ( ) + " - Result: " + this . order ; } } |
CrunchifyPrintResult.java
|
1 2 3 4 5 6 7 8 9 10 11 12 13 14 15 16 17 18 19 20 21 22 23 24 25 |
package com . crunchify . spring . tutorials ; import java . util . List ; import org . springframework . beans . factory . annotation . Autowired ; import org . springframework . stereotype . Component ; /** * @author Crunchify.com * */ @Component public class CrunchifyPrintResult { @Autowired private List <CrunchifyCompany> order ; private String result = "" ; public String toString ( ) { order . stream ( ) . forEach ( ( temp ) - > { this . result = result + temp + "\n" ; // print result and add new line } ) ; return this . result ; } } |
第 9 步
现在让我们创建测试用例CrunchifyOrderTest.java
|
1 2 3 4 5 6 7 8 9 10 11 12 13 14 15 16 17 18 19 20 21 22 23 24 25 26 27 |
package com . crunchify . spring . tests ; import org . springframework . context . ApplicationContext ; import org . springframework . context . support . ClassPathXmlApplicationContext ; import com . crunchify . spring . tutorials . CrunchifyPrintResult ; /** * @author Crunchify.com * */ public class CrunchifyOrderTest { @SuppressWarnings ( "resource" ) public static void main ( String [ ] args ) { // Load Spring ApplicationContext file crunchify-beans.xml ApplicationContext context = new ClassPathXmlApplicationContext ( "crunchify-beans.xml" ) ; // get the bean which we specified in file crunchify-beans.xml file CrunchifyPrintResult results = ( CrunchifyPrintResult ) context . getBean ( "orders" ) ; // After loading each class - just print result System . out . println ( results ) ; } } |
第十步
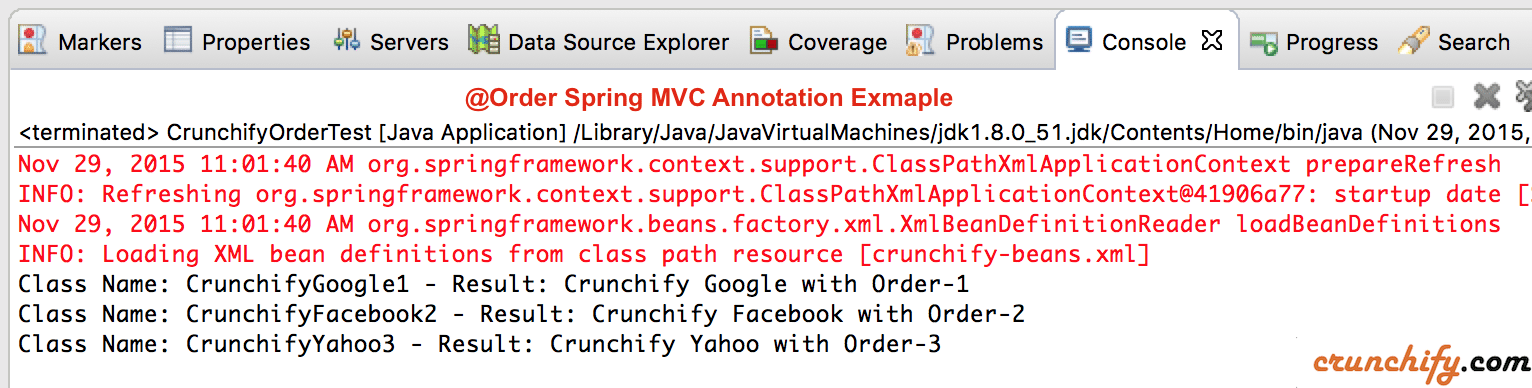
现在只需右键单击文件CrunchifyOrderTest.java和Run As -> Java Application 。 您应该会看到按照我们指定的顺序打印的结果。
|
1 2 3 |
Class Name : CrunchifyGoogle1 - Result : Crunchify Google with Order - 1 Class Name : CrunchifyFacebook2 - Result : Crunchify Facebook with Order - 2 Class Name : CrunchifyYahoo3 - Result : Crunchify Yahoo with Order - 3 |