
Tutoriel sur le serveur Web intégré : comment démarrer le serveur HTTP Jersey intégré lors du démarrage de l'application Java
Publié: 2014-07-01
Il y a quelque temps, j'ai écrit un tutoriel sur Comment créer un service RESTful avec Java en utilisant JAX-RS et Jersey. Après toutes les étapes détaillées, vous devez déployer votre projet sur Tomcat Web Server et tout devrait bien se passer. Avec ce didacticiel, vous devriez pouvoir créer simplement un service RESTFul en environ 20 minutes.
Mais qu'en est-il de le faire en
~5 mins? De plus, il est parfois très difficile de configurer Tomcat pour votre application Web.
Il y a plusieurs raisons :
- Vous devrez peut-être copier les fichiers binaires Tomcat dans l'environnement de développement.
- Si toutes les configurations ne sont pas correctement configurées, votre application Tomcat peut ne pas fonctionner.
- Vous devez exporter votre projet en tant que projet
.war - Que faire si vous ne souhaitez pas déployer votre application sur Tomcat et exécuter un simple .jar ?
- Avec le projet .jar - comment allez-vous démarrer le serveur http ? Votre application acceptera-t-elle les appels REST entrants ?
Extra : Comment ajouter le filtre CORS à votre application Web Jersey ?
Vous devez ajouter Cross-origin resource sharing à votre application Web Jersey. Veuillez suivre ce tutoriel pour la même chose :
Qu'est-ce que le partage de ressources cross-origin (CORS) - Comment l'ajouter à votre serveur Web Java Jersey ?
Eh bien, il existe une solution simple. Il existe un moyen de créer un serveur HTTP très basique (ne prenant en charge que GET/POST) en Java en utilisant uniquement l'API Java SE, sans écrire de code pour analyser manuellement les requêtes HTTP et formater manuellement les réponses HTTP.
En utilisant com.sun.net.httpserver.HttpServer , nous devrions pouvoir réaliser tout ce qui précède.
Commençons:
Étape 1:
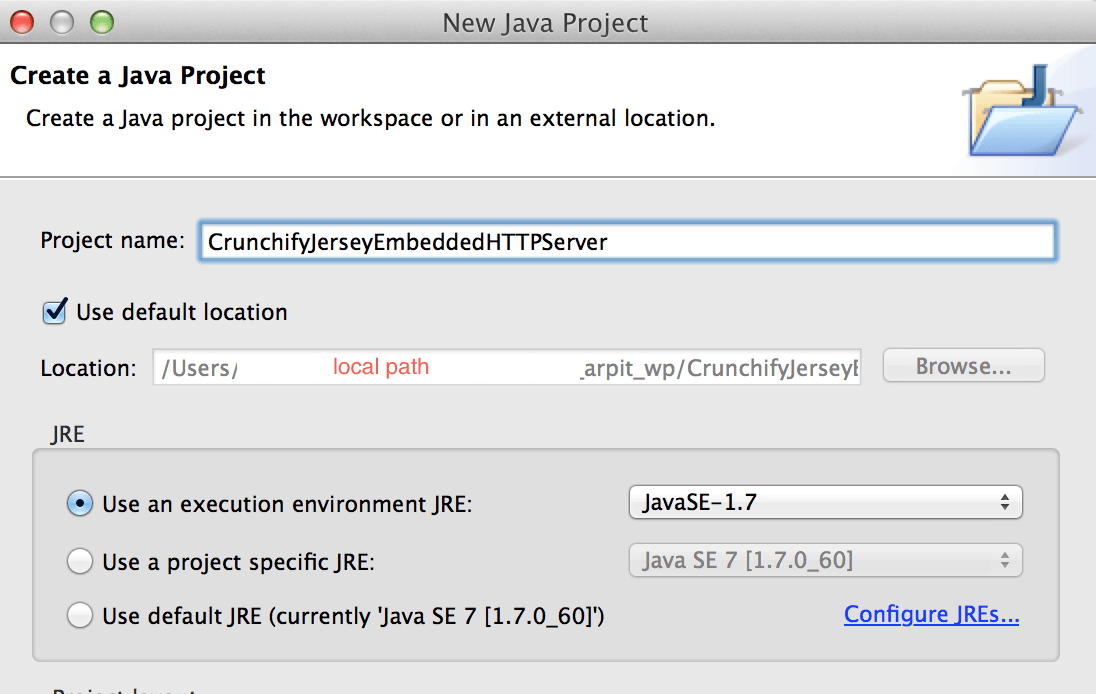
Créez un nouveau projet Java « CrunchifyJerseyEmbeddedHTTPServer ».
Étape 2:
Convertissez-le en projet Maven. Cela nous simplifiera la vie pour ajouter des dépendances. Veuillez suivre ce tutoriel pour convertir un projet Java existant en projet Maven.
Étape 3:
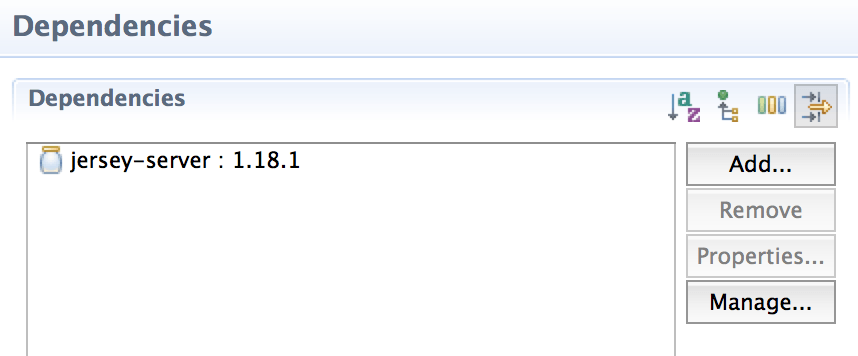
Dans ce projet, nous avons juste besoin d'une dépendance jersey-server .
Étape 4:
Créez JerseyEmbeddedHTTPServerCrunchify.java sous le package com.crunchify.tutorial .
|
1 2 3 4 5 6 7 8 9 10 11 12 13 14 15 16 17 18 19 20 21 22 23 24 25 26 27 28 29 30 31 32 33 34 35 36 37 38 39 40 41 42 43 44 45 46 47 48 49 50 51 |
package com . crunchify . tutorial ; import java . io . IOException ; import java . net . InetAddress ; import java . net . URI ; import java . net . UnknownHostException ; import javax . ws . rs . core . UriBuilder ; import com . sun . jersey . api . container . httpserver . HttpServerFactory ; import com . sun . jersey . api . core . PackagesResourceConfig ; import com . sun . jersey . api . core . ResourceConfig ; import com . sun . net . httpserver . HttpServer ; /** * @author Crunchify.com * */ @SuppressWarnings ( "restriction" ) public class JerseyEmbeddedHTTPServerCrunchify { public static void main ( String [ ] args ) throws IOException { System . out . println ( "Starting Crunchify's Embedded Jersey HTTPServer...\n" ) ; HttpServer crunchifyHTTPServer = createHttpServer ( ) ; crunchifyHTTPServer . start ( ) ; System . out . println ( String . format ( "\nJersey Application Server started with WADL available at " + "%sapplication.wadl\n" , getCrunchifyURI ( ) ) ) ; System . out . println ( "Started Crunchify's Embedded Jersey HTTPServer Successfully !!!" ) ; } private static HttpServer createHttpServer ( ) throws IOException { ResourceConfig crunchifyResourceConfig = new PackagesResourceConfig ( "com.crunchify.tutorial" ) ; // This tutorial required and then enable below line: https://crunchify.com/?p=6360 //crunchifyResourceConfig.getContainerResponseFilters().add(CrunchifyCORSFilter.class); return HttpServerFactory . create ( getCrunchifyURI ( ) , crunchifyResourceConfig ) ; } private static URI getCrunchifyURI ( ) { return UriBuilder . fromUri ( "http://" + crunchifyGetHostName ( ) + "/" ) . port ( 8085 ) . build ( ) ; } private static String crunchifyGetHostName ( ) { String hostName = "localhost" ; try { hostName = InetAddress . getLocalHost ( ) . getCanonicalHostName ( ) ; } catch ( UnknownHostException e ) { e . printStackTrace ( ) ; } return hostName ; } } |

Étape 5 :
Créez votre API REST. Créez la classe Java CrunchifyAPI.java sous le même package " com.crunchify.tutorial "
|
1 2 3 4 5 6 7 8 9 10 11 12 13 14 15 16 17 |
package com . crunchify . tutorial ; import javax . ws . rs . GET ; import javax . ws . rs . Path ; import javax . ws . rs . Produces ; import javax . ws . rs . core . MediaType ; @Path ( "api" ) public class CrunchifyAPI { @GET @Produces ( MediaType . TEXT_PLAIN ) public String get ( ) { return "\n This is Crunchify REST API via HTTPServer" ; } } |
Étape 6 :
Et c'est tout. Maintenant, faites un clic droit sur JerseyEmbeddedHTTPServerCrunchify.java et « Run it as Java Application ».
|
1 2 3 4 5 6 7 8 9 10 11 12 13 14 15 16 |
Starting Crunchify 's Embedded Jersey HTTPServer... Jun 30, 2014 3:45:26 PM com.sun.jersey.api.core.PackagesResourceConfig init INFO: Scanning for root resource and provider classes in the packages: com.crunchify.tutorial Jun 30, 2014 3:45:26 PM com.sun.jersey.api.core.ScanningResourceConfig logClasses INFO: Root resource classes found: class com.crunchify.tutorial.CrunchifyAPI Jun 30, 2014 3:45:26 PM com.sun.jersey.api.core.ScanningResourceConfig init INFO: No provider classes found. Jun 30, 2014 3:45:27 PM com.sun.jersey.server.impl.application.WebApplicationImpl _initiate INFO: Initiating Jersey application, version ' Jersey : 1.18.1 02 / 19 / 2014 03 : 28 AM ' Jersey Application Server started with WADL available at http://localhost:8085/application.wadl Started Crunchify' s Embedded Jersey HTTPServer Successfully ! ! ! |
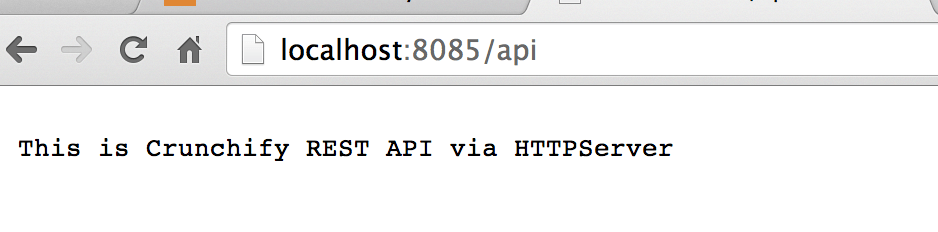
Étape 7 :
Valider le résultat. Visitez cette URL : http://localhost:8085/api et vous devriez voir le résultat sur le navigateur.
J'espère que vous apprécierez ce tutoriel. Besoin de partager un commentaire ?
Je suis ici pour écouter. Merci.