
如何验证 WordPress 附加链接搜索框 JSON-LD 架构? 修改搜索页面 URL 提示
已发表: 2020-04-25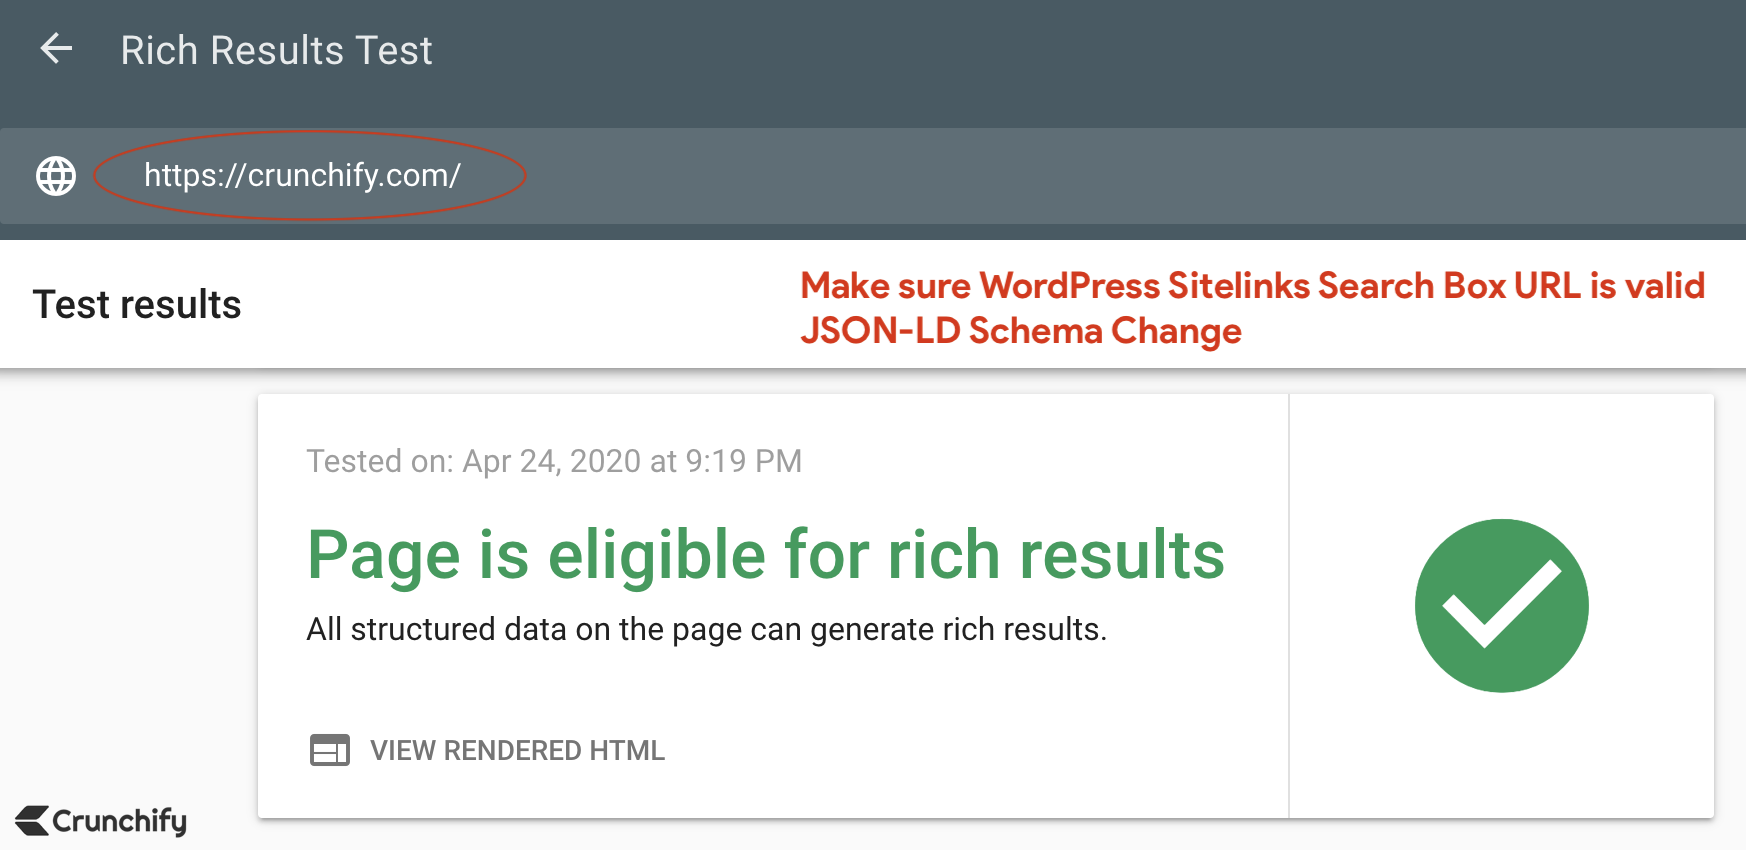
Google 默认支持Sitelinks search box 。 但我们需要确保它在 WordPress 网站上设置正确。
什么是附加链接搜索框?
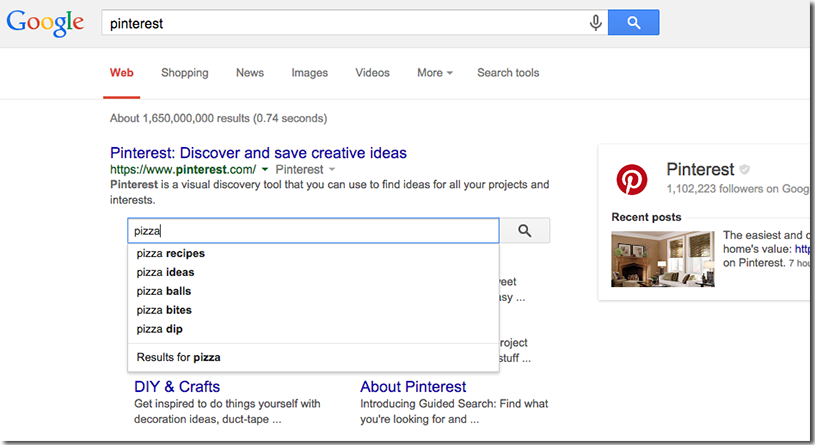
正如您在下面看到的,附加链接搜索框是一个搜索框,可以帮助用户非常快速地搜索任何字词。
他们不必去您的网站进行搜索。 结果显示在 Google 搜索结果页面 (SERP) 本身上。
它为用户提供实时搜索建议。
今天在 Crunchify 上,在查看其他一些问题时,我们发现我们的附加链接搜索框已broken 。
这需要一些时间,但我们修复了 Crunchify 上的附加链接搜索框 URL。 我想与所有 Crunchify 读者分享相同的技巧。
第1步。 安装 SEO WordPress 插件
确保您已安装 Yoast SEO WordPress 插件。 默认情况下,多合一 SEO 包还支持 JSON-LD 和附加链接搜索框。
自过去几年以来,我们一直在使用相同的方法,到目前为止还不错。 默认情况下,Yoast SEO 插件会在您的每个页面上添加JSON-LD schema markup 。 只需激活插件,您就可以期待您的自定义搜索页面。
什么是 JSON-LD?
JSON-LD 代表
JavaScript Object Notation for Linked Data,由多维数组组成)。
这是来自 Crunchify home page的 JSON-lD 示例:
|
1 2 3 4 5 6 7 8 9 10 11 12 13 14 15 16 17 18 19 20 21 22 23 24 25 26 |
{ "@context" : "https://schema.org" , "@graph" : [ { "@type" : "WebSite" , "@id" : "https://crunchify.com/#website" , "url" : "https://crunchify.com/" , "name" : "Crunchify" , "inLanguage" : "en-US" , "description" : "Largest free Technical and Blogging resource site for Beginner. We help clients transform their great ideas into reality!" , "potentialAction" : [ { "@type" : "SearchAction" , "target" : "https://crunchify.com/search/?q={search_term_string}" , "query-input" : "required name=search_term_string" } ] } , { "@type" : "CollectionPage" , "@id" : "https://crunchify.com/#webpage" , "url" : "https://crunchify.com/" , "name" : "Crunchify \u2022 Largest free Technical and Blogging resource site for Beginner. We help clients transform their great ideas into reality!" , "isPartOf" : { "@id" : "https://crunchify.com/#website" } , "inLanguage" : "en-US" , "description" : "Largest free Technical, Blogging resource site for Beginners. We help clients transform their great ideas into reality!" } ] } |
以下是示例blog post中的 JSON-LD 示例:
|
1 2 3 4 5 6 7 8 9 10 11 12 13 14 15 16 17 18 19 20 21 22 23 24 25 26 27 28 29 30 31 32 33 34 35 36 37 38 39 40 41 42 43 44 45 46 47 48 49 50 51 52 53 54 55 56 57 58 59 |
{ "@context" : "https://schema.org" , "@graph" : [ { "@type" : "WebSite" , "@id" : "https://crunchify.com/#website" , "url" : "https://crunchify.com/" , "name" : "Crunchify" , "inLanguage" : "en-US" , "description" : "Largest free Technical and Blogging resource site for Beginner. We help clients transform their great ideas into reality!" , "potentialAction" : [ { "@type" : "SearchAction" , "target" : "https://crunchify.com/search/?q={search_term_string}" , "query-input" : "required name=search_term_string" } ] } , { "@type" : "ImageObject" , "@id" : "https://crunchify.com/step-by-step-guide-to-enable-https-or-ssl-correct-way-on-apache-tomcat-server-port-8443/#primaryimage" , "inLanguage" : "en-US" , "url" : "https://cdn.crunchify.com/wp-content/uploads/2020/04/Apache-tomcat-running-on-port-8443-over-HTTPS.png" , "width" : 1261 , "height" : 451 , "caption" : "Apache tomcat running on port 8443 over HTTPS" } , { "@type" : "WebPage" , "@id" : "https://crunchify.com/step-by-step-guide-to-enable-https-or-ssl-correct-way-on-apache-tomcat-server-port-8443/#webpage" , "url" : "https://crunchify.com/step-by-step-guide-to-enable-https-or-ssl-correct-way-on-apache-tomcat-server-port-8443/" , "name" : "Step by Step guide to Enable HTTPS or SSL correct way on Apache Tomcat Server - Port 8443 \u2022 Crunchify" , "isPartOf" : { "@id" : "https://crunchify.com/#website" } , "inLanguage" : "en-US" , "primaryImageOfPage" : { "@id" : "https://crunchify.com/step-by-step-guide-to-enable-https-or-ssl-correct-way-on-apache-tomcat-server-port-8443/#primaryimage" } , "datePublished" : "2020-04-24T06:08:30+00:00" , "dateModified" : "2020-04-24T17:44:01+00:00" , "author" : { "@id" : "https://crunchify.com/#/schema/person/b40f3806c0a1ef3372253a9198e0562f" } , "description" : "It's been almost 12 years I started using Apache Tomcat. I believe when I did my 1st under grade project, it was on Tomcat version 1.x. Now it's already" , "potentialAction" : [ { "@type" : "ReadAction" , "target" : [ "https://crunchify.com/step-by-step-guide-to-enable-https-or-ssl-correct-way-on-apache-tomcat-server-port-8443/" ] } ] } , { "@type" : [ "Person" ] , "@id" : "https://crunchify.com/#/schema/person/b40f3806c0a1ef3372253a9198e0562f" , "name" : "App Shah" , "image" : { "@type" : "ImageObject" , "@id" : "https://crunchify.com/#authorlogo" , "inLanguage" : "en-US" , "url" : "https://secure.gravatar.com/avatar/d8c1b220ca438566d5e5d0e70be7ef5e?s=96&d=mm&r=g" , "caption" : "App Shah" } , "description" : "I'm an Engineer by profession, Blogger by passion & Founder of Crunchify, LLC, the largest free blogging & technical resource site for beginners. Love SEO, SaaS, #webperf, WordPress, Java. With over <a href=\"https://crunchify.com/advertise/\" target=\"_blank\" rel=\"noopener noreferrer\">16 millions+</a> pageviews/month, Crunchify has changed the life of over thousands of individual around the globe teaching Java & Web Tech for FREE. Get latest update on <a target=\"_blank\" href=\"https://www.facebook.com/Crunchify\" class=\"crunchify-social-icon-facebook\" rel=\"noopener noreferrer\"><i class=\"fab fa-facebook\" style=\"margin: 0px 5px\"></i></a> and <a target=\"_blank\" href=\"https://twitter.com/Crunchify\" class=\"crunchify-social-icon-twitter\" rel=\"noopener noreferrer\"><i class=\"fab fa-twitter\" style=\"margin: 0px 0px 0px 5px;\"></i></a>.\r\n\r\n<div style=\"clear:both\"></div>" , "sameAs" : [ "https://facebook.com/Crunchify" , "https://twitter.com/Crunchify" ] } ] } |

第2步。 验证附加链接搜索网址
确保您指定了correct Sitelinks search URL 。 第 10 到 14 行在上面的代码中突出显示。 请仔细检查。
默认情况下,Yoast SEO 添加以下 URL。
-
"target": "https://crunchify.com/?s={search_term_string}"
Note:如果您尚未设置 Google 自定义搜索,那么您就可以了。 你不必修改任何东西。 但我建议根据过去 6 年的经验使用 Google 自定义搜索结果设置。 用户体验和搜索结果质量比默认的 Google 搜索要好得多。
步骤 3。 更改目标搜索 URL
在 Crunchify 上,我们使用的是 Google 自定义搜索设置。 因此默认目标 URL 对我们不起作用。
我们的自定义搜索 URL 是:
-
https://crunchify.com/search/?q=java
如何更改 Yoast SEO 架构标记中的 URL?
将以下代码片段添加到主题的 functions.php 文件并保存更改。
|
1 2 3 4 5 |
// Yoast - change ld+json search url function crunchify_change_json_ld_search_url ( ) { return trailingslashit ( home_url ( ) ) . 'search/?q={search_term_string}' ; } add_filter ( 'wpseo_json_ld_search_url' , 'crunchify_change_json_ld_search_url' ) ; |
此代码段将为您替换和更新正确的搜索 URL:
这是一个更新的网址:
-
"target": "https://crunchify.com/search/?q={search_term_string}"
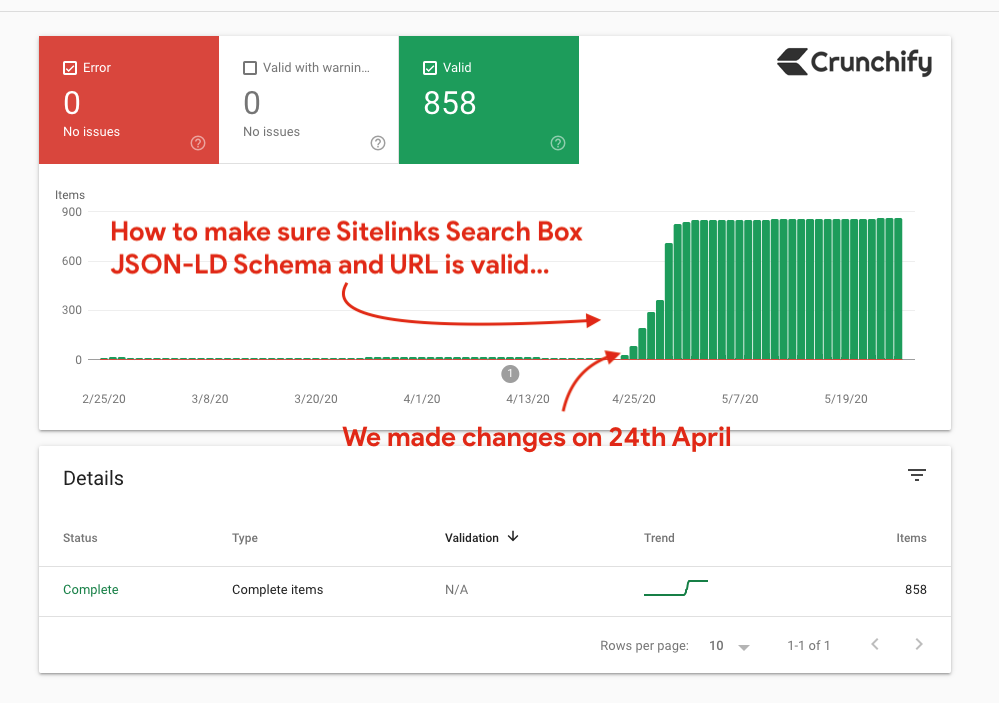
第四步。 等几个星期
现在是时候等待几周并再次检查 Google 搜索结果页面中的结果了。 结帐实时结果。 我们于 2020 年 4 月 24 日进行了更改,此后 Google 立即开始识别 URL 更改。
这是一个 URL: https://search.google.com/search-console/sitelinks-searchbox。 选择一个属性,您应该会看到结果。
这是 Crunchify Sitelink 搜索结果的示例。
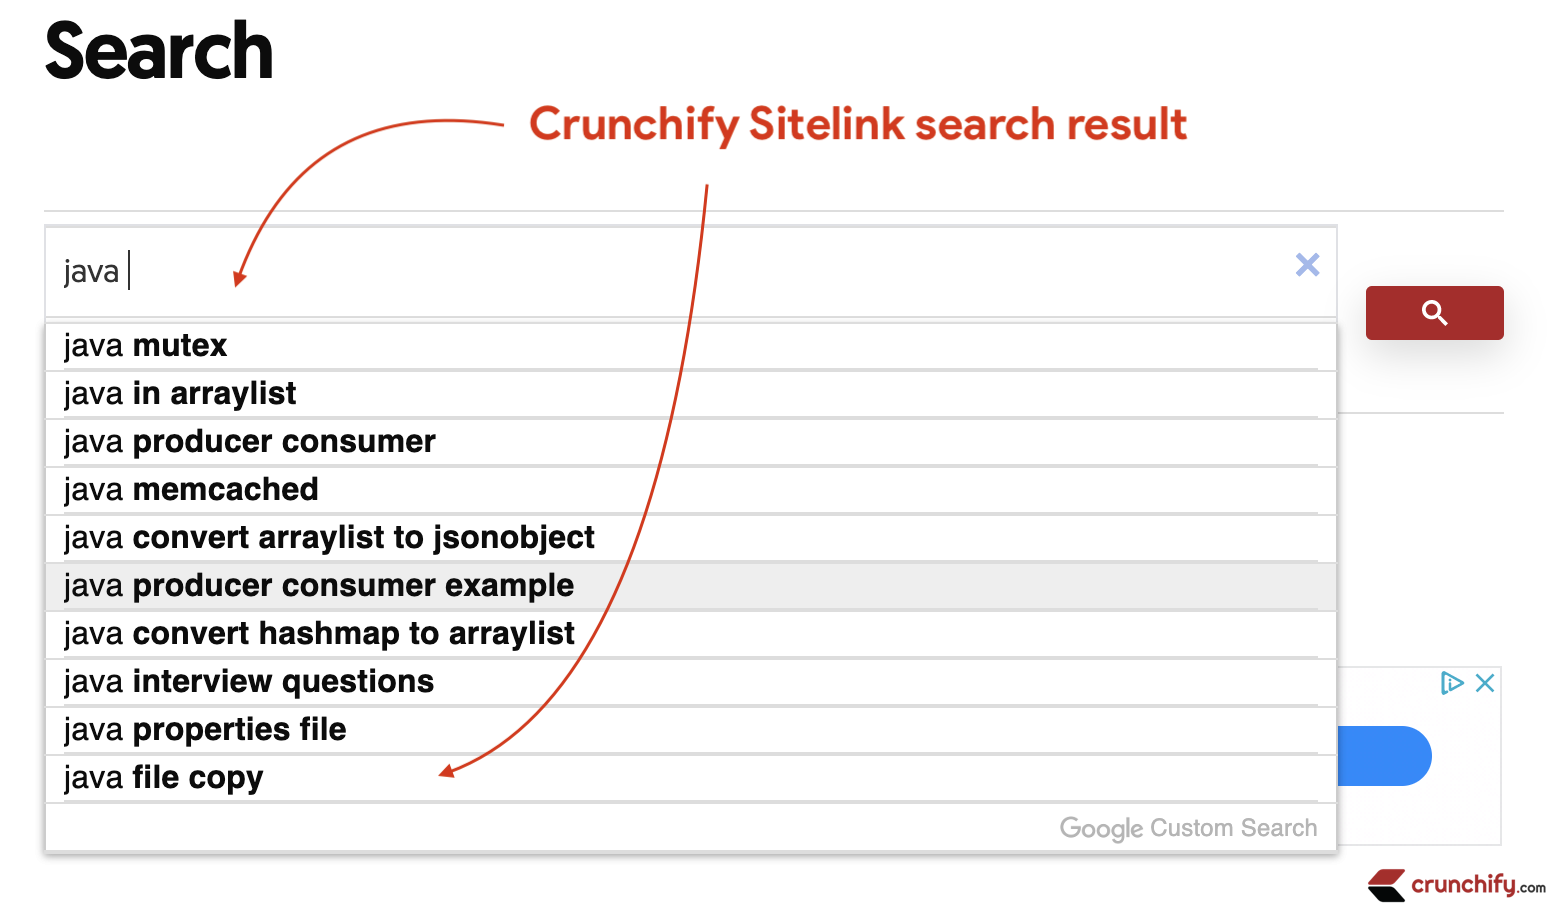
以下是更多详细信息:
有兴趣了解有关结构化数据的更多信息吗?
在页面的什么位置插入它?
JSON-LD 吗?@JohnMu 让您参与了本周的#AskGoogleWebmasters!检查出来→ https://t.co/b7utqUQf0m pic.twitter.com/iYxgtZGRrr
— 谷歌网站管理员 (@googlewmc) 2019 年 9 月 11 日
希望本教程能帮助您解决 JSON-LD Google Sitelinks 搜索框架构标记可能遇到的任何问题。 快乐的博客。