
如何在没有任何插件的情况下为评论和评分添加丰富的片段? Google Structured Schema.org 微数据标记
已发表: 2020-04-21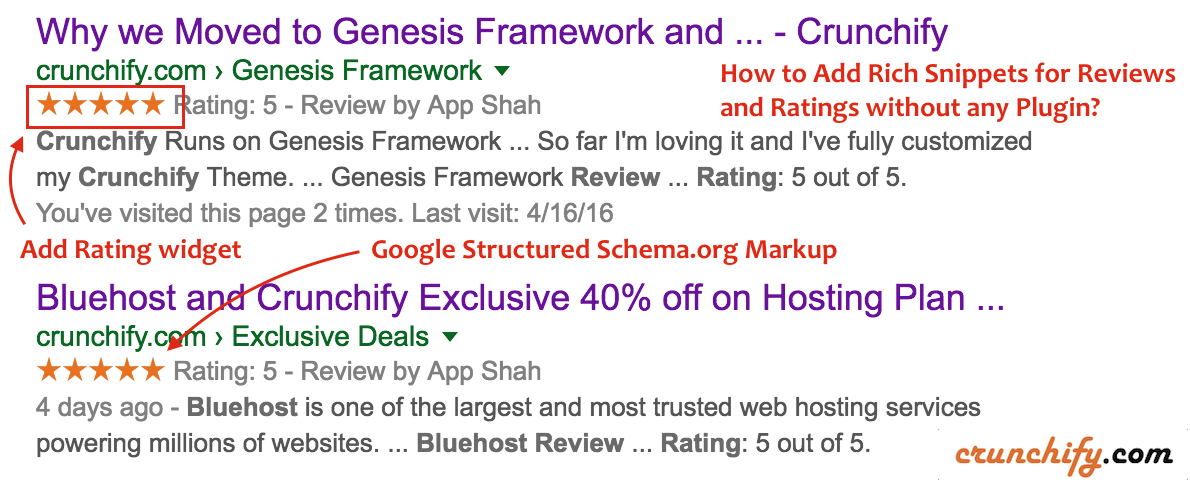
你有没有想过谷歌how and why在谷歌搜索结果页面 (SERP) 中显示一些特殊评论帖子的评级?
在本教程中,我们将讨论如何以schema.org的形式为 Review/Rating add rich snippet ,以便 Google 可以了解有关您的评论的详细信息并将其显示在搜索页面中。
结帐实时结果:https://crunchify.me/2VAUkTK。 丰富的片段链接。
在开始之前,让我们了解一下什么是 schema.org?
Schema 是一种microdata ,它使 Google 或 Bing 搜索引擎更容易更effectively解析和解释您的博客页面上的信息。 想法是帮助搜索引擎以structured format理解所有数据,以便搜索引擎也可以根据搜索查询将这些相关的结果数据显示给最终用户。
让我们开始吧:
Point-1)如何以schema.org的形式将结构化数据添加到您的博客中?
在 Crunchify 上,我们使用的是 Genesis Framework,默认情况下它带有所有schema.org microdata格式。 它在您网站的代码中输出微数据。 我不需要添加任何东西,这就是 Genesis Framework 的美妙之处,除了我们将在discuss below的Review metadata选项。
Point-2)如何验证您网站的结构化数据?
默认情况下, Google Search Console提供了查看结构化数据的选项。 看看下面的图表。
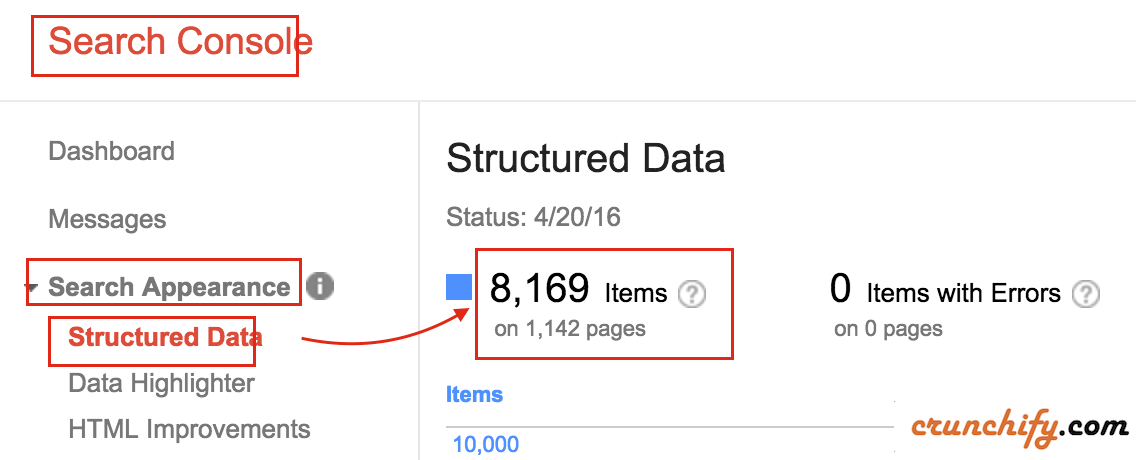
为了查看这些数据,您必须将您的网站/博客添加到 Search Console。 一旦您验证了您网站的身份,您就可以立即查看数据OR等待一周以automatically生成此数据。
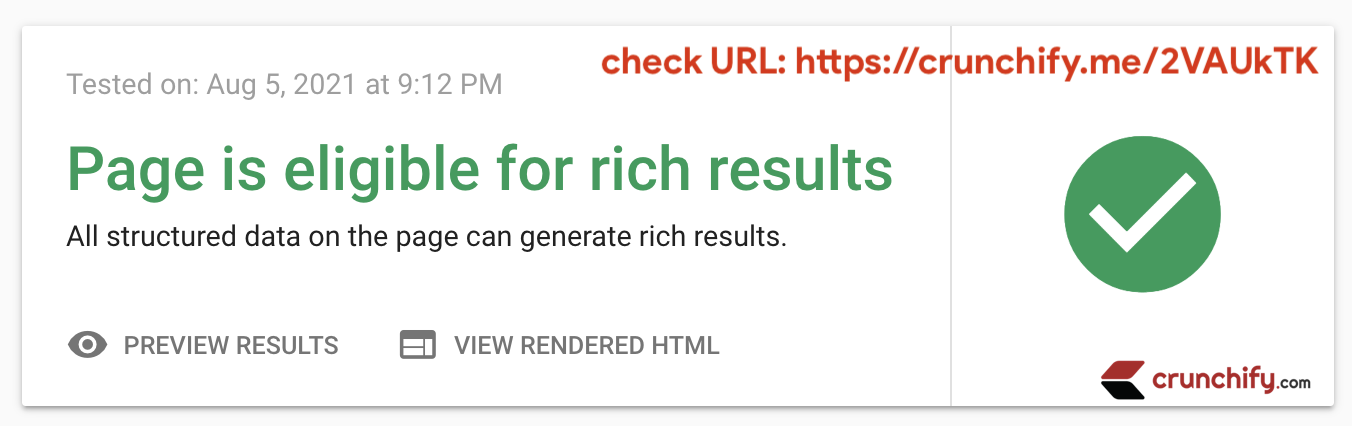
Point-3 如何验证您的结构化数据是否有效或有任何问题?
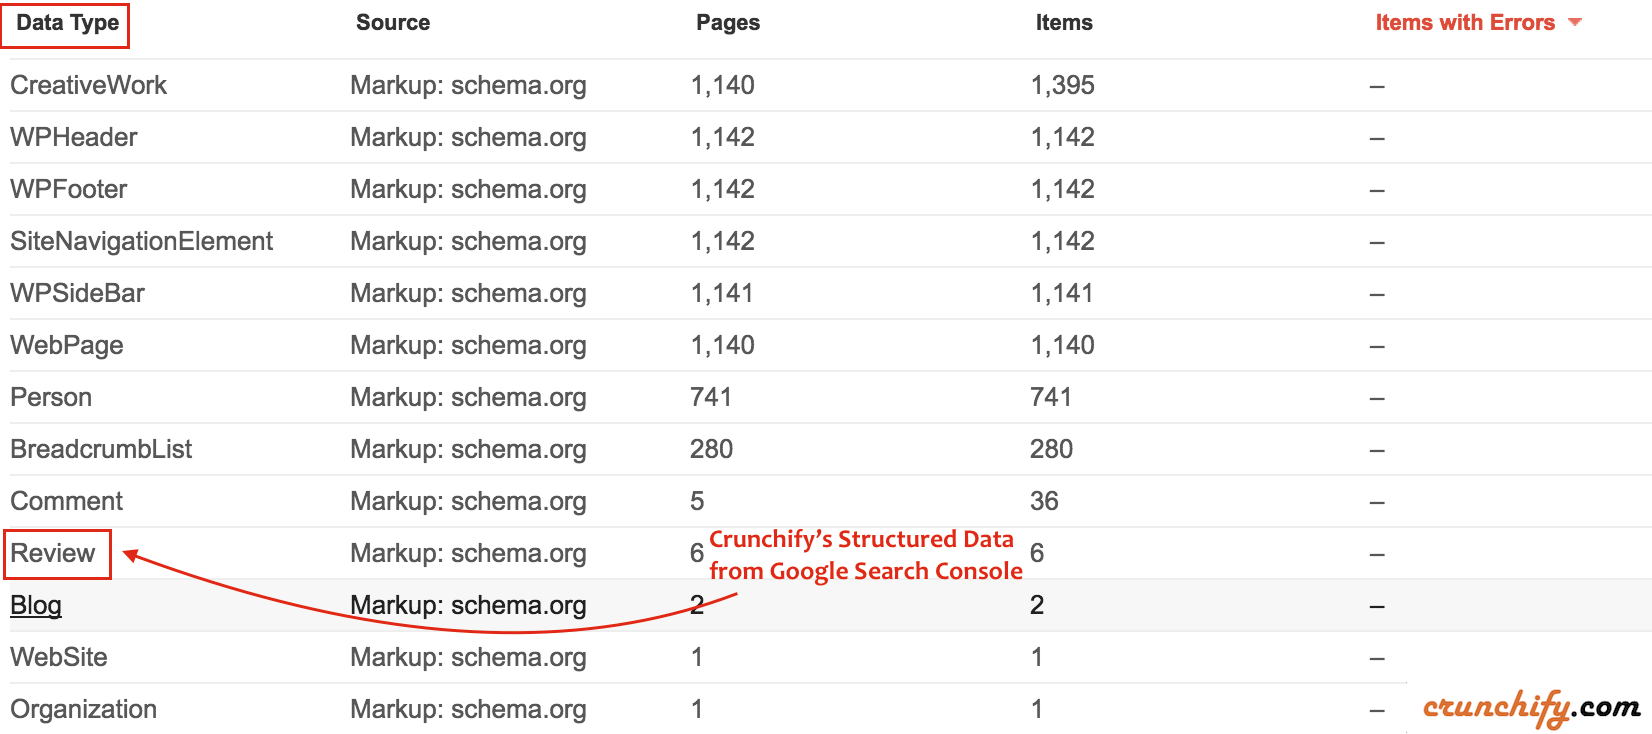
- 在上图中
Items with Errors的最后一列中,Google 还提供了称为结构化数据测试工具的附加工具。 - 只需去那里并点击
Fetch URL。 - 提供 URL 并点击
FETCH & VALIDATE。 - 在右侧——您应该看到 schema.org 验证结果。
- 如果出现故障和错误的
schema.org- 您应该会看到红色消息。

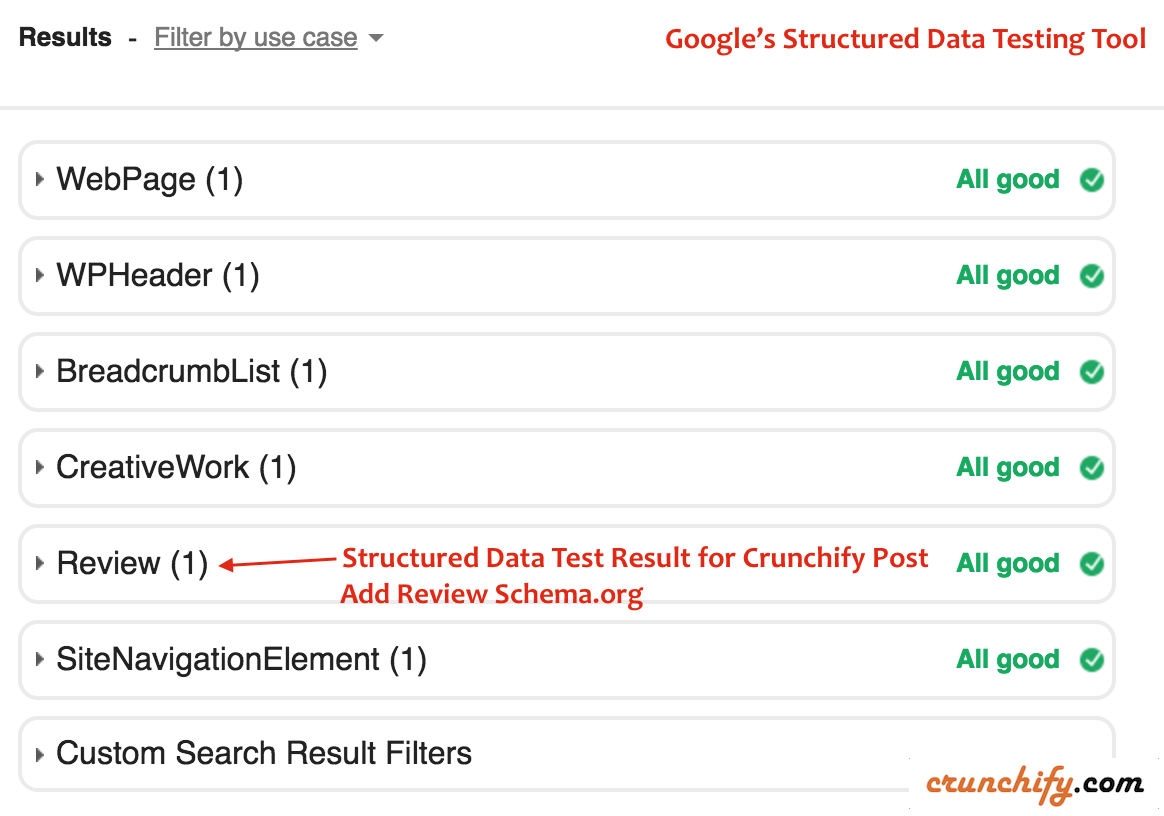
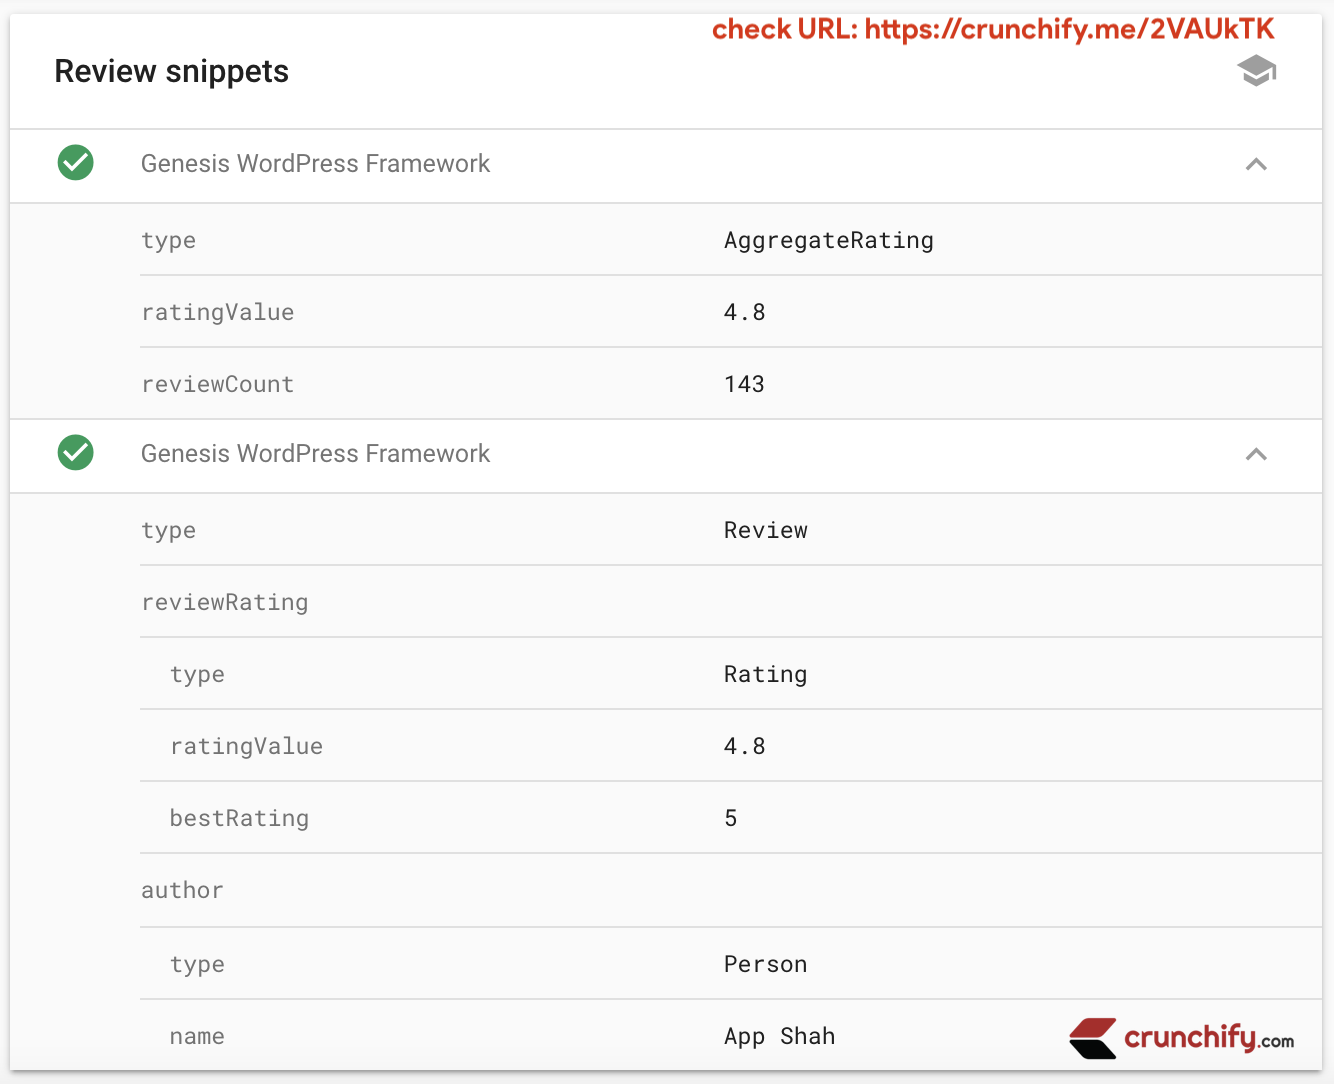
Expand above Review section ,您应该能够看到所有详细的微数据供您查看。 你可以自己检查一下。 Here is a URL.
如果您有以下任何问题,本教程将起作用:
- 为评论和评级启用丰富的片段
- 用于审查的结构化数据
- 用于评级的结构化数据
- 综合评分模式生成器
- 'Review' schema.org 微数据的模式创建者
- 丰富的片段评论生成器
- 谷歌丰富的片段供审查
- 丰富网页摘要预览工具
- WordPress博客文章的丰富片段
- 丰富网页摘要网站的食谱
第 4 步让我们添加 Review Schema.org 片段
这是一个 HTML 代码,您需要将其放入TEXT section下的帖子编辑面板中。
|
1 2 3 4 5 6 7 8 9 10 |
< div class = "crunchify-rating" itemscope itemtype = "http://schema.org/Review" > < span itemprop = "itemReviewed" itemscope itemtype = "http://schema.org/Thing" style = "font-size: 14px;" > < a itemprop = "url" href = "https://crunchify.me/genesis" target = "_blank" > < span itemprop = "name" > < strong > Genesis WordPress Theme Framework Review < / strong > < / span > < / a > < / span > < p > < / p > < strong > Description : < / strong > < span itemprop = "description" > One of the best WordPress Theme Framework which we use on Crunchify . com . Default comes with Google ' s rich schema . org snippet microdata . < / span > < span itemprop = "author" itemscope itemtype = "http://schema.org/Person" > < strong > Written by : < / strong > < span itemprop = "name" > App Shah < / span > < / span > < span itemprop = "reviewRating" itemscope itemtype = "http://schema.org/Rating" > < strong > Rating : < / strong > < span itemprop = "ratingValue" > 5 < / span > out of < span itemprop = "bestRating" > 5 < / span > < / span > < span itemprop = "publisher" itemscope itemtype = "http://schema.org/Organization" > < meta itemprop = "name" content = "Crunchify, LLC." / > < / span > < / div > |
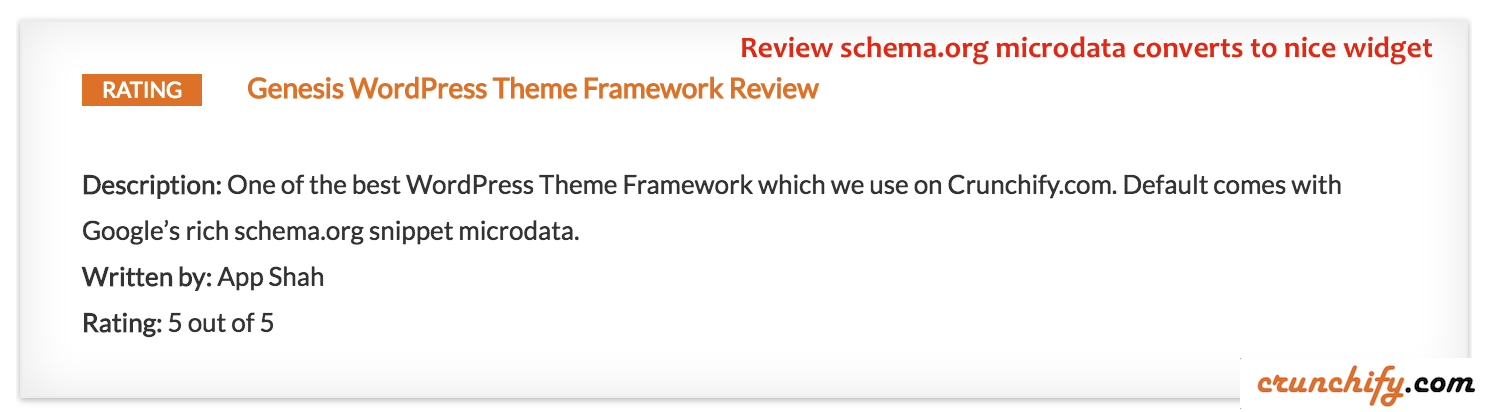
相应地修改值,上面的代码将通过简单的CSS tricks转换为漂亮的小部件,如下图所示。
带有实时评论示例的 URL:https://crunchify.com/crunchify-co-moved-to-genesis-framework-thesis-vs-genesis/
就是这样。 将上述代码添加到博客文章后,再次返回Google Structured Data Validation tool并检查您的文章 URL :)。 根据抓取算法将您的帖子更新到 SERP 可能需要长达week的时间。
我们在 Crunchify 上使用的 CSS 是什么?
在 Crunchify 上,我们使用下面的 CSS。 只需将以下代码添加到主题的 style.css 文件中,根据需要修改属性,一切都很好。
|
1 2 3 4 5 6 7 8 9 10 11 12 13 14 15 16 17 18 19 20 21 22 |
. crunchify - rating { overflow : hidden ; margin - bottom : 35px ; border - radius : 3px ; box - shadow : 0 0 2px 0 rgba ( 0 , 0 , 0 , . 12 ) , 0 2px 2px 0 rgba ( 0 , 0 , 0 , . 24 ) ; font - size : 16px ; color : #333; padding : 30px 60px 5px ; background : #fff; border - left : 2px solid #157BDA; } . crunchify - rating : before { content : "Rating" ! important ; font - size : 16px ; text - transform : uppercase ; color : #fff; float : left ; margin : 2px 15px 15px 0 ; background : #157BDA; padding : 0px 20px ; border - radius : 30px ; } |
如何将上述 CSS 文件添加到启用 AMP 的页面?
只需在<style amp-custom> HTML 标记下的页面 <head> 下添加上述 CSS 内容。

|
1 2 3 4 5 6 7 8 9 10 11 12 13 14 15 16 17 18 19 20 21 22 23 24 25 26 27 28 29 |
< head > . . . <style amp-custom> /* any custom styles go here. */ .crunchify-rating { overflow : hidden ; margin-bottom : 35px ; border-radius : 3px ; box-shadow : 0 0 2px 0 rgba ( 0,0,0,.12 ) , 0 2px 2px 0 rgba ( 0,0,0,.24 ) ; font-size : 16px ; color : #333 ; padding : 30px 60px 5px ; background : #fff ; border-left : 2px solid #157BDA ; } .crunchify-rating:before { content : "Rating" !important ; font-size : 16px ; text-transform : uppercase ; color : #fff ; float : left ; margin : 2px 15px 15px 0 ; background : #157BDA ; padding : 0px 20px ; border-radius : 30px ; } </style> . . . < / head > |
如果您还有其他问题,请告诉我。
不要忘记获取您的 Genesis 框架副本。
快乐的博客。