
如何設置 WordPress 和 AMP:加速移動頁面:附加設置分析、AdSense、社交媒體指南
已發表: 2016-09-25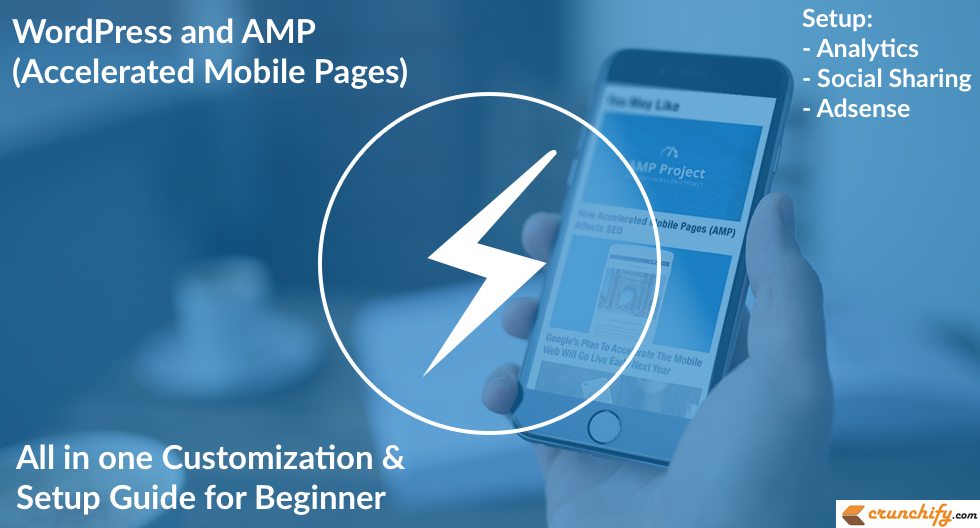
最近幾天有很多關於 Google AMP 的討論。 Google 正式宣布將 AMP 頁面支持作為移動搜索頁面的一部分。 這真的很有趣。 到目前為止,我出於某種原因避免在 Crunchify 上實施 AMP,並且從未覺得它有任何重要性。
但是在查看了 Barry 的推文後,我也決定AMPlify Crunchify。
您在尋找 AMP 和 wordpress 提示嗎? 您想使用 Google 的 Accelerated Mobile Pages 來增強您的 WordPress 網站嗎? 或者您想在 WordPress 中安裝 AMP? 在本教程中,我們將詳細介紹如何通過所有詳細步驟對您的 WordPress 網站進行 AMPlify。
什麼是加速移動頁面 (AMP)?
Accelerated Mobile Pages (AMP) 項目是一個開源項目,在創建時牢記速度,它創建了一次移動優化內容,並在任何地方立即加載。 頁面上根本沒有加載 JavaScript。 具有嚴格限制的 CSS 加載非常少。 我注意到你甚至不能在 CSS 中使用!important的觀察結果之一。
有以下任何問題嗎?
- Google AMP:它是什麼以及它是否適合您的 WordPress 網站
- 為 AMP 設置 WordPress 的最佳方式
- 如何從 Google AMP 頁面和 WordPress 開始
- 加速移動頁面wordpress插件
- WordPress 放大器頁面
- Yoast amp 膠水和 wordpress 查詢
讓我們開始吧:為您的 WordPress 帖子啟用 AMP
第1步
安裝官方 AMP 插件。
- 激活後,一切就緒。 您不會看到任何選項菜單。
- 您必須轉到
Settings->“Permalinks”菜單。 單擊Save Changes而不進行任何更改。
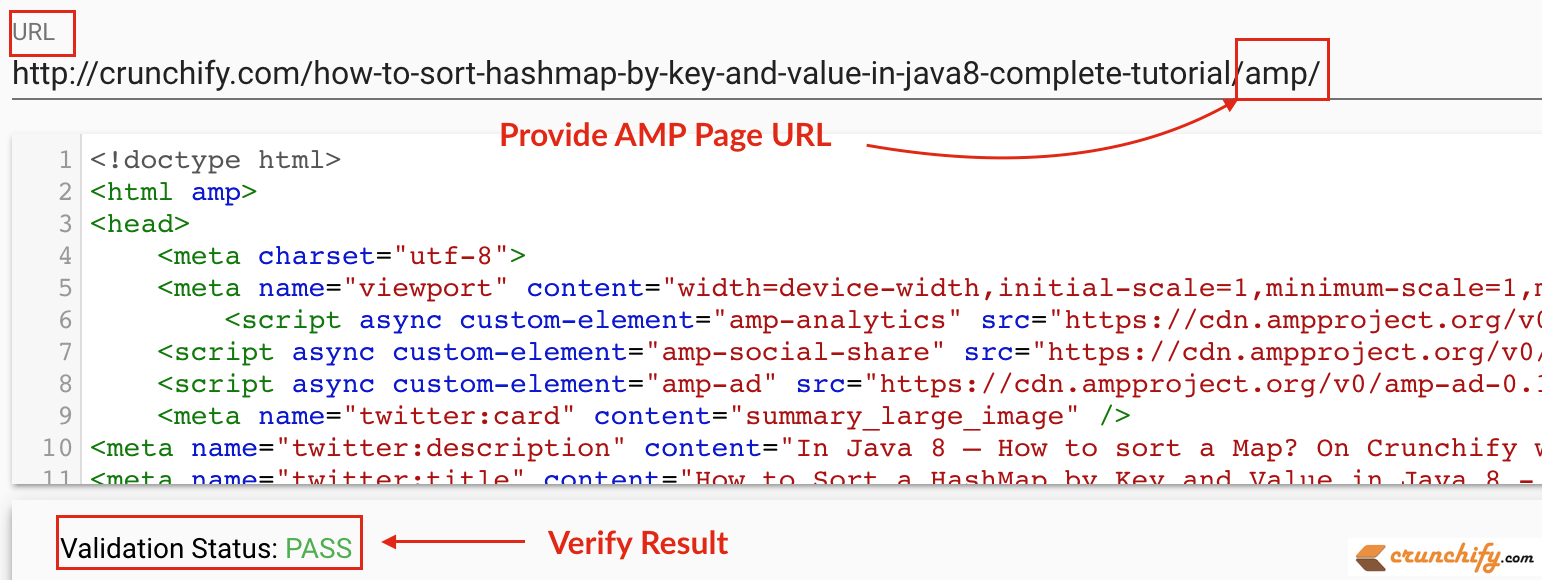
官方 AMP 插件提供基本功能,您的所有帖子都將自動 AMPlify。 您可以通過在任何帖子 URL 的末尾添加/amp/來訪問您的帖子的 AMPlified 版本。
看一個例子:
-
Original帖網址:https://crunchify.com/how-to-sort-hashmap-by-key-and-value-in-java8-complete-tutorial/ -
AMPlify發佈網址:https://crunchify.com/how-to-sort-hashmap-by-key-and-value-in-java8-complete-tutorial/amp/
第2步
為 Yoast SEO 和 AMP 插件安裝 Glue。 我相信從0.4 AMP WordPress version開始,您不需要任何其他與 AMP 相關的插件。
現在:
- 轉到
Appearance -> AMP。 - 提供
Header和Background顏色,然後單擊Save。

第三步
我看到這個插件的唯一問題是它在頁面底部添加了Powered by WordPress鏈接。 為了更改它,您可能需要使用以下代碼更改footer.php頁面。
- 轉到
Plugins->Editor - 選擇插件
AMP - 選擇文件 amp/templates/
footer.php
|
1 2 3 4 5 6 7 8 9 |
< footer class = "amp-wp-footer" > < div > < h2 > <?php echo esc_html ( $this - > get ( 'blog_name' ) ) ; ?> < / h2 > < p > Copyright < i class = "fa fa-copyright" aria - hidden = "true" > < / i > 2012 - 16 < a href = "https://crunchify.com" > Crunchify , LLC . < / a > • < a href = "https://crunchify.com/sitemap/" target = "_blank" > Archives < / a > • < a href = "https://crunchify.com/advertise/" target = "_blank" > Advertise < / a > < / p > < a href = "#top" class = "back-to-top" > <?php _e ( 'Back to top' , 'amp' ) ; ?> < / a > < / div > < / footer > |
根據您的需要修改版權行代碼

第四步
將Analytics和Social Media圖標添加到您的 AMP 頁面。
-
crunchify_amp_add_analytics_social_ads_js函數會將所需的分析和社交媒體javascript代碼添加到您的 amp 頁面。 -
crunchify_amp_add_analytics_social_code函數將添加實際的分析代碼和社交媒體圖標。 - 請確保在下方更新您的
Google Analytics Universal tracking ID和Facebook App ID。
|
1 2 3 4 5 6 7 8 9 10 11 12 13 14 15 16 17 18 19 20 21 22 23 24 25 26 27 28 29 30 31 32 33 34 35 36 37 38 39 40 41 42 43 44 45 |
// ~~~~~~~~~~~~~~~~~~~~~ AMP Changes Start ~~~~~~~~~~~~~~~~~~~ add_action ( 'amp_post_template_head' , 'crunchify_amp_add_analytics_social_ads_js' ) ; function crunchify_amp_add_analytics_social_ads_js ( $ amp_template ) { $ post_id = $ amp_template - > get ( 'post_id' ) ; ? > <script async custom-element = "amp-analytics" src = "https://cdn.ampproject.org/v0/amp-analytics-0.1.js" > </script> <script async custom-element = "amp-social-share" src = "https://cdn.ampproject.org/v0/amp-social-share-0.1.js" > </script> <?php } add_action ( 'amp_post_template_footer' , 'crunchify_amp_add_analytics_social_code' ) ; function crunchify_amp_add_analytics_social_code ( $amp_template ) { $post_id = $amp_template - > get ( 'post_id' ) ; ?> < amp - analytics type = "googleanalytics" id = "analytics1" > <script type = "application/json" > { "vars" : { "account" : "UA-43876549-1" // Modify universal tracking ID } , "triggers" : { "trackPageview" : { "on" : "visible" , "request" : "pageview" } } } </script> < / amp - analytics > // Social Media Code < div align = "center" > < amp - social - share type = "twitter" width = "30" height = "30" > < / amp - social - share > < amp - social - share type = "gplus" width = "30" height = "30" > < / amp - social - share > < amp - social - share type = "facebook" width = "30" height = "30" data - param - app_id = "509582389234904" > < / amp - social - share > // Modify your App ID < / div > < ? php } // ~~~~~~~~~~~~~~~~~~~~~ AMP Changes End ~~~~~~~~~~~~~~~~~~~ |
第 5 步
將 Google Adsense 代碼添加到您的 AMP 頁面。 就我而言,我想在特色圖片下方添加300x250的 Adsense 代碼。 沒有任何官方掛鉤可供使用,因此我修改了位於 <AMP Plugin directory> amp/templates/single.php的single.php文件。

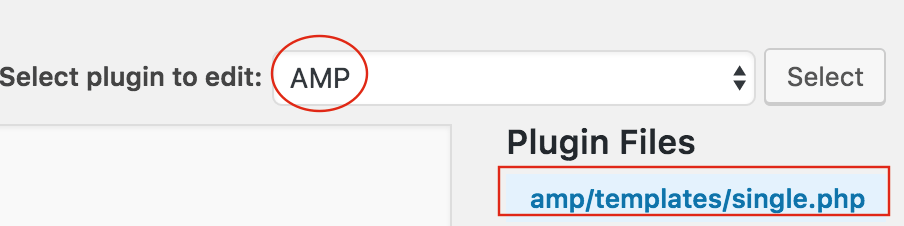
- 轉到
Plugins菜單 - 單擊
Editor - 選擇
AMP插件 - 轉到
single.php文件 - 添加 Adsense 代碼,如下面的代碼片段所示。 只需
look for line featured-image並在此之後添加 Adsense 代碼。
|
1 2 3 4 5 6 7 8 9 10 11 12 13 14 15 |
<?php $this - > load_parts ( array ( 'featured-image' ) ) ; ?> // Adsense code START < br > < div align = "center" > < amp - ad width = 300 height = 250 type = "adsense" data - ad - client = "ca-pub-xxxxxxxxxxxxxxxx" data - ad - slot = "0110036438" > < div placeholder > < / div > < div fallback > < / div > < / amp - ad > < / div > // Adsense code END < div class = "amp-wp-article-content" > |
你都準備好了。 只需清理您的網站緩存並查看實時 AMP 頁面。 您將看到所有 Google Analytics、Adsense 和社交媒體圖標正常工作
怎麼辦?
讓我們驗證並檢查您的 AMP 頁面是否存在任何問題。 轉到 https://validator.ampproject.org/ 並檢查結果。
Google 將如何抓取 AMP Post 頁面?
現在您的頁面同時擁有AMP and non-AMP versions ,AMP 插件會自動將以下關係元標記添加到您的兩個頁面。
在非 AMP 頁面上檢查
您應該看到該頁面的 AMP 版本的參考,以便讓 Google 和其他平台了解它:
<link rel="amphtml" href="https://crunchify.com/how-to-sort-hashmap-by-key-and-value-in-java8-complete-tutorial/amp/">

在 AMP 頁面上檢查
您應該會看到引用其非 AMP 規範版本的文本:
<link rel="canonical" href="https://crunchify.com/how-to-sort-hashmap-by-key-and-value-in-java8-complete-tutorial/">

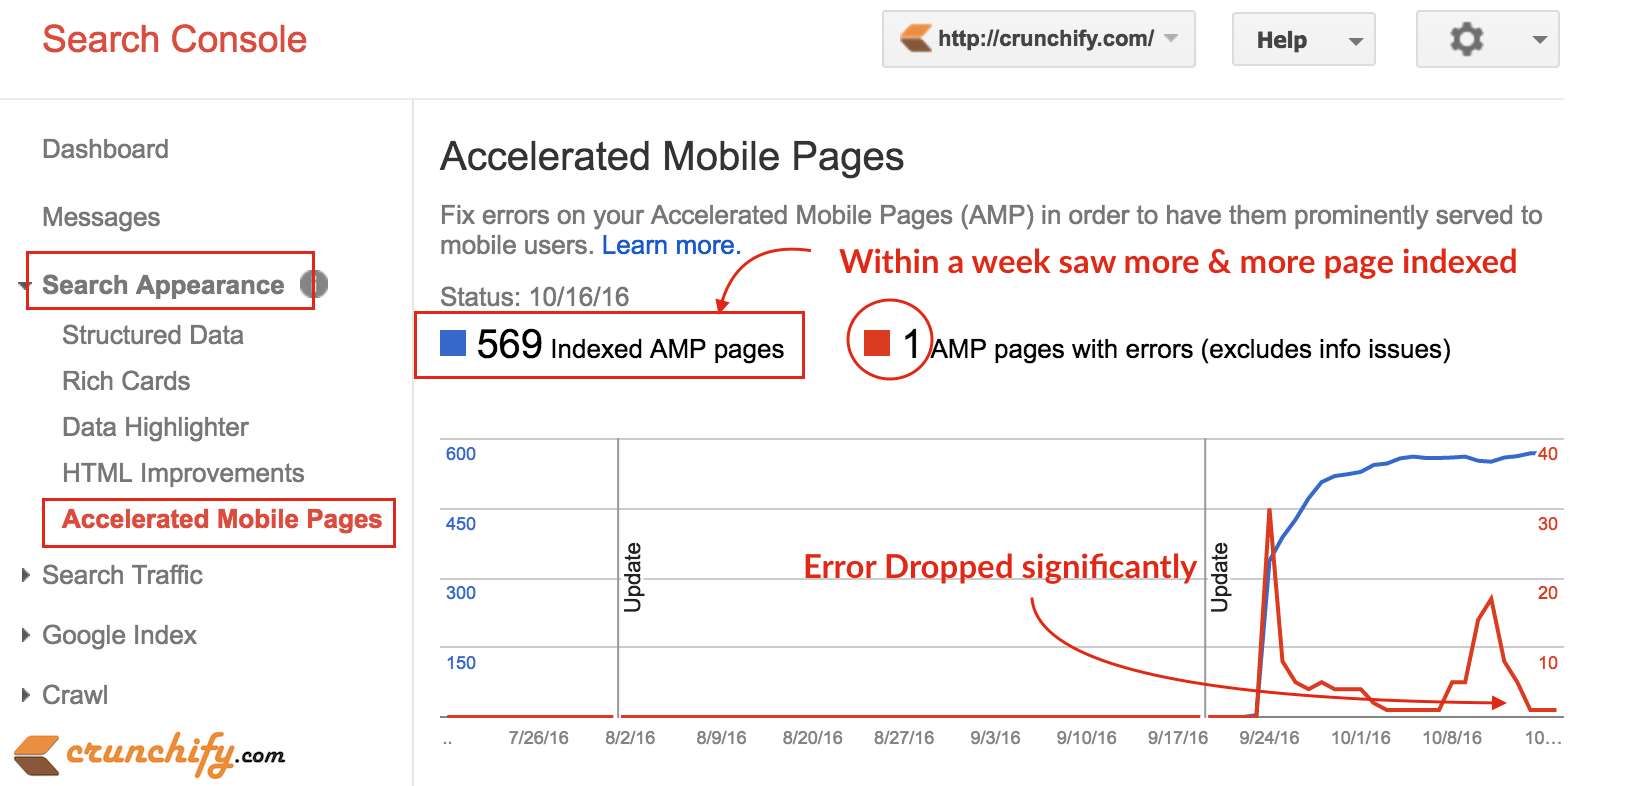
現在讓我們等待幾天或至少一周,您應該會在 Google Search Console 中看到 AMPlify 頁面。 對我來說,這只是 4 天,我看到近 500 個頁面已經為 AMP 結果編入索引
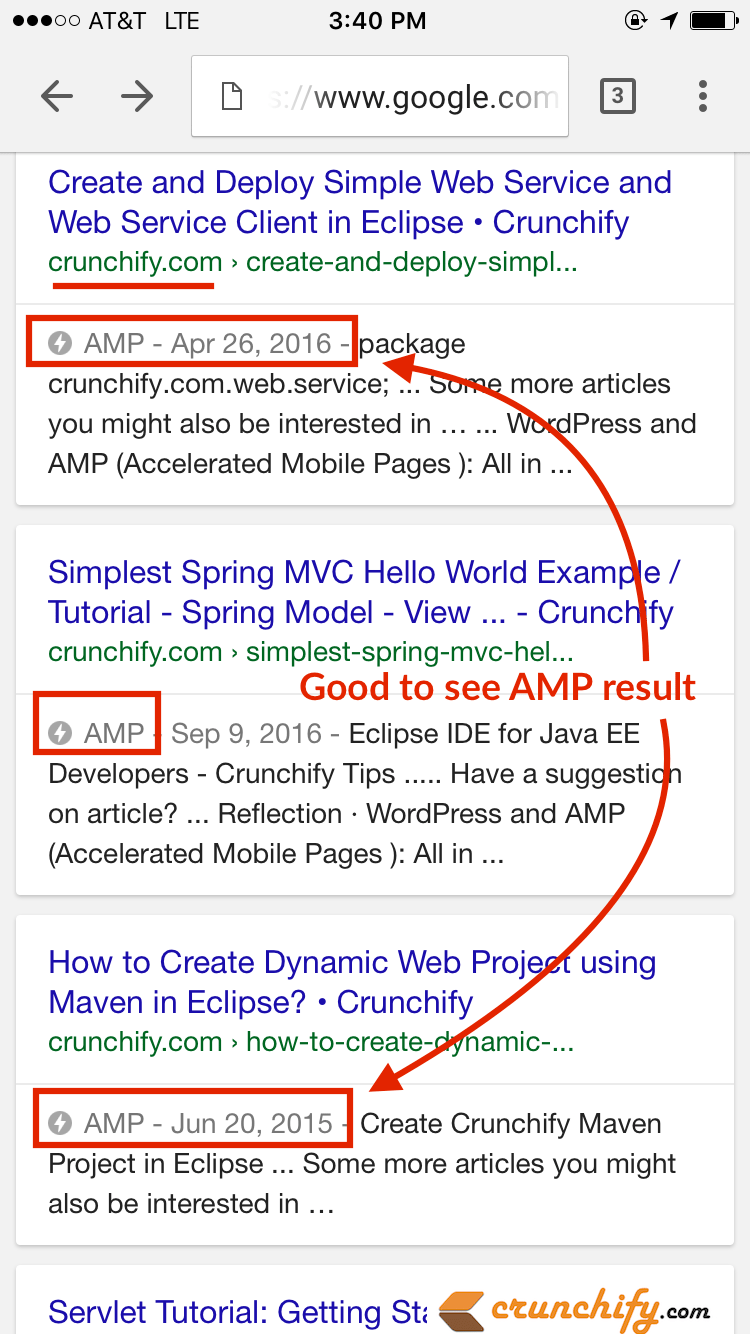
如何查看實時結果?
只需在移動瀏覽器上的 Google 中搜索帖子,您應該會在搜索結果頁面中看到AMP result 。
另外,請繼續訪問此頁面或添加書籤,因為我會根據我的學習不斷更新本教程。 快樂的博客和幫助加快網絡速度。