
如何在 Linux 上安裝 Docker 容器? (Ubuntu 和 CentOS)
已發表: 2019-08-01
毫無疑問,Docker 是滿足您企業和/或個人項目需求的最佳Container Management Platform 。
為什麼我們需要 Docker?
為您的項目考慮這個簡單的場景。
- 您有一個複雜的 Java Enterprise 應用程序,其中包含 50 多個 maven 依賴項。
- 您有更多的本地服務依賴項。
- 您有自己的數據庫實例在本地運行。
- 您有超過 10 個自定義 shell 腳本來設置您的環境。
- 你有 ~5 個環境變量。
- 你有大約 5 個自動啟動腳本。
- 等等…
好吧,當您想將以上所有內容運送給您的客戶時,這需要很多步驟。 不是嗎?
這就是 Docker 發揮作用的地方。
簡單:
如何在single docker image中構建和組裝以上所有內容並將該映像發送給您的客戶? 只需single step install , get ready within few minutes 。
在本教程中,我們將介紹如何install Docker on Linux以及所有必需的步驟。
讓我們開始吧:
第1步。 登錄 Linux 主機並檢查先決條件
Docker 有 3 種風格:
- Docker 引擎 – 社區
- Docker 引擎 – 企業
- 碼頭工人企業
在本教程中,我們將介紹安裝Docker Community Edition的步驟。
1.1) 登錄您的 Linux 主機。
我正在使用 Digital Ocean droplet 作為我的 linux 主機。
|
1 2 3 |
bash - 3.2 $ ssh root @ 45.56.94.4 root @ 45.56.94.4 ' s password : Welcome to Ubuntu 19.04 ( GNU / Linux 5.0.0 - 13 - generic x86_64 ) |
1.2) 檢查 Linux 操作系統架構:
您需要64-bit架構。
|
1 2 3 |
root @ localhost : ~ # arch x86_64 |
1.3) 檢查 Linux 操作系統內核級別:
內核級別應大於 3.0。
|
1 2 3 |
root @ localhost : ~ # uname -r 5.0.0 - 13 - generic |
第2步。 安裝 Docker 社區版
2.1) 確保將 Docker 的官方 PGP 密鑰添加到您的系統中。
|
1 2 3 4 |
root @ localhost : ~ # curl -fsSL https://download.docker.com/linux/ubuntu/gpg | sudo apt-key add - OK root @ localhost : ~ # |
2.2) 確保您獲得正確的 PGP 密鑰:
|
1 2 3 4 |
root @ localhost : ~ # sudo apt-key fingerprint 0EBFCD88 | grep 5822 Warning : apt - key output should not be parsed ( stdout is not a terminal ) 9DC8 5822 9FC7 DD38 854A E2D8 8D81 803C 0EBF CD88 |
2.3) 確保將您的 Ubuntu 操作系統安裝到最新版本
Command: sudo apt-get update
|
1 2 3 4 5 6 7 8 9 10 11 12 13 14 15 16 17 18 19 |
root @ localhost : ~ # sudo apt-get update Hit : 1 http : //mirrors.linode.com/ubuntu disco InRelease Get : 2 http : //mirrors.linode.com/ubuntu disco-updates InRelease [97.5 kB] Get : 3 http : //mirrors.linode.com/ubuntu disco-backports InRelease [88.8 kB] Hit : 4 https : //download.docker.com/linux/ubuntu disco InRelease Get : 5 http : //mirrors.linode.com/ubuntu disco-updates/main amd64 Packages [226 kB] Get : 6 http : //security.ubuntu.com/ubuntu disco-security InRelease [97.5 kB] Get : 7 http : //mirrors.linode.com/ubuntu disco-updates/main i386 Packages [194 kB] Get : 8 http : //mirrors.linode.com/ubuntu disco-updates/universe i386 Packages [252 kB] Get : 9 http : //mirrors.linode.com/ubuntu disco-updates/universe amd64 Packages [254 kB] Get : 10 http : //mirrors.linode.com/ubuntu disco-updates/universe Translation-en [80.1 kB] Get : 11 http : //security.ubuntu.com/ubuntu disco-security/main i386 Packages [144 kB] Get : 12 http : //security.ubuntu.com/ubuntu disco-security/main amd64 Packages [173 kB] Get : 13 http : //security.ubuntu.com/ubuntu disco-security/universe amd64 Packages [220 kB] Get : 14 http : //security.ubuntu.com/ubuntu disco-security/universe i386 Packages [217 kB] Get : 15 http : //security.ubuntu.com/ubuntu disco-security/universe Translation-en [55.4 kB] Fetched 2 , 098 kB in 2s ( 1 , 188 kB / s ) Reading package lists . . . Done |
2.4) 設置最新穩定的 Docker 存儲庫
Command: sudo add-apt-repository “deb [arch=amd64] https://download.docker.com/linux/ubuntu $(lsb_release -cs) stable”
|
1 2 3 4 5 6 7 8 |
root @ localhost : ~ # sudo add-apt-repository "deb [arch=amd64] https://download.docker.com/linux/ubuntu $(lsb_release -cs) stable" Hit : 1 http : //mirrors.linode.com/ubuntu disco InRelease Hit : 2 http : //mirrors.linode.com/ubuntu disco-updates InRelease Hit : 3 http : //mirrors.linode.com/ubuntu disco-backports InRelease Hit : 4 https : //download.docker.com/linux/ubuntu disco InRelease Hit : 5 http : //security.ubuntu.com/ubuntu disco-security InRelease Reading package lists . . . Done |
2.5) 安裝 Docker
Command: sudo apt-get install docker-ce
|
1 2 3 4 5 6 7 8 9 10 11 12 13 14 15 16 17 18 19 20 21 22 23 24 25 26 27 28 29 30 31 32 33 34 35 36 37 38 39 40 41 42 43 44 45 46 47 48 49 50 51 52 53 54 55 56 57 |
root @ localhost : ~ # sudo apt-get install docker-ce Reading package lists . . . Done Building dependency tree Reading state information . . . Done The following packages were automatically installed and are no longer required : bridge - utils dns - root - data dnsmasq - base ubuntu - fan Use 'sudo apt autoremove' to remove them . The following additional packages will be installed : aufs - tools containerd . io docker - ce - cli libltdl7 The following packages will be REMOVED : containerd docker . io runc The following NEW packages will be installed : aufs - tools containerd . io docker - ce docker - ce - cli libltdl7 0 upgraded , 5 newly installed , 3 to remove and 101 not upgraded . Need to get 87.9 MB of archives . After this operation , 133 MB of additional disk space will be used . Do you want to continue ? [ Y / n ] Y Get : 1 http : //mirrors.linode.com/ubuntu disco/universe amd64 aufs-tools amd64 1:4.9+20170918-2 [104 kB] Get : 2 http : //mirrors.linode.com/ubuntu disco/main amd64 libltdl7 amd64 2.4.6-10 [38.3 kB] Get : 3 https : //download.docker.com/linux/ubuntu disco/stable amd64 containerd.io amd64 1.2.6-3 [22.6 MB] Get : 4 https : //download.docker.com/linux/ubuntu disco/stable amd64 docker-ce-cli amd64 5:19.03.1~3-0~ubuntu-disco [42.5 MB] Get : 5 https : //download.docker.com/linux/ubuntu disco/stable amd64 docker-ce amd64 5:19.03.1~3-0~ubuntu-disco [22.7 MB] Fetched 87.9 MB in 3s ( 34.9 MB / s ) ( Reading database . . . 83080 files and directories currently installed . ) Removing docker . io ( 18.09.5 - 0ubuntu1 ) . . . '/usr/share/docker.io/contrib/nuke-graph-directory.sh' - > '/var/lib/docker/nuke-graph-directory.sh' Removing containerd ( 1.2.6 - 0ubuntu1 ) . . . Removing runc ( 1.0.0 ~ rc7 + git20190403 . 029124da - 0ubuntu1 ) . . . Selecting previously unselected package aufs - tools . ( Reading database . . . 82836 files and directories currently installed . ) Preparing to unpack . . . / aufs - tools_1 % 3a4.9 + 20170918 - 2_amd64.deb . . . Unpacking aufs - tools ( 1 : 4.9 + 20170918 - 2 ) . . . Selecting previously unselected package containerd . io . Preparing to unpack . . . / containerd . io_1 . 2.6 - 3_amd64.deb . . . Unpacking containerd . io ( 1.2.6 - 3 ) . . . Selecting previously unselected package docker - ce - cli . Preparing to unpack . . . / docker - ce - cli_5 % 3a19.03.1 ~ 3 - 0 ~ ubuntu - disco_amd64 . deb . . . Unpacking docker - ce - cli ( 5 : 19.03.1 ~ 3 - 0 ~ ubuntu - disco ) . . . Selecting previously unselected package docker - ce . Preparing to unpack . . . / docker - ce_5 % 3a19.03.1 ~ 3 - 0 ~ ubuntu - disco_amd64 . deb . . . Unpacking docker - ce ( 5 : 19.03.1 ~ 3 - 0 ~ ubuntu - disco ) . . . Selecting previously unselected package libltdl7 : amd64 . Preparing to unpack . . . / libltdl7_2 . 4.6 - 10_amd64.deb . . . Unpacking libltdl7 : amd64 ( 2.4.6 - 10 ) . . . Setting up aufs - tools ( 1 : 4.9 + 20170918 - 2 ) . . . Setting up containerd . io ( 1.2.6 - 3 ) . . . Setting up libltdl7 : amd64 ( 2.4.6 - 10 ) . . . Setting up docker - ce - cli ( 5 : 19.03.1 ~ 3 - 0 ~ ubuntu - disco ) . . . Setting up docker - ce ( 5 : 19.03.1 ~ 3 - 0 ~ ubuntu - disco ) . . . Installing new version of config file / etc / init . d / docker . . . Installing new version of config file / etc / init / docker . conf . . . Created symlink / etc / systemd / system / multi - user . target . wants / docker . service → / lib / systemd / system / docker . service . Processing triggers for systemd ( 240 - 6ubuntu5 ) . . . Processing triggers for man - db ( 2.8.5 - 2 ) . . . Processing triggers for libc - bin ( 2.29 - 0ubuntu2 ) . . . |

2.6) 檢查 Docker 版本
|
1 2 |
root @ localhost : ~ # docker -v Docker version 19.03.1 , build 74b1e89 |
步驟 3。 啟動 Docker 並運行 Hello World
3.1) 在 Linux 上運行 Docker 的簡單命令
正如您在安裝過程中看到的,Docker 將自己註冊為系統服務: /lib/systemd/system/docker.service 。
|
1 |
root @ localhost : ~ # sudo systemctl start docker |
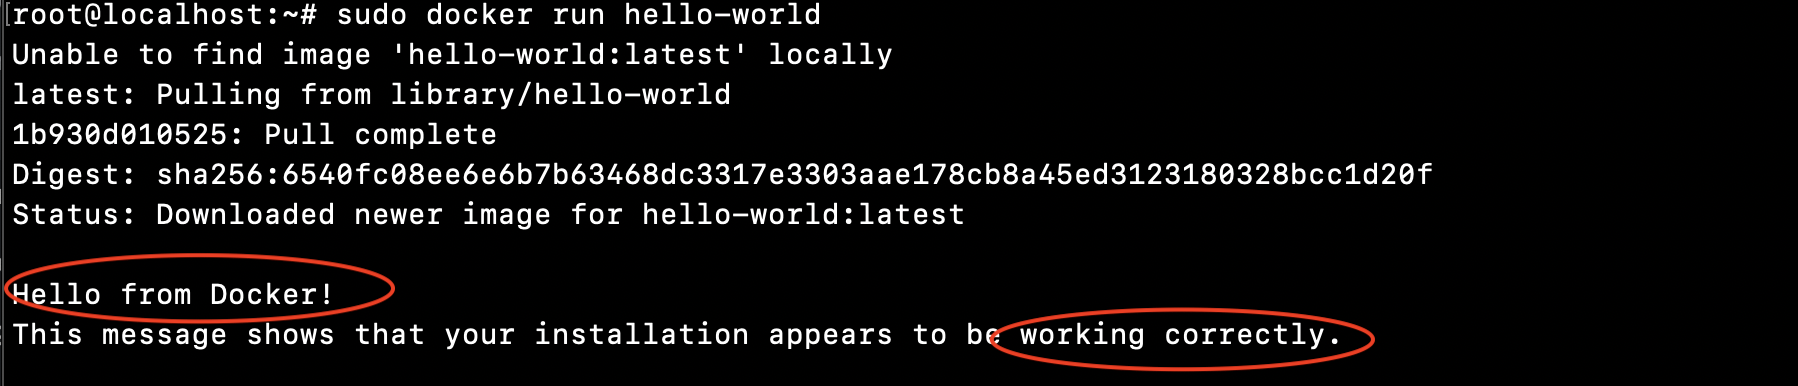
3.2) 讓我們拉出 Hello World Docker 並運行
Command: sudo docker run hello-world
|
1 2 3 4 5 6 7 8 9 10 11 12 13 14 15 16 17 18 19 20 21 22 23 24 25 26 27 28 29 |
root @ localhost : ~ # sudo docker run hello-world Unable to find image 'hello-world:latest' locally latest : Pulling from library / hello - world 1b930d010525 : Pull complete Digest : sha256 : 6540fc08ee6e6b7b63468dc3317e3303aae178cb8a45ed3123180328bcc1d20f Status : Downloaded newer image for hello - world : latest Hello from Docker ! This message shows that your installation appears to be working correctly . To generate this message , Docker took the following steps : 1. The Docker client contacted the Docker daemon . 2. The Docker daemon pulled the "hello-world" image from the Docker Hub . ( amd64 ) 3. The Docker daemon created a new container from that image which runs the executable that produces the output you are currently reading . 4. The Docker daemon streamed that output to the Docker client , which sent it to your terminal . To try something more ambitious , you can run an Ubuntu container with : $ docker run - it ubuntu bash Share images , automate workflows , and more with a free Docker ID : https : //hub.docker.com/ For more examples and ideas , visit : https : //docs.docker.com/get-started/ root @ localhost : ~ # |
上面的命令將拉取 docker 鏡像,您將能夠運行 Docker Hello World 應用程序。
第四步。 如何檢查 Docker 映像/存儲庫?
在運行 Hello World 應用程序之前:
|
1 2 3 4 5 6 |
root @ localhost : ~ # docker images REPOSITORY TAG IMAGE ID CREATED SIZE keyansoftwares / logviewersvc latest 04612d6a457d 2 months ago 144MB keyansoftwares / logreadagent latest 0385a757deb5 2 months ago 138MB keyansoftwares / logreadagent < none > d75a02abb278 2 months ago 369MB grafana / grafana latest f96bf1723e2a 3 months ago 245MB |
運行 Hello World 應用程序後:
正如你在這裡看到的——你會在下面看到新的存儲庫 hello-world
|
1 2 3 4 5 6 7 |
root @ localhost : ~ # docker images REPOSITORY TAG IMAGE ID CREATED SIZE keyansoftwares / logviewersvc latest 04612d6a457d 2 months ago 144MB keyansoftwares / logreadagent latest 0385a757deb5 2 months ago 138MB keyansoftwares / logreadagent < none > d75a02abb278 2 months ago 369MB grafana / grafana latest f96bf1723e2a 3 months ago 245MB hello - world latest fce289e99eb9 7 months ago 1.84kB |
恭喜。 你都準備好了。 您已經為 Docker 設置了 Linux 環境,安裝了 Docker 並運行了您的第一個 Docker 應用程序。
額外步驟:
我們建議您遵循這些安裝後步驟。
VM重啟後如何自動啟動docker?
Command: sudo systemctl enable docker
|
1 2 3 4 |
root @ localhost : ~ # sudo systemctl enable docker Synchronizing state of docker . service with SysV service script with / lib / systemd / systemd - sysv - install . Executing : / lib / systemd / systemd - sysv - install enable docker |
只需執行上述命令,您的 docker 將在您下次重新啟動 VM/主機時自動啟動。
如果您遇到任何運行以上命令的問題和任何 Docker 問題,請告訴我。
想在 CentOS 上安裝 Docker?
只需將上面的Step-2替換為以下步驟:
|
1 2 3 4 5 6 7 8 9 |
root @ localhost : ~ # sudo yum install -y yum-utils device-mapper-persistent-data lvm2 root @ localhost : ~ # sudo yum-config-manager --add-repo https://download.docker.com/linux/centos/docker-ce.repo root @ localhost : ~ # sudo yum install docker-ce docker-ce-cli containerd.io root @ localhost : ~ # sudo systemctl start docker root @ localhost : ~ # sudo docker run hello-world |