
如何在沒有任何插件的情況下為評論和評分添加豐富的片段? Google Structured Schema.org 微數據標記
已發表: 2020-04-21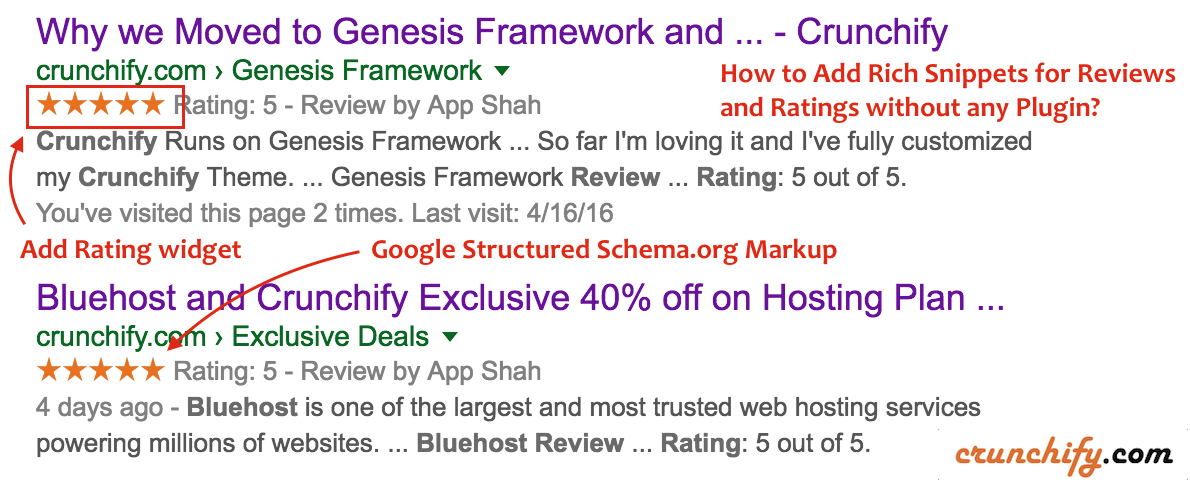
你有沒有想過谷歌how and why在谷歌搜索結果頁面 (SERP) 中顯示一些特殊評論帖子的評級?
在本教程中,我們將討論如何以schema.org的形式為 Review/Rating add rich snippet ,以便 Google 可以了解有關您的評論的詳細信息並將其顯示在搜索頁面中。
結帳實時結果:https://crunchify.me/2VAUkTK。 豐富的片段鏈接。
在開始之前,讓我們了解一下什麼是 schema.org?
Schema 是一種microdata ,它使 Google 或 Bing 搜索引擎更容易更effectively解析和解釋您的博客頁面上的信息。 想法是幫助搜索引擎以structured format理解所有數據,以便搜索引擎也可以根據搜索查詢將這些相關的結果數據顯示給最終用戶。
讓我們開始吧:
Point-1)如何以schema.org的形式將結構化數據添加到您的博客中?
在 Crunchify 上,我們使用的是 Genesis Framework,默認情況下它帶有所有schema.org microdata格式。 它在您網站的代碼中輸出微數據。 我不需要添加任何東西,這就是 Genesis Framework 的美妙之處,除了我們將在discuss below的Review metadata選項。
Point-2)如何驗證您網站的結構化數據?
默認情況下, Google Search Console提供了查看結構化數據的選項。 看看下面的圖表。
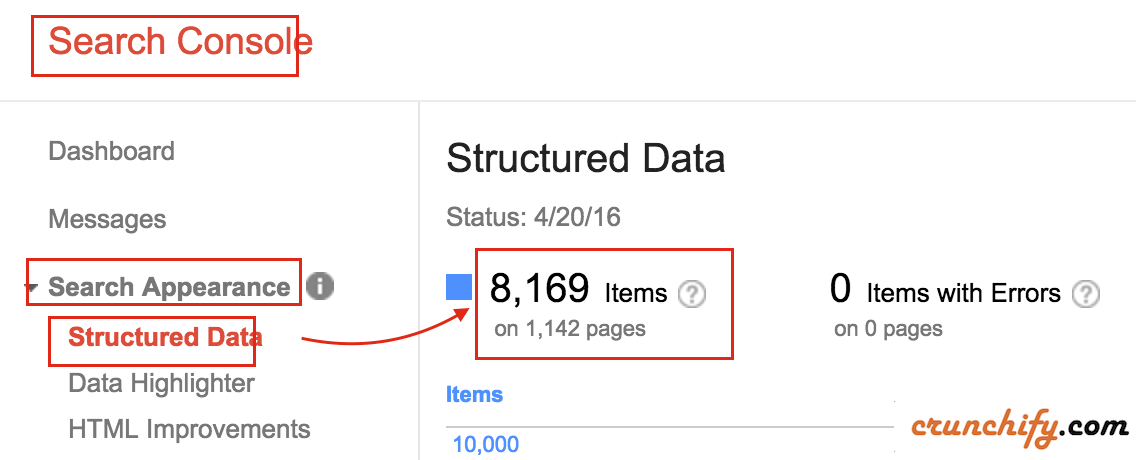
為了查看這些數據,您必須將您的網站/博客添加到 Search Console。 一旦您驗證了您網站的身份,您就可以立即查看數據OR等待一周以automatically生成此數據。
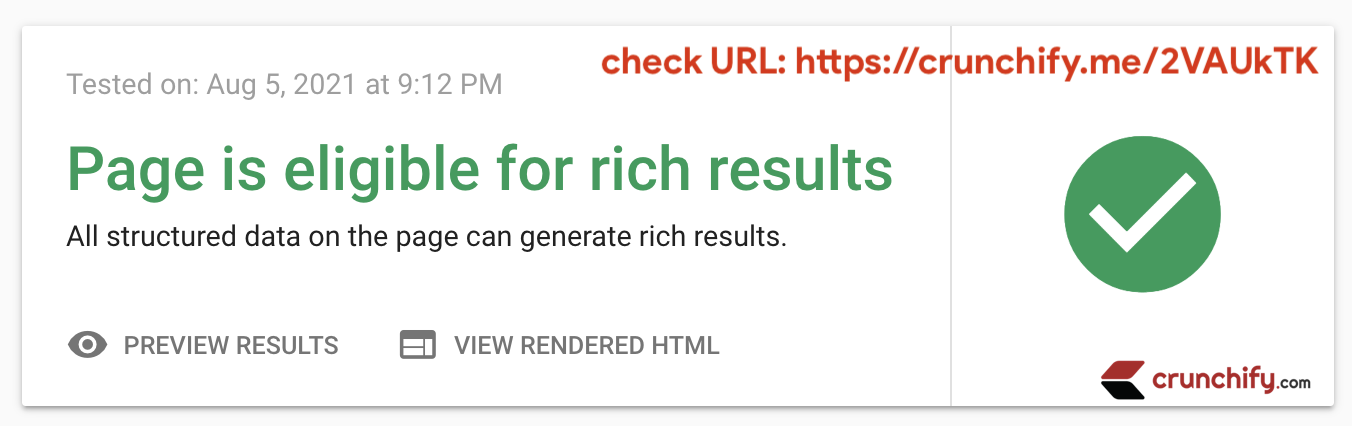
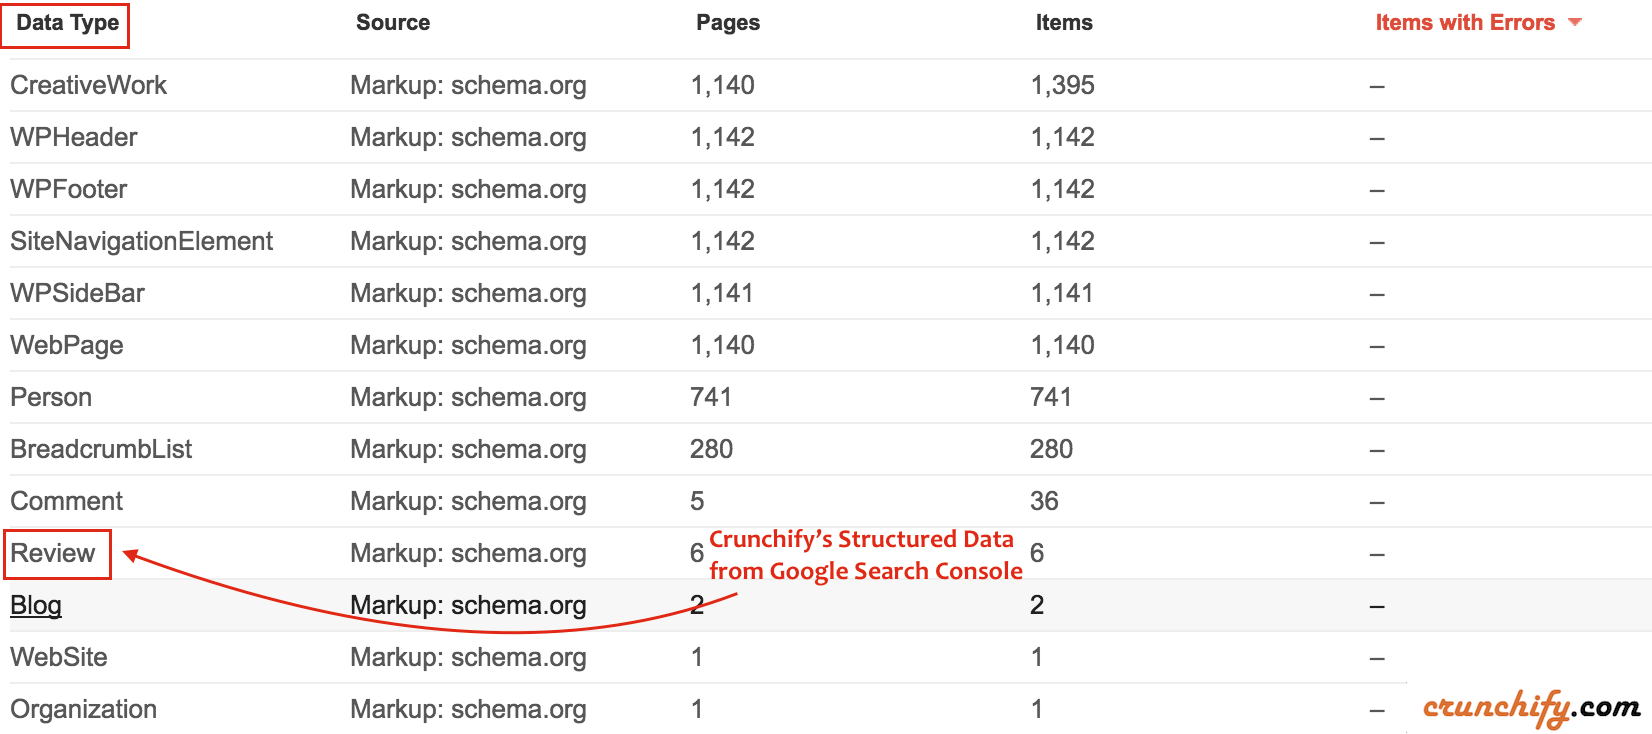
Point-3 如何驗證您的結構化數據是否有效或有任何問題?
- 在上圖中
Items with Errors的最後一列中,Google 還提供了稱為結構化數據測試工具的附加工具。 - 只需去那裡並點擊
Fetch URL。 - 提供 URL 並點擊
FETCH & VALIDATE。 - 在右側——您應該看到 schema.org 驗證結果。
- 如果出現故障和錯誤的
schema.org- 您應該會看到紅色消息。

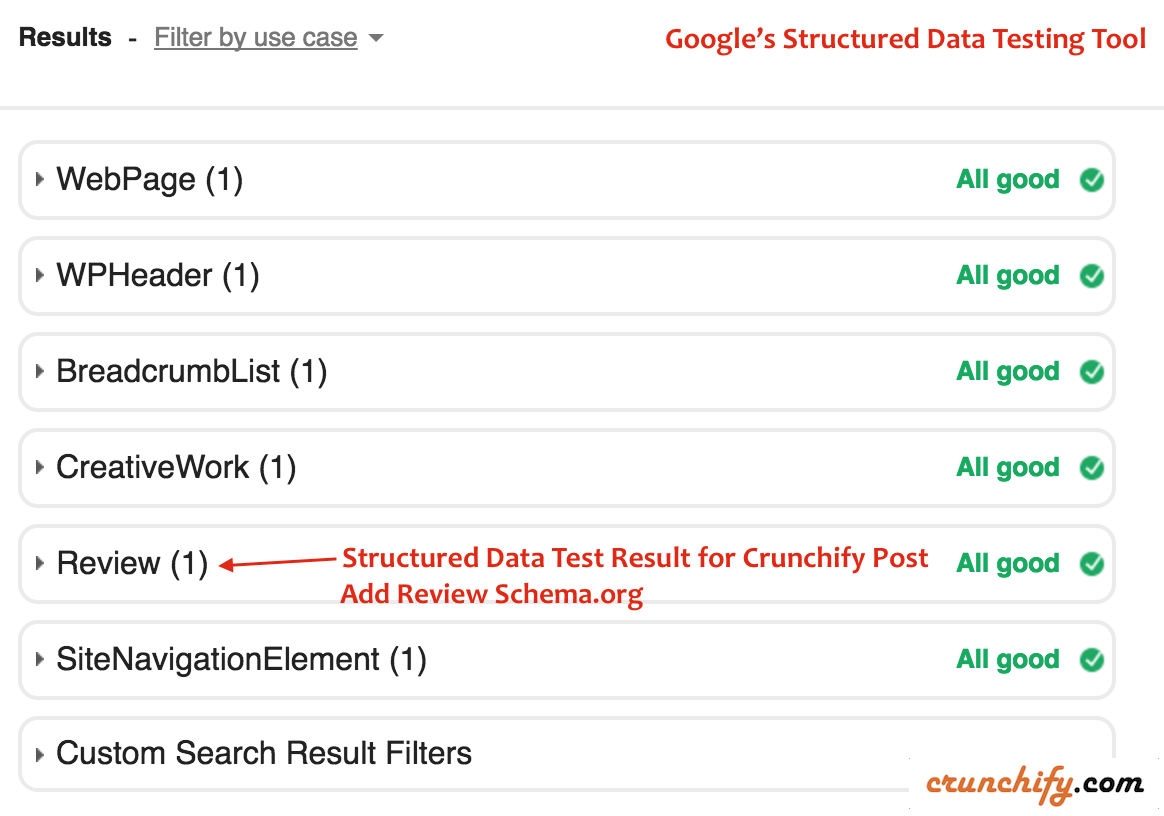
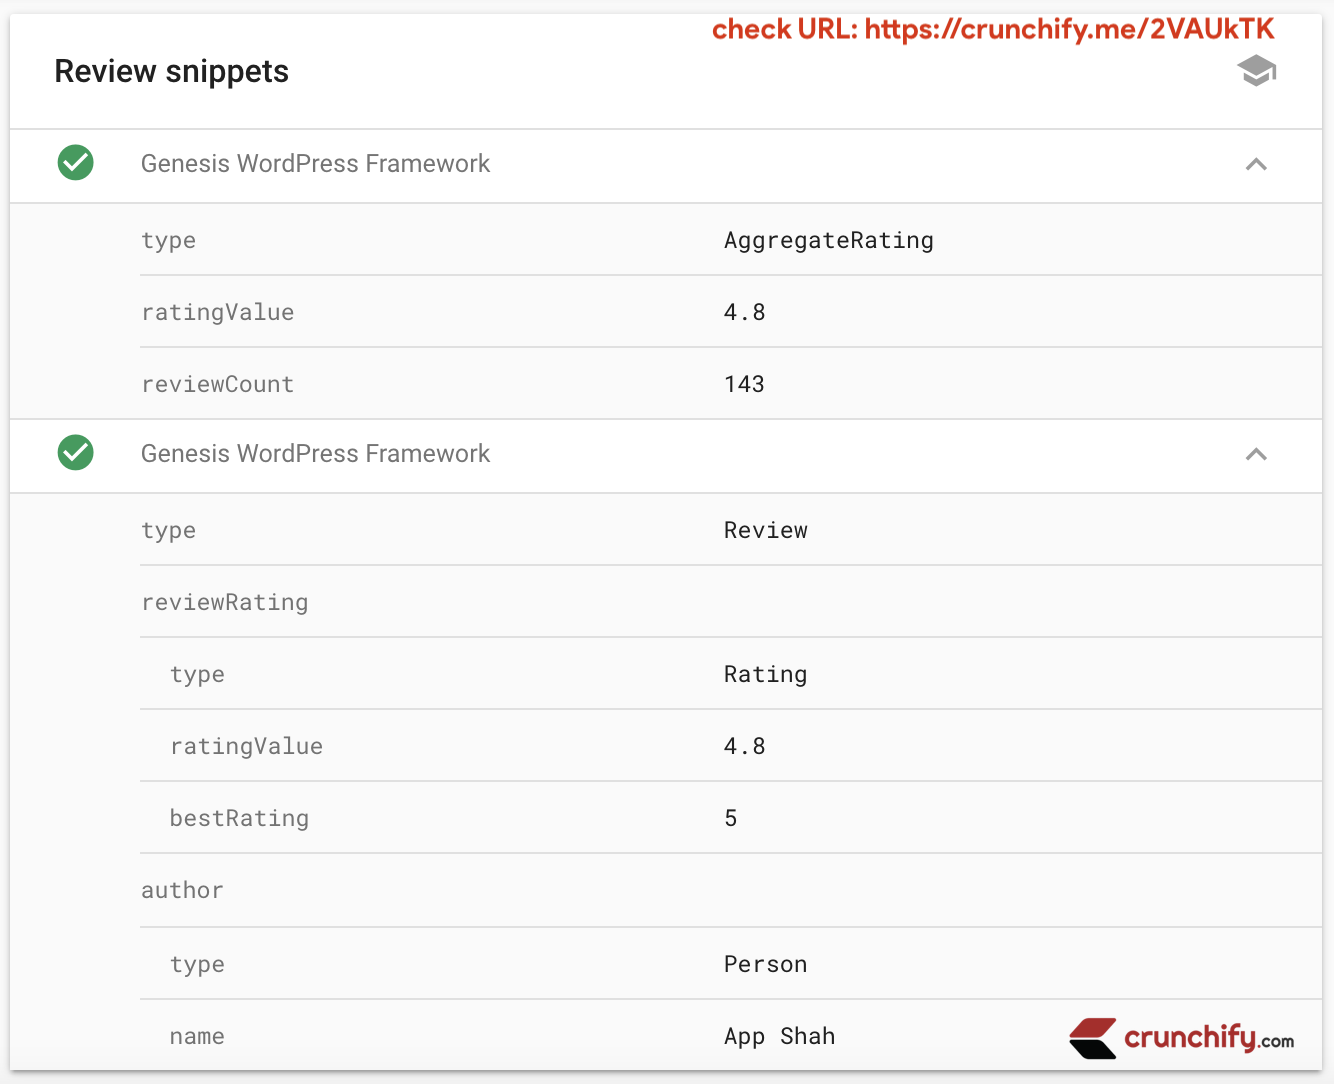
Expand above Review section ,您應該能夠看到所有詳細的微數據供您查看。 你可以自己檢查一下。 Here is a URL.
如果您有以下任何問題,本教程將起作用:
- 為評論和評級啟用豐富的片段
- 用於審查的結構化數據
- 用於評級的結構化數據
- 綜合評分模式生成器
- 'Review' schema.org 微數據的模式創建者
- 豐富的片段評論生成器
- 谷歌豐富的片段供審查
- 豐富網頁摘要預覽工具
- WordPress博客文章的豐富片段
- 豐富網頁摘要網站的食譜
第 4 步讓我們添加 Review Schema.org 片段
這是一個 HTML 代碼,您需要將其放入TEXT section下的帖子編輯面板中。
|
1 2 3 4 5 6 7 8 9 10 |
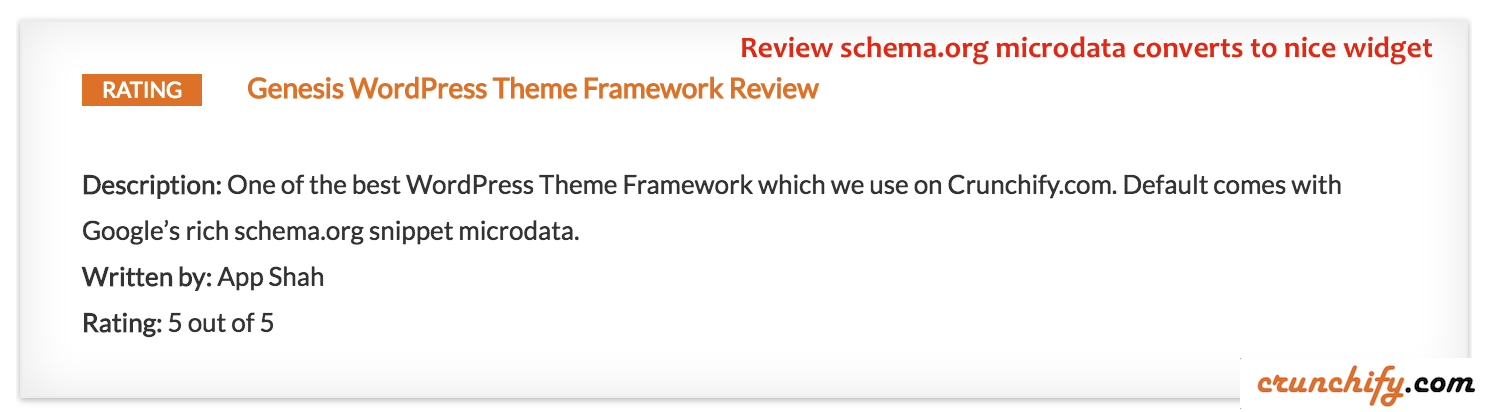
< div class = "crunchify-rating" itemscope itemtype = "http://schema.org/Review" > < span itemprop = "itemReviewed" itemscope itemtype = "http://schema.org/Thing" style = "font-size: 14px;" > < a itemprop = "url" href = "https://crunchify.me/genesis" target = "_blank" > < span itemprop = "name" > < strong > Genesis WordPress Theme Framework Review < / strong > < / span > < / a > < / span > < p > < / p > < strong > Description : < / strong > < span itemprop = "description" > One of the best WordPress Theme Framework which we use on Crunchify . com . Default comes with Google ' s rich schema . org snippet microdata . < / span > < span itemprop = "author" itemscope itemtype = "http://schema.org/Person" > < strong > Written by : < / strong > < span itemprop = "name" > App Shah < / span > < / span > < span itemprop = "reviewRating" itemscope itemtype = "http://schema.org/Rating" > < strong > Rating : < / strong > < span itemprop = "ratingValue" > 5 < / span > out of < span itemprop = "bestRating" > 5 < / span > < / span > < span itemprop = "publisher" itemscope itemtype = "http://schema.org/Organization" > < meta itemprop = "name" content = "Crunchify, LLC." / > < / span > < / div > |
相應地修改值,上面的代碼將通過簡單的CSS tricks轉換為漂亮的小部件,如下圖所示。
帶有實時評論示例的 URL:https://crunchify.com/crunchify-co-moved-to-genesis-framework-thesis-vs-genesis/
就是這樣。 將上述代碼添加到博客文章後,再次返回Google Structured Data Validation tool並檢查您的文章 URL :)。 根據抓取算法將您的帖子更新到 SERP 可能需要長達week的時間。
我們在 Crunchify 上使用的 CSS 是什麼?
在 Crunchify 上,我們使用下面的 CSS。 只需將以下代碼添加到主題的 style.css 文件中,根據需要修改屬性,一切都很好。
|
1 2 3 4 5 6 7 8 9 10 11 12 13 14 15 16 17 18 19 20 21 22 |
. crunchify - rating { overflow : hidden ; margin - bottom : 35px ; border - radius : 3px ; box - shadow : 0 0 2px 0 rgba ( 0 , 0 , 0 , . 12 ) , 0 2px 2px 0 rgba ( 0 , 0 , 0 , . 24 ) ; font - size : 16px ; color : #333; padding : 30px 60px 5px ; background : #fff; border - left : 2px solid #157BDA; } . crunchify - rating : before { content : "Rating" ! important ; font - size : 16px ; text - transform : uppercase ; color : #fff; float : left ; margin : 2px 15px 15px 0 ; background : #157BDA; padding : 0px 20px ; border - radius : 30px ; } |
如何將上述 CSS 文件添加到啟用 AMP 的頁面?
只需在<style amp-custom> HTML 標記下的頁面 <head> 下添加上述 CSS 內容。

|
1 2 3 4 5 6 7 8 9 10 11 12 13 14 15 16 17 18 19 20 21 22 23 24 25 26 27 28 29 |
< head > . . . <style amp-custom> /* any custom styles go here. */ .crunchify-rating { overflow : hidden ; margin-bottom : 35px ; border-radius : 3px ; box-shadow : 0 0 2px 0 rgba ( 0,0,0,.12 ) , 0 2px 2px 0 rgba ( 0,0,0,.24 ) ; font-size : 16px ; color : #333 ; padding : 30px 60px 5px ; background : #fff ; border-left : 2px solid #157BDA ; } .crunchify-rating:before { content : "Rating" !important ; font-size : 16px ; text-transform : uppercase ; color : #fff ; float : left ; margin : 2px 15px 15px 0 ; background : #157BDA ; padding : 0px 20px ; border-radius : 30px ; } </style> . . . < / head > |
如果您還有其他問題,請告訴我。
不要忘記獲取您的 Genesis 框架副本。
快樂的博客。