
如何轻松更改 WordPress 登录页面 Logo 和 URL?
已发表: 2021-09-09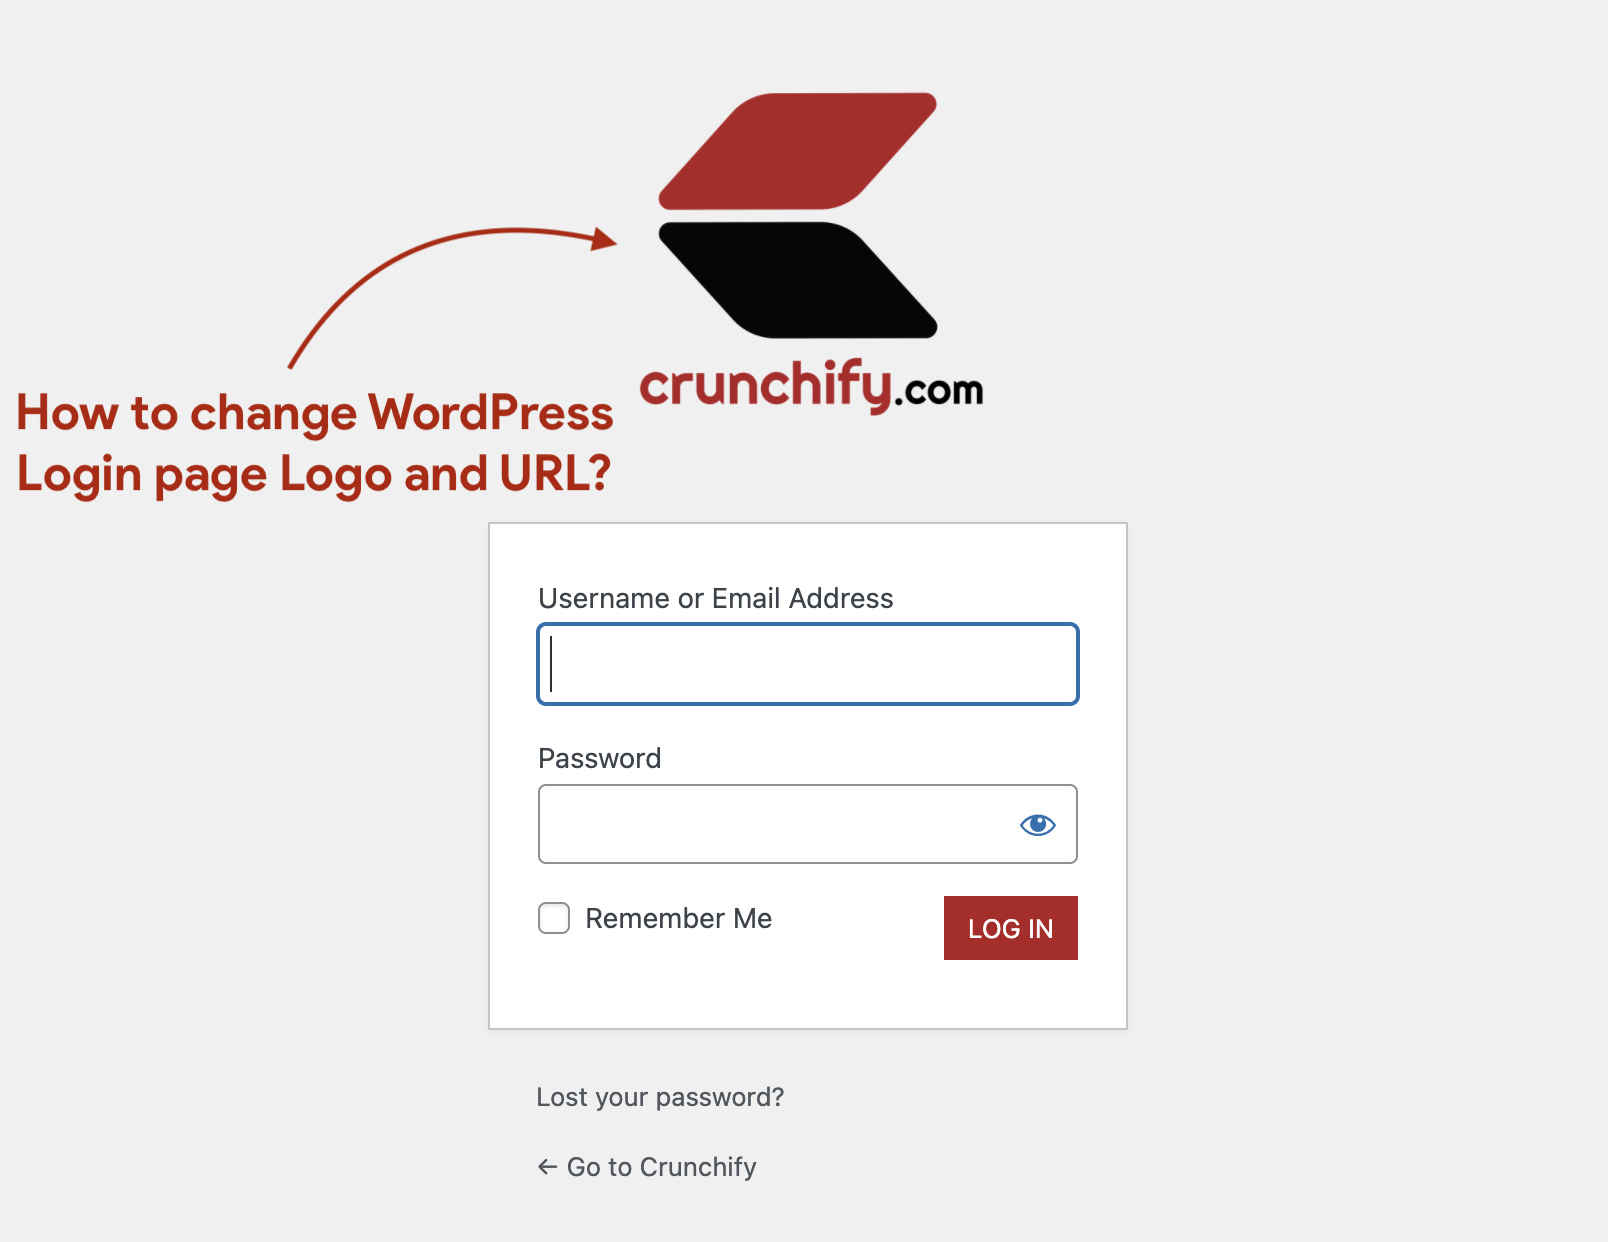
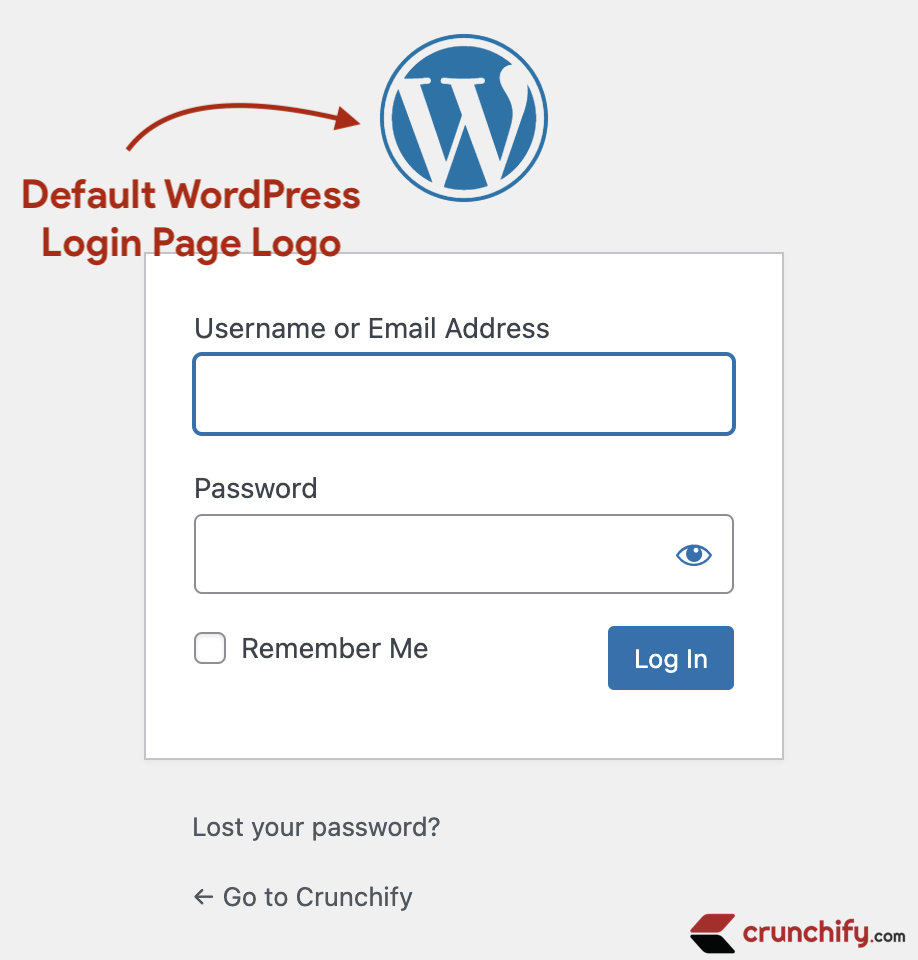
这是登录页面默认的 WordPress 徽标:
- 如何更改 WordPress 登录徽标和 URL?
- 自定义登录表单
- 如何轻松更改 WordPress 中的登录徽标?
默认情况下,每个 WordPress 页面都有默认徽标和 WordPress.org URL。 如果您想更改 WordPress 默认登录 URL 和徽标,那么您来对地方了。
让我们开始吧:
步骤 1:更改登录页面 URL
我们将使用login_headerurl WordPress 挂钩更改 URL 链接。 它用于过滤 WordPress 登录页面上徽标的 URL。 默认情况下,此徽标链接到 WordPress 网站。
将以下代码放入 functions.php 文件中。
|
1 2 3 4 5 6 7 8 |
// The “login_headerurl” filter is used to filter the URL of the logo on the WordPress login page. // By default, this logo links to the WordPress site. add_filter ( 'login_headerurl' , 'crunchify_login_link' ) ; function crunchify_login_link ( ) { // Change Logo link if you want user to redirect to other link. return home_url ( ) ; } |
第2步。 更改登录页面徽标
我们将使用login_enqueue_scripts WordPress 钩子。 当将要出现在登录页面上的项目排入队列时,它是正确使用的钩子。 尽管有这个名字,但它用于将脚本和样式排入队列。
将以下代码放入 functions.php 文件中。
|
1 2 3 4 5 6 7 8 9 10 11 12 13 14 15 16 17 18 19 20 21 22 23 24 25 26 27 28 29 30 31 32 33 34 35 36 37 38 39 40 41 42 43 44 45 46 47 48 49 50 51 52 53 54 55 56 57 58 59 60 61 62 63 64 65 66 67 68 69 70 71 72 73 74 75 76 77 78 79 80 81 82 83 84 85 86 87 88 89 90 91 92 93 94 95 96 97 98 99 |
// login_enqueue_scripts is the proper hook to use when enqueuing items that are meant to appear on the login page. // Despite the name, it is used for enqueuing both scripts and styles. add_action ( 'login_enqueue_scripts' , 'crunchify_change_login_logo' ) ; function crunchify_change_login_logo ( ) { ? > <style type ="text/css"> #login { width : 400px ; } #login h1 { background : transparent ; padding : 10px ; } #login h1 a { background : url ( 'https://cdn.crunchify.com/crunchify-logo.png' ) no-repeat center center ; background-size : 200px ; height : 200px ; margin : 0 auto ; width : 200px ; } .login form .input, .login input[type="text"] { font-size : 20px ; font-weight : 100 ; margin : 3px 7px 17px 0 ; padding : 6px 12px ; } input[type="checkbox"]:focus, input[type="color"]:focus, input[type="date"]:focus, input[type="datetime-local"]:focus, input[type="datetime"]:focus, input[type="email"]:focus, input[type="month"]:focus, input[type="number"]:focus, input[type="password"]:focus, input[type="radio"]:focus, input[type="search"]:focus, input[type="tel"]:focus, input[type="text"]:focus, input[type="time"]:focus, input[type="url"]:focus, input[type="week"]:focus, select:focus, textarea:focus { border : 2px solid #ddd ; box-shadow : 0 0 3px rgba ( 0, 0, 0, .3 ) ; } .wp-core-ui .button-group.button-large .button, .wp-core-ui .button.button-large { background : #b11f24 ; border : 0 ; border-radius : 0 ; box-shadow : none ; font-weight : 400 ; height : 20px ; line-height : 30px ; padding : 2px 14px 4px ; text-shadow : none ; text-transform : uppercase ; } .login #backtoblog a:hover, .login #nav a:hover, .login h1 a:hover { color : #b11f24 ; } .login .message { border-left-color : #ddd ; } input[type="checkbox"], input[type="color"], input[type="date"], input[type="datetime-local"], input[type="datetime"], input[type="email"], input[type="month"], input[type="number"], input[type="password"], input[type="radio"], input[type="search"], input[type="tel"], input[type="text"], input[type="time"], input[type="url"], input[type="week"], select, textarea { border : 2px solid #ccc ; } </style> < ? php } |
只需保存所有更改并转到您网站的登录页面。 它应该看起来像这样:https://crunchify.com/wp-admin/

而已。 恭喜。 您已成功更新登录页面徽标和 URL。 如果您在运行此代码时遇到任何问题,请告诉我。