
WordPressのログインページのロゴとURLを簡単に変更するにはどうすればよいですか?
公開: 2021-09-09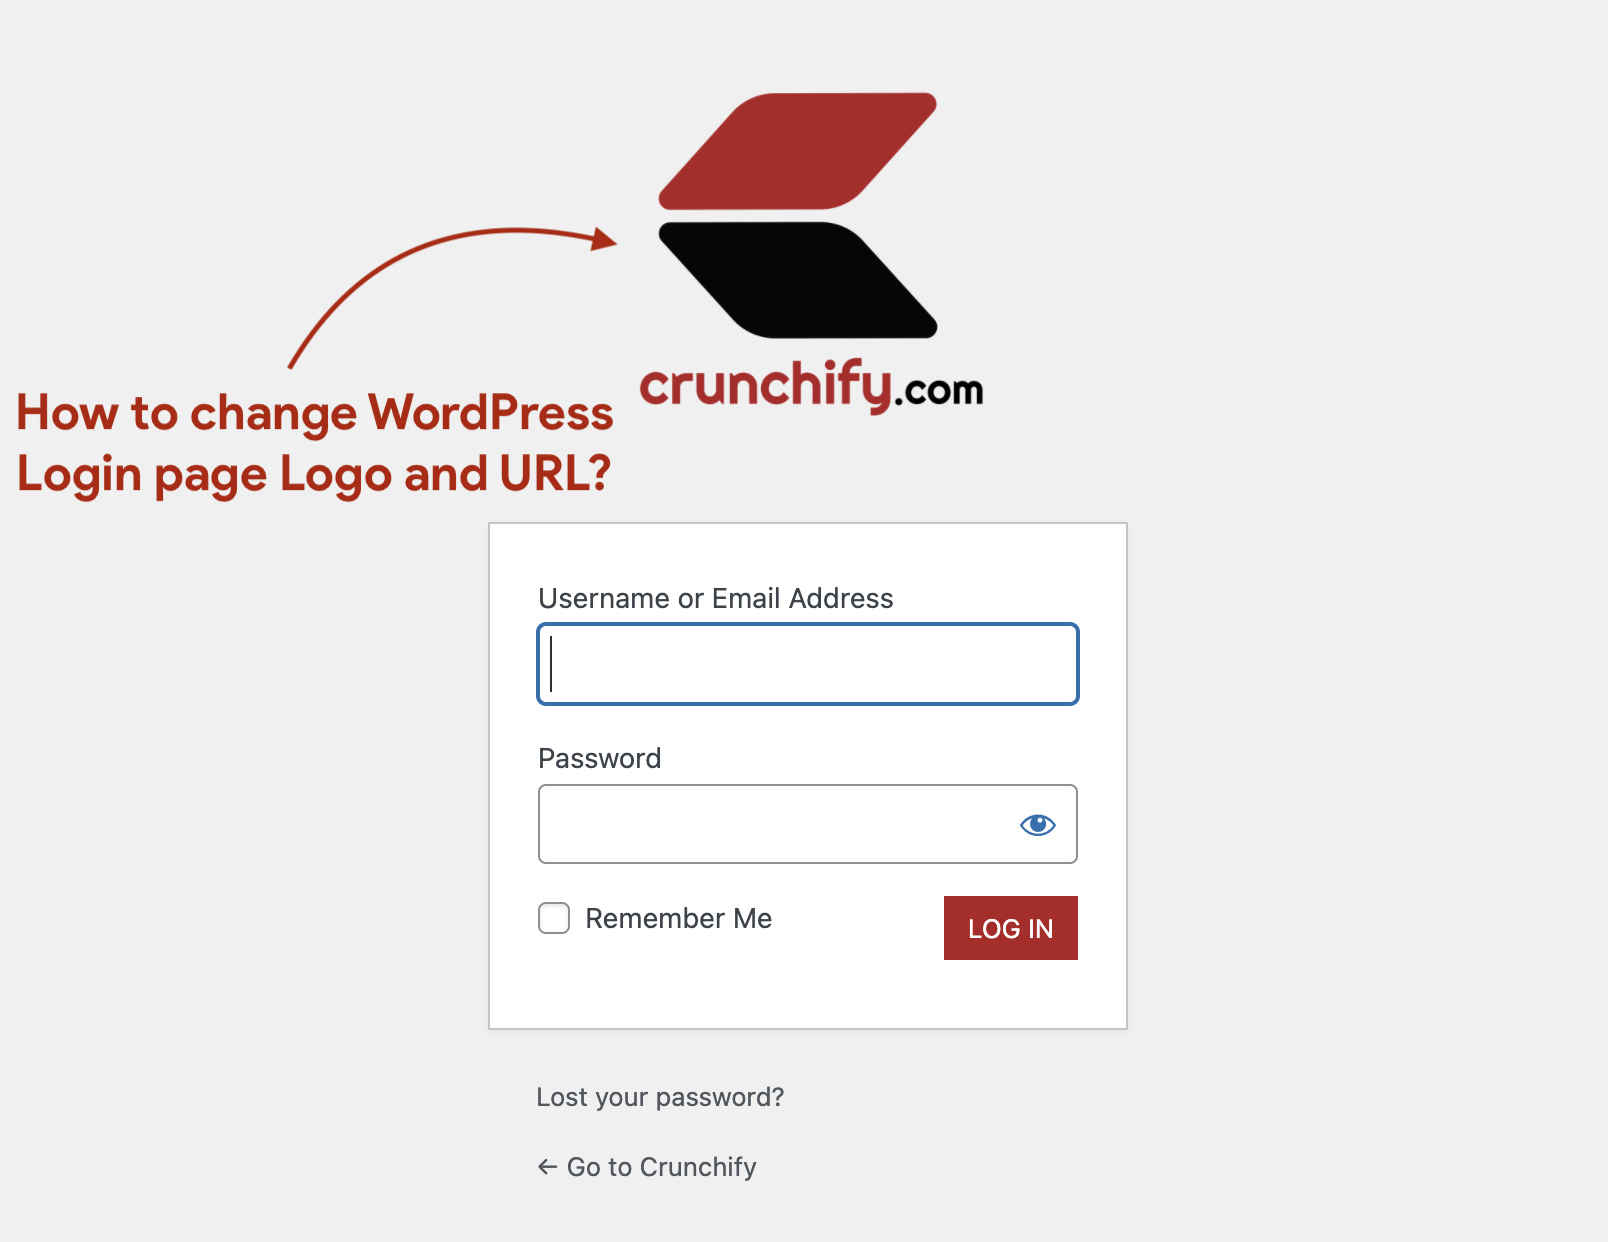
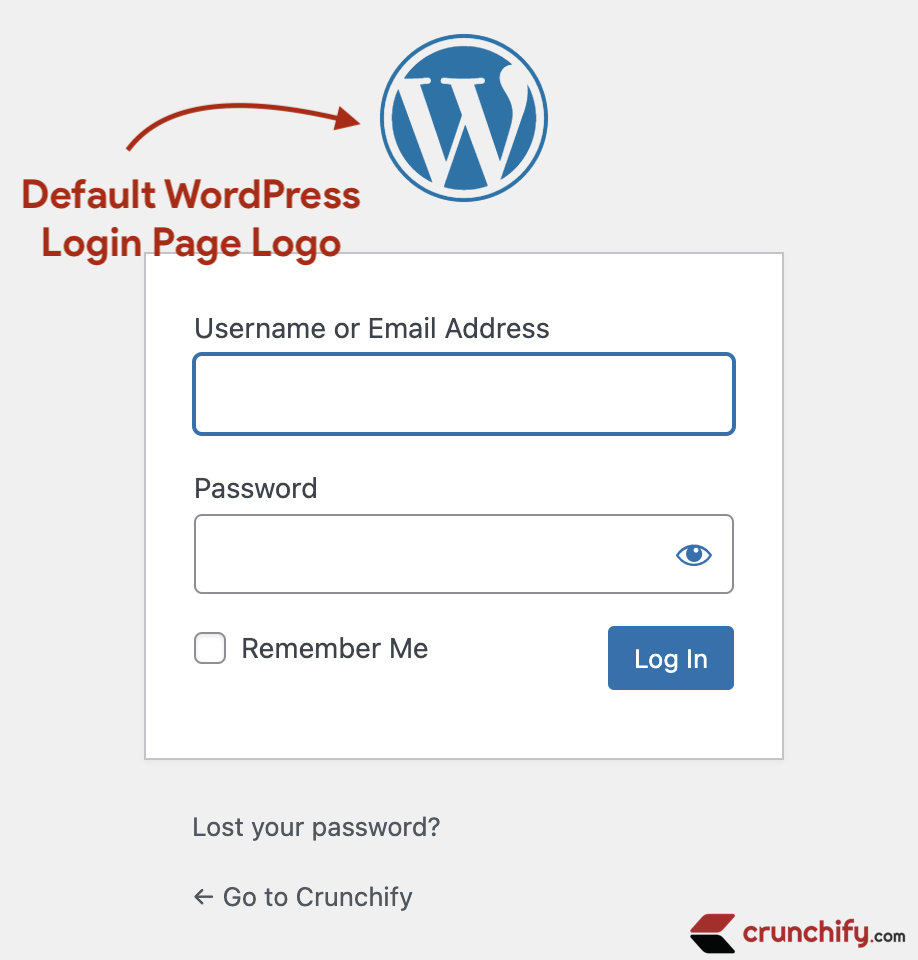
ログインページのデフォルトのWordPressロゴは次のとおりです。
- WordPressのログインロゴとURLを変更するにはどうすればよいですか?
- ログインフォームのカスタマイズ
- WordPressでログインロゴを簡単に変更するにはどうすればよいですか?
デフォルトでは、すべてのWordPressページにデフォルトのロゴとWordPress.orgのURLがあります。 WordPressのデフォルトのログインURLとロゴを変更したい場合に備えて、あなたは正しい場所にいます。
始めましょう:
ステップ-1:ログインページのURLを変更する
我々は使用するだろうlogin_headerurlリンクを変更するためのWordPressフック。 WordPressログインページのロゴのURLをフィルタリングするために使用されます。 デフォルトでは、このロゴはWordPressサイトにリンクしています。
以下のコードをfunctions.phpファイルに入れます。
|
1 2 3 4 5 6 7 8 |
// The “login_headerurl” filter is used to filter the URL of the logo on the WordPress login page. // By default, this logo links to the WordPress site. add_filter ( 'login_headerurl' , 'crunchify_login_link' ) ; function crunchify_login_link ( ) { // Change Logo link if you want user to redirect to other link. return home_url ( ) ; } |
ステップ2。 ログインページのロゴを変更する
我々は使用するだろうlogin_enqueue_scriptsフック。 これは、ログインページに表示されることを意図したアイテムをキューに入れるときに使用する適切なフックです。 名前にもかかわらず、スクリプトとスタイルの両方をキューに入れるために使用されます。
以下のコードをfunctions.phpファイルに入れます。
|
1 2 3 4 5 6 7 8 9 10 11 12 13 14 15 16 17 18 19 20 21 22 23 24 25 26 27 28 29 30 31 32 33 34 35 36 37 38 39 40 41 42 43 44 45 46 47 48 49 50 51 52 53 54 55 56 57 58 59 60 61 62 63 64 65 66 67 68 69 70 71 72 73 74 75 76 77 78 79 80 81 82 83 84 85 86 87 88 89 90 91 92 93 94 95 96 97 98 99 |
// login_enqueue_scripts is the proper hook to use when enqueuing items that are meant to appear on the login page. // Despite the name, it is used for enqueuing both scripts and styles. add_action ( 'login_enqueue_scripts' , 'crunchify_change_login_logo' ) ; function crunchify_change_login_logo ( ) { ? > <style type ="text/css"> #login { width : 400px ; } #login h1 { background : transparent ; padding : 10px ; } #login h1 a { background : url ( 'https://cdn.crunchify.com/crunchify-logo.png' ) no-repeat center center ; background-size : 200px ; height : 200px ; margin : 0 auto ; width : 200px ; } .login form .input, .login input[type="text"] { font-size : 20px ; font-weight : 100 ; margin : 3px 7px 17px 0 ; padding : 6px 12px ; } input[type="checkbox"]:focus, input[type="color"]:focus, input[type="date"]:focus, input[type="datetime-local"]:focus, input[type="datetime"]:focus, input[type="email"]:focus, input[type="month"]:focus, input[type="number"]:focus, input[type="password"]:focus, input[type="radio"]:focus, input[type="search"]:focus, input[type="tel"]:focus, input[type="text"]:focus, input[type="time"]:focus, input[type="url"]:focus, input[type="week"]:focus, select:focus, textarea:focus { border : 2px solid #ddd ; box-shadow : 0 0 3px rgba ( 0, 0, 0, .3 ) ; } .wp-core-ui .button-group.button-large .button, .wp-core-ui .button.button-large { background : #b11f24 ; border : 0 ; border-radius : 0 ; box-shadow : none ; font-weight : 400 ; height : 20px ; line-height : 30px ; padding : 2px 14px 4px ; text-shadow : none ; text-transform : uppercase ; } .login #backtoblog a:hover, .login #nav a:hover, .login h1 a:hover { color : #b11f24 ; } .login .message { border-left-color : #ddd ; } input[type="checkbox"], input[type="color"], input[type="date"], input[type="datetime-local"], input[type="datetime"], input[type="email"], input[type="month"], input[type="number"], input[type="password"], input[type="radio"], input[type="search"], input[type="tel"], input[type="text"], input[type="time"], input[type="url"], input[type="week"], select, textarea { border : 2px solid #ccc ; } </style> < ? php } |
すべての変更を保存して、サイトのログインページに移動するだけです。 次のようになります:https://crunchify.com/wp-admin/

それでおしまい。 おめでとう。 ログインページのロゴとURLが正常に更新されました。 このコードの実行で問題が発生した場合はお知らせください。