
在 Java 中如何使用 net.spy.spymemcached 庫實現 Memcached 客戶端?
已發表: 2020-12-27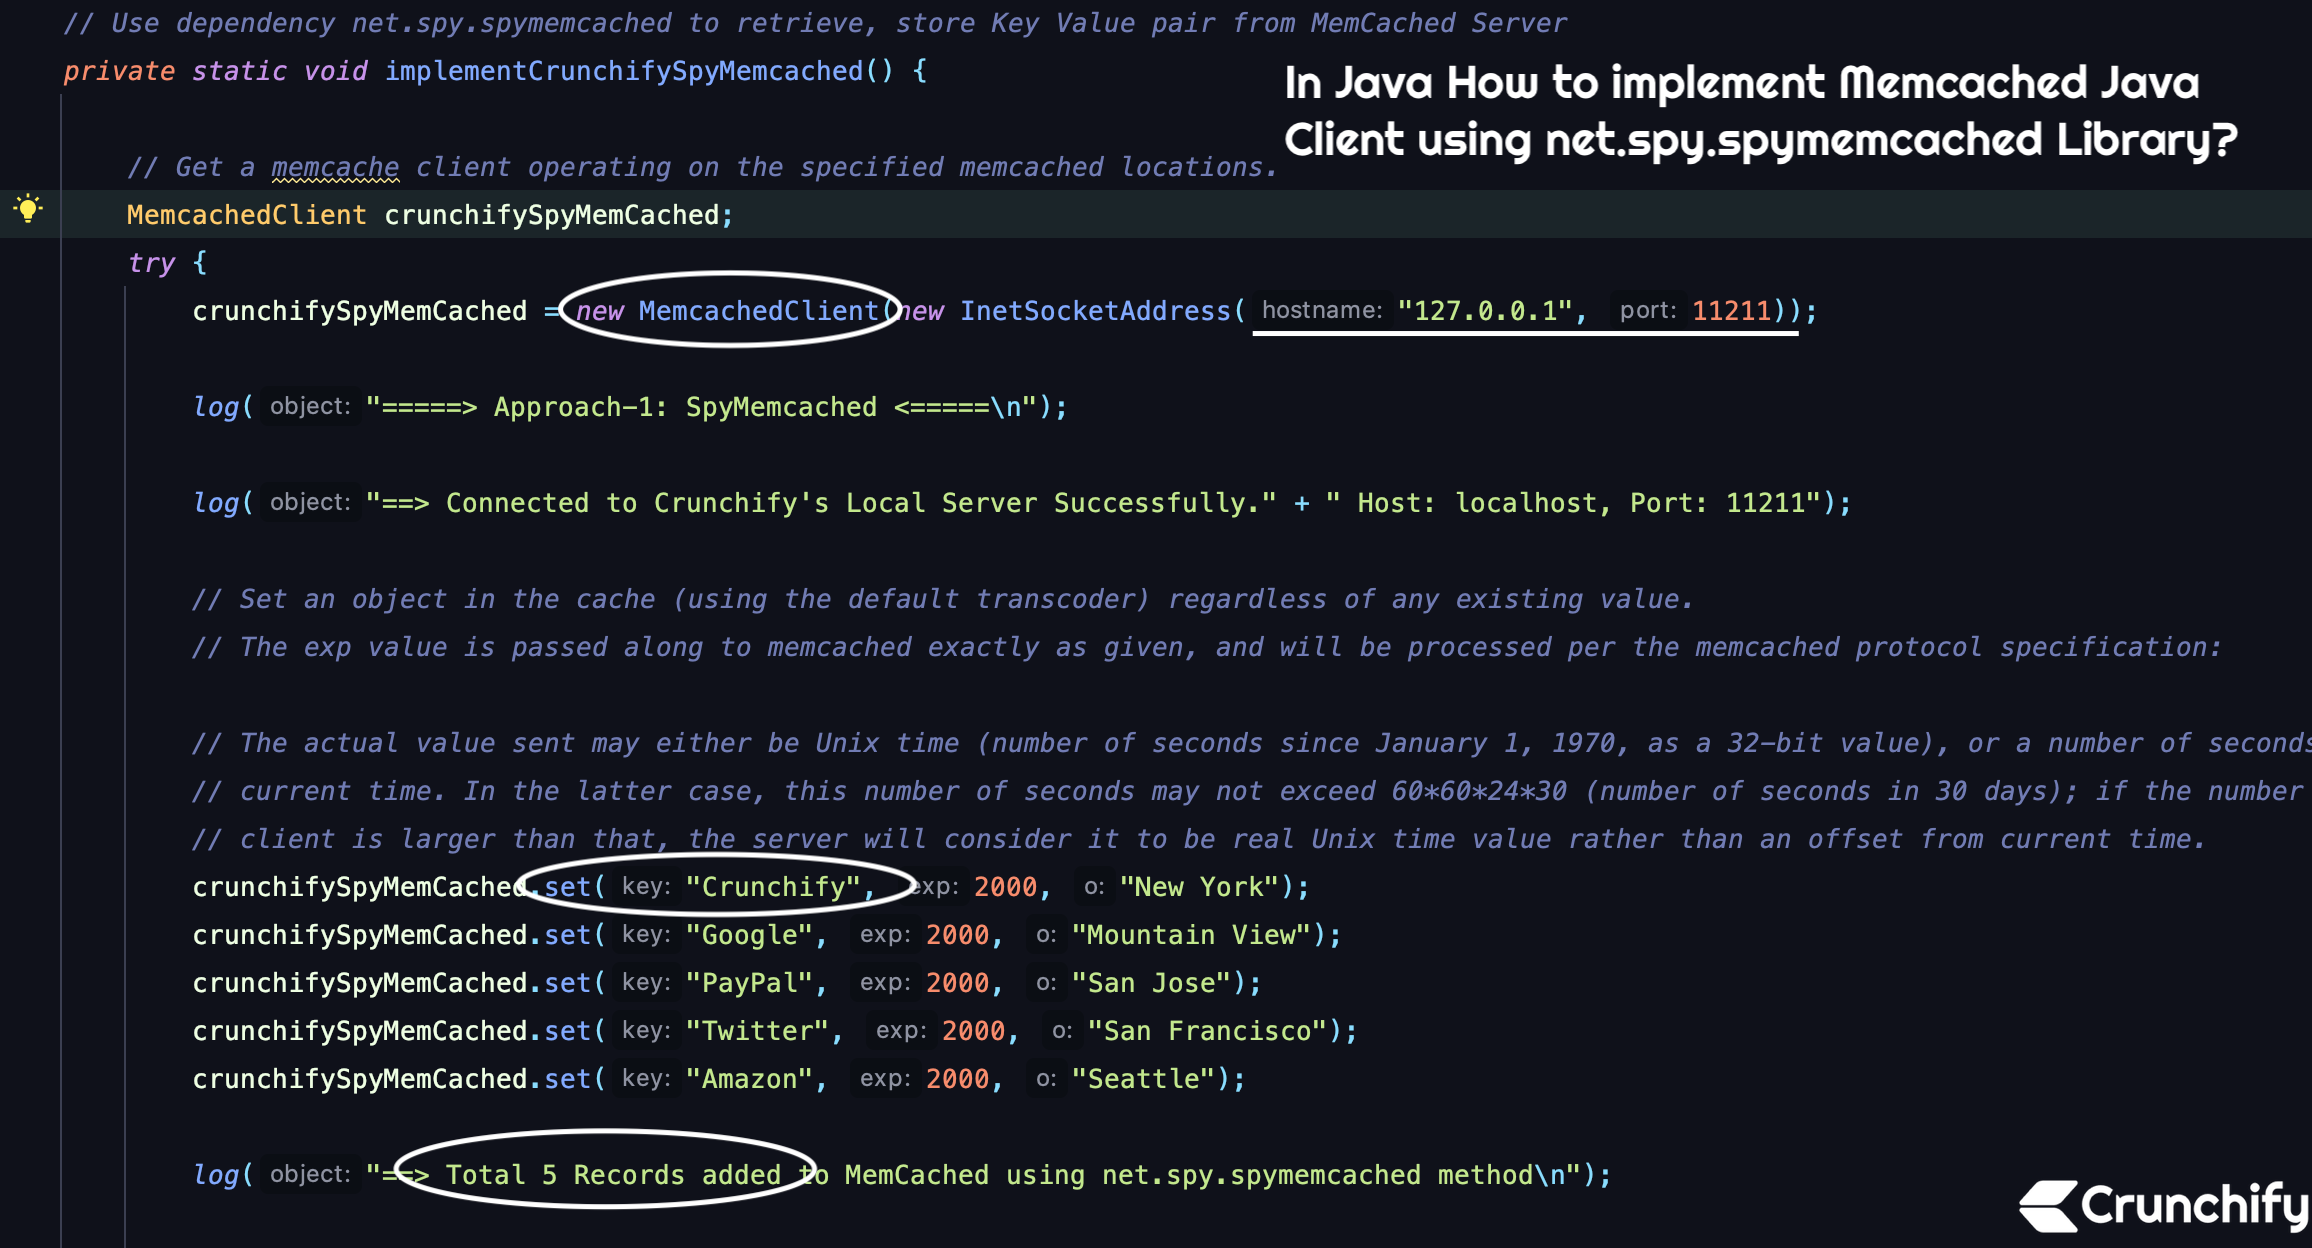
幾天前,我寫了一篇文章,介紹如何通過幾個簡單的步驟在 Mac OS 上本地設置和啟動 MemCached Server。
創建 Memcached Java Client 有三種不同的方法。
- net.spy.spymemcached 方法
- com.whalin.Memcached – Java –客戶端方法
- com.googlecode.xmemcached 方法
在本教程中,我們將介紹如何使用net.spy.spymemcached庫編寫簡單的 Java 客戶端。 如果您的 Eclipse 環境中有 Maven 項目,請在pom.xml文件中添加以下依賴項。
看一下 set()、get()、delete() 操作。
|
1 2 3 4 5 |
< dependency > < groupId > net . spy < / groupId > < artifactId > spymemcached < / artifactId > < version > 2.12.3 < / version > < / dependency > |
更新 pom.xml 文件後,請嘗試更新 Java 項目。 接下來是編寫簡單的Java程序。
實現SpyMemcached.java
庫帶有非常簡單的set() 、 get() 、 delete()操作。 這是一個完整的例子。
|
1 2 3 4 5 6 7 8 9 10 11 12 13 14 15 16 17 18 19 20 21 22 23 24 25 26 27 28 29 30 31 32 33 34 35 36 37 38 39 40 41 42 43 44 45 46 47 48 49 50 51 52 53 54 55 56 57 58 59 60 61 62 63 64 65 66 67 68 69 70 71 72 73 74 75 76 77 |
package crunchify . java . tutorials ; import net . spy . memcached . MemcachedClient ; import java . io . IOException ; import java . net . InetSocketAddress ; /** * @author Crunchify.com * Version: 1.0.0 * Details: Use dependency net.spy.spymemcached to retrieve, store Key Value pair from MemCached Server * */ public class CrunchifySpyMemcachedClient { public static void main ( String [ ] args ) { implementCrunchifySpyMemcached ( ) ; } // Approach-1: net.spy.spymemcached // Use dependency net.spy.spymemcached to retrieve, store Key Value pair from MemCached Server private static void implementCrunchifySpyMemcached ( ) { // Get a memcache client operating on the specified memcached locations. MemcachedClient crunchifySpyMemCached ; try { crunchifySpyMemCached = new MemcachedClient ( new InetSocketAddress ( "127.0.0.1" , 11211 ) ) ; log ( "=====> Approach-1: SpyMemcached <=====\n" ) ; log ( "==> Connected to Crunchify's Local Server Successfully." + " Host: localhost, Port: 11211" ) ; // Set an object in the cache (using the default transcoder) regardless of any existing value. // The exp value is passed along to memcached exactly as given, and will be processed per the memcached protocol specification: // The actual value sent may either be Unix time (number of seconds since January 1, 1970, as a 32-bit value), or a number of seconds starting from // current time. In the latter case, this number of seconds may not exceed 60*60*24*30 (number of seconds in 30 days); if the number sent by a // client is larger than that, the server will consider it to be real Unix time value rather than an offset from current time. crunchifySpyMemCached . set ( "Crunchify" , 2000 , "New York" ) ; crunchifySpyMemCached . set ( "Google" , 2000 , "Mountain View" ) ; crunchifySpyMemCached . set ( "PayPal" , 2000 , "San Jose" ) ; crunchifySpyMemCached . set ( "Twitter" , 2000 , "San Francisco" ) ; crunchifySpyMemCached . set ( "Amazon" , 2000 , "Seattle" ) ; log ( "==> Total 5 Records added to MemCached using net.spy.spymemcached method\n" ) ; // Get with a single key and decode using the default transcoder. log ( "Key: Google, Value: " + crunchifySpyMemCached . get ( "Google" ) ) ; log ( "Key: PayPal, Value: " + crunchifySpyMemCached . get ( "PayPal" ) ) ; log ( "Key: Twitter, Value: " + crunchifySpyMemCached . get ( "Twitter" ) ) ; log ( "Key: Amazon, Value: " + crunchifySpyMemCached . get ( "Amazon" ) ) ; log ( "Key: Crunchify, Value: " + crunchifySpyMemCached . get ( "Crunchify" ) ) ; log ( "==> Total 5 Records Retrieved from MemCached using net.spy.spymemcached method\n" ) ; // Delete the given key from the cache. crunchifySpyMemCached . delete ( "Crunchify" ) ; log ( "==> Key:Crunchify deleted successfully\n" ) ; log ( "Key: Crunchify, Value: " + crunchifySpyMemCached . get ( "Crunchify" ) ) ; log ( "==> If no record found, it returns NULL\n" ) ; } catch ( IOException e ) { // Prints this throwable and its backtrace to the standard error stream e . printStackTrace ( ) ; } } private static void log ( Object object ) { System . out . println ( object ) ; } } |
在本地啟動 MemCached Server
轉到終端窗口並鍵入命令memcached -d -p 11211 。

教程:如何在 Mac OS X 上安裝和配置 Memcached 進程/服務器?
Eclipse 控制台輸出:
只需在上面的程序運行一個 Java 應用程序,您應該會看到這樣的結果。
|
1 2 3 4 5 6 7 8 9 10 11 12 13 14 15 16 17 18 19 |
2018 - 12 - 07 16 : 25 : 45.437 INFO net . spy . memcached . MemcachedConnection : Setting retryQueueSize to - 1 2018 - 12 - 07 16 : 25 : 45.459 INFO net . spy . memcached . MemcachedConnection : Added { QA sa =/ 127.0.0.1 : 11211 , #Rops=0, #Wops=0, #iq=0, topRop=null, topWop=null, toWrite=0, interested=0} to connect queue ===== > Approach - 1 : SpyMemcached < ===== == > Connected to Crunchify ' s Local Server Sucessfully . Host : localhost , Port : 11211 == > Total 5 Records added to MemCached using net . spy . spymemcached method Key : Google , Value : Mountain View Key : PayPal , Value : San Jose Key : Twitter , Value : San Francisco Key : Amazon , Value : Seattle Key : Crunchify , Value : New York == > Total 5 Records Retrieved from MemCached using net . spy . spymemcached method == > Key : Crunchify deleted successfully Key : Crunchify , Value : null == > If no record found , it returns NULL |
如果您在運行程序時遇到任何問題,請告訴我。 在下一個教程we will go over another libraries來設置和獲取 Memcached 數據。
接下來是什麼?
嘗試使用另外兩個庫的 Memcached Java 客戶端教程。